07610-002-41-09-F
23
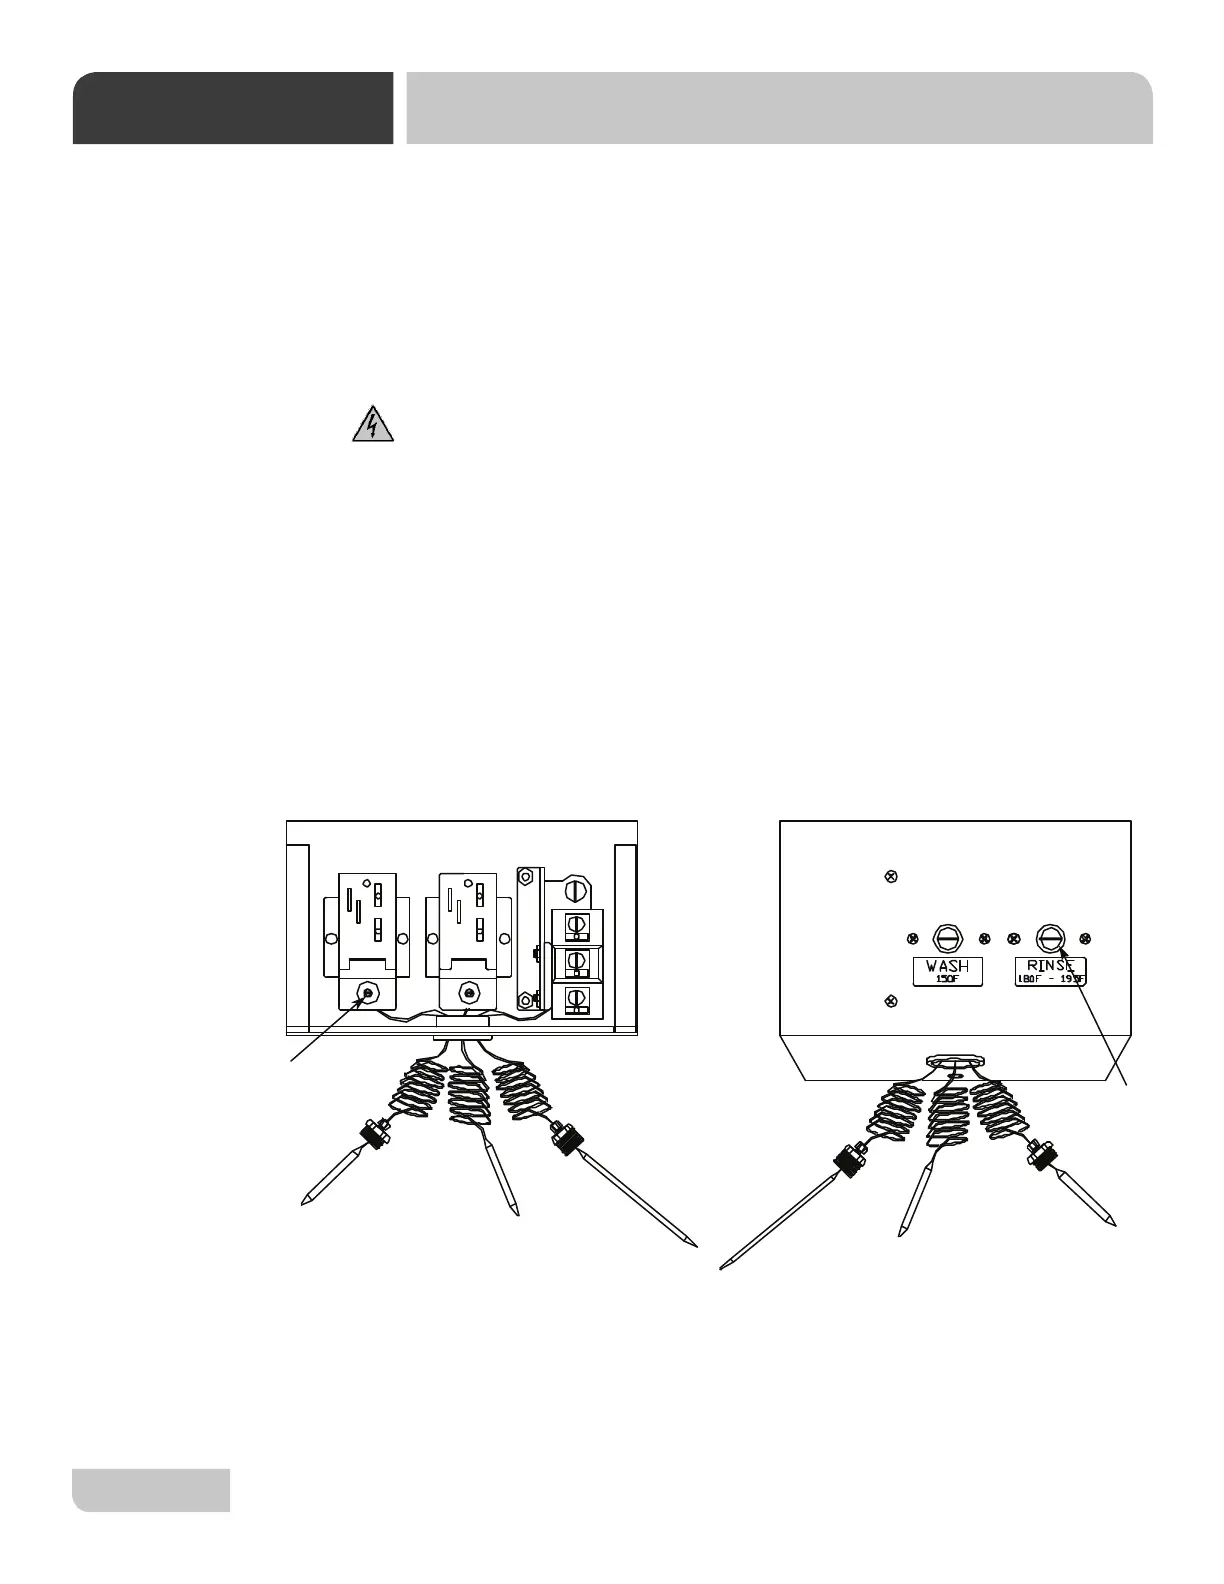
The thermostat can be adjusted by turning screw #1 (see diagram below) on the
thermostat housing cover. (Remember the preset setting in case the problems
are elsewhere in the control circuit.) A clockwise rotation is used to obtain a lower
temperature setting and a counter-clockwise rotation is used to obtain a higher
temperature setting. A 1/8” turn of screw #1 changes the temperature approximately
15°F. If screw #1 is turned all the way to its stop in either direction, adjust screw #2
as follows. DO NOT TOUCH THE SCREW SEALED WITH RED PAINT!
When adjusting screw #2, power should be disconnected during adjustment.
Set screw #1 so that it can be turned equal distances in either direction, then:
-if screw #1 stopped while turning in clockwise direction, turn screw #2 3/4”
turn in a clockwise direction.
-if screw #1 stopped while turning in counterclockwise direction, turn screw
#2 3/4” turn in a counterclockwise direction.
This will bring the thermostat to approximately the same setting obtained where
screw #1 stopped. Check the preset temperature setting before attempting any
further adjustments. Use screw #1 for any further adjustments.
THERMOSTAT
ADJUSTMENT
Thermostats can be ordered by using the following
numbers:
Rinse Thermostat 05930-510-02-00
Wash Thermostat 05930-510-01-00