GENSET AND BATTERY PACK
4271491-Second Edition 3-37
3
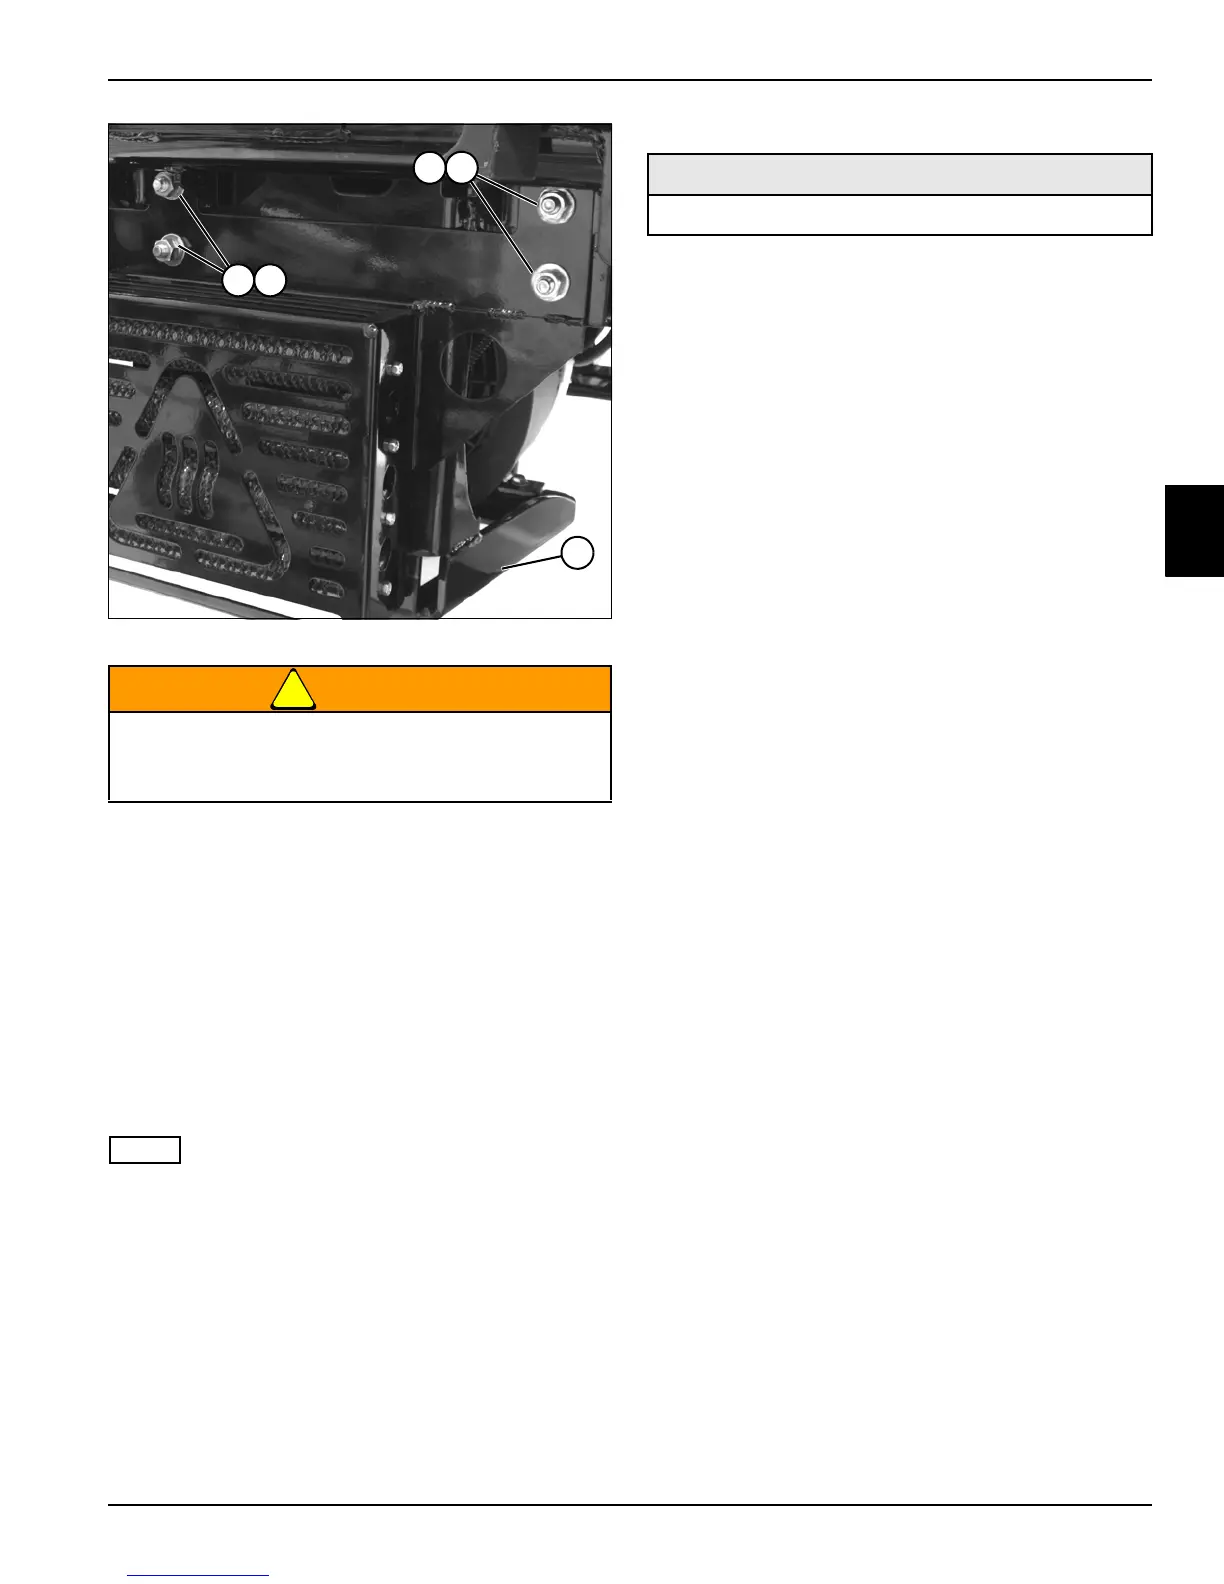
Figure 3-63
30. Using an engine hoist, support the genset (30), and
remove nuts (28) and screws (29).
31. Remove the resistor bank assembly and jumper
harness. (See “Resistor Bank Assembly and Jumper
Harness” on page 4-165.)
32. Repeat step 30 for other side of machine.
33. Check for any connected wires and components and
carefully remove the genset from the machine.
34. Place the genset on a suitable stand or workbench
that will support the full weight in a safe manner while
preventing damage to the genset.
If the engine is being replaced, some components must
be removed and installed on the new engine. See the
“Parts and Maintenance Manual” for additional
information and illustrations.
Installation Notes
•I
• Inspect engine mounts and replace if necessary.
• Install the genset by reversing the order of removal.
• If necessary, remove components from the engine
and install the components on the new engine.
• Apply Loctite
®
242 (Blue) to eight genset carrier
mounting screws (29) prior to installation.
• Tighten genset carrier mounting screws (29) to 65.0
lb-ft (88 N·m).
• Use new gaskets when installing the exhaust
system.
• Use new cable ties to secure wire connectors and
wire harnesses.
• Apply dielectric grease (Jacobsen PN 365422) to any
connectors removed.
• Replace the engine oil filter and fill engine with oil.
Prevent personal injury. Use a properly rated
lifting device. Always be sure the load is
balanced before lifting.
Required Materials
Loctite
®
242 (Blue)