Page 9
ENGLISH
Jandy
®
Pro Series JE Heat Pumps
|
Installation and Operation Manual
pump where it will damage the components.
In certain regions of the country it may be more
economical to run a heat pump during the warmer
months and a gas heater during the cooler months.
In some situations it may be desirable to run the heat
pump in the “Chiller” mode during the hottest portion of
the year and a heater during the cooler months.
The Zodiac
®
heat pump may be plumbed with a gas
or electric heater or any combination of heat sources
including solar. All heat sources must be plumbed in
series to work correctly and efficiently.
Figure 5 illustrates a recommended plumbing layout
for a heat pump / heater / solar combination heating
system for a pool / spa combination. Your system may
not contain all of these components, but the basic
plumbing will apply by eliminating the component in
the illustration that is not a part of your system.
All plumbing on multiple heat pump installations must
be done in parallel (see Figures 6 and 7). An equal flow
of water to each heat pump is important for optimum
operation.
It may be necessary to adjust water pressure
switch if a unit is installed below the water level.
See Section 5.6 for details on when and how to
adjust the pressure switch.
Each heat pump allows a maximum ow rate of
70 gpm (265 lpm) and requires a minimum of
20 gpm (76 lpm).
Wiring connections must be made exactly as shown in
the wiring diagram found on the inside of the heat pump
access compartment (see Figure 8 for single phase
electrical wiring and Figure 9 for 3-phase electrical
wiring). The heat pump must include a definite means
of grounding and bonding. There is a bonding lug on the
right side of the heat pump, where a bond wire must be
attached.
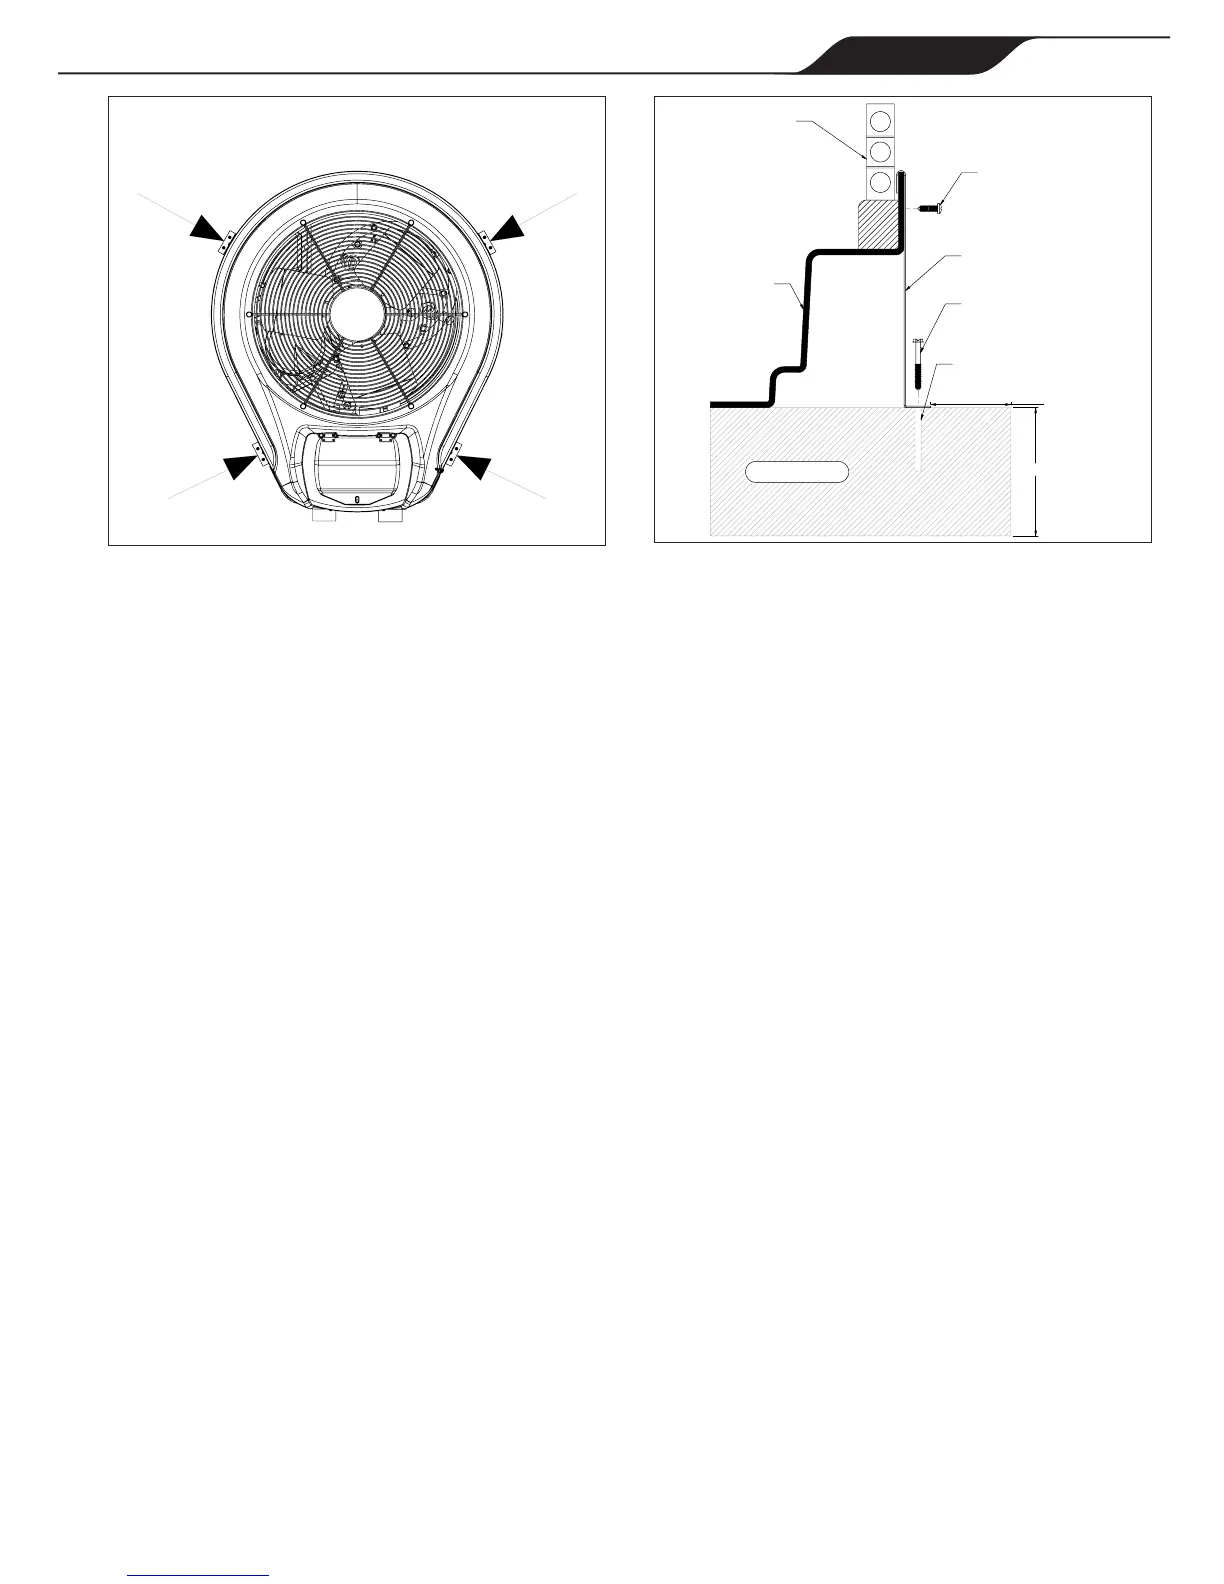
4" MIN
2 1/2" MIN
CONCRETE
EQUIPMENT PAD
1/4" X 1 3/4"
GALVANIZED OR PLATED
CONCRETE SCREW
(MANUFACTURER PROVIDED)
HEAT PUMP
ANCHOR
BRACKET
3/16" DRILLED HOLE
#10 X 5/8"
STAINLESS STEEL SCREW
EVAPORATOR
COIL
HEAT PUMP
PLASTIC BASE
ATTACH ANCHOR BRACKETS
TO BASE OF HEAT PUMP
WHERE INDICATED
 Loading...