Page 15
ENGLISH
Jandy
®
Pro Series JE Heat Pumps
|
Installation and Operation Manual
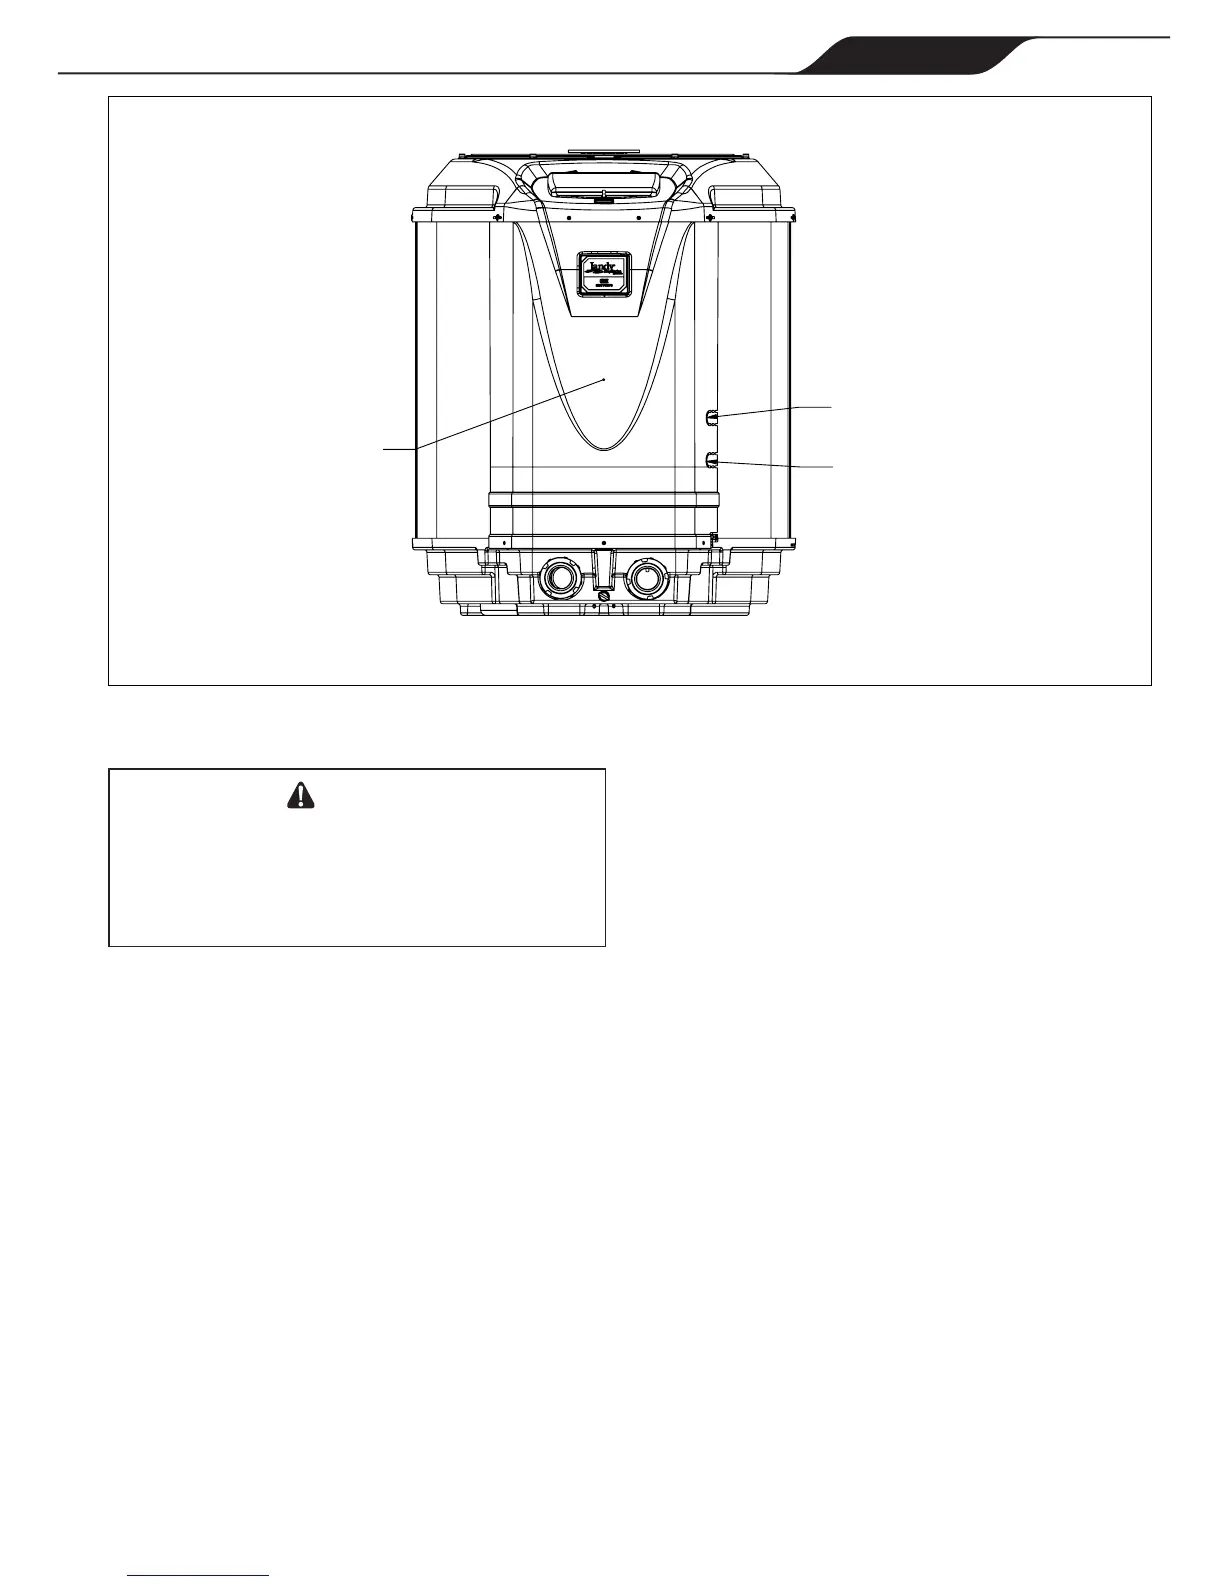
SERVICE ACCESS
PANEL (5 SCREWS)
CONNECTOR FOR
HIGH VOLTAGE WIRES
CONNECTOR FOR
LOW VOLTAGE WIRES
This heater must be connected to a bonding
grid with a solid copper wire not smaller in
diameter than 8 AWG (In Canada, it shall be no
smaller than 6 AWG.)
The National Electrical Code
®
and most other U.S.
codes require that all metallic components of a pool
structure, including reinforcing steel, metal fittings,
and above ground equipment be bonded together with
a solid copper conductor not smaller than 8 AWG. The
heat pump, along with pumps and other pool equipment
must be connected to this bonding grid. A bonding lug
is provided on the right hand side of the heat pump to
ensure this requirement is met.
Electrical wiring must be in accordance with all
applicable national and local codes and ordinances.
1. Turn off the power to both the pool/spa control
system and the heat pump unit.
2. Remove the screws that attach the service/access
panel to the heat pump unit and the cover to the
junction box (see Figure 10).
3. Run the wires from the pool/spa control system
into the conduit connection labeled “Low Voltage
Connection”, located on the lower right hand side
of the heat pump (see Figure 10).
4. Connect the wiring from the pool/spa control
system to the heat pump remote control terminal
(see Figure 11a).
5. Restore power to the heat pump and the pool/spa
control system.
1. Make sure the control is in the mode.
2. To enter the Service Setup mode, press and hold
the , , and buttons for 5
seconds.
The display will revert back to after one
minute since the last key press.
3. Press the or button to display
. Press the button. The
(default remote)
appears, use the
or button to scroll
through the Remote options. When you reach
, press the button to select the
remote. Press or to exit the Service
Setup mode.
 Loading...