Description and Operation
Operation
Connecting the Receiver and a Computer
19www.javad.com
1.4.4. Connecting the Receiver and a Computer
JAVAD GNSS NetView software provides an interface for various configuration, monitoring, and
management functions for the receiver.
To configure, manage files, or maintain the receiver, connect the receiver and a computer using one of the
following methods and start NetView:
• an RS232 cable and a computer/controller
• a USB cable and a computer/controller with the JAVAD GNSS USB driver installed.
Once you have established a connection between the receiver and the computer/controller, you will be
able to configure the receiver and its components, send commands to the receiver, download files from
the receiver’s memory; as well as, upload new firmware, upload an OAF, and upload configuration files to
a receiver, using NetView.
Establishing an RS232 Cable Connection
1. Using the RS232 cable, connect the serial port of your computer (usually COM1) to the receiver’s
serial port A.
2. Press the power buttons on the receiver and computer to turn them on.
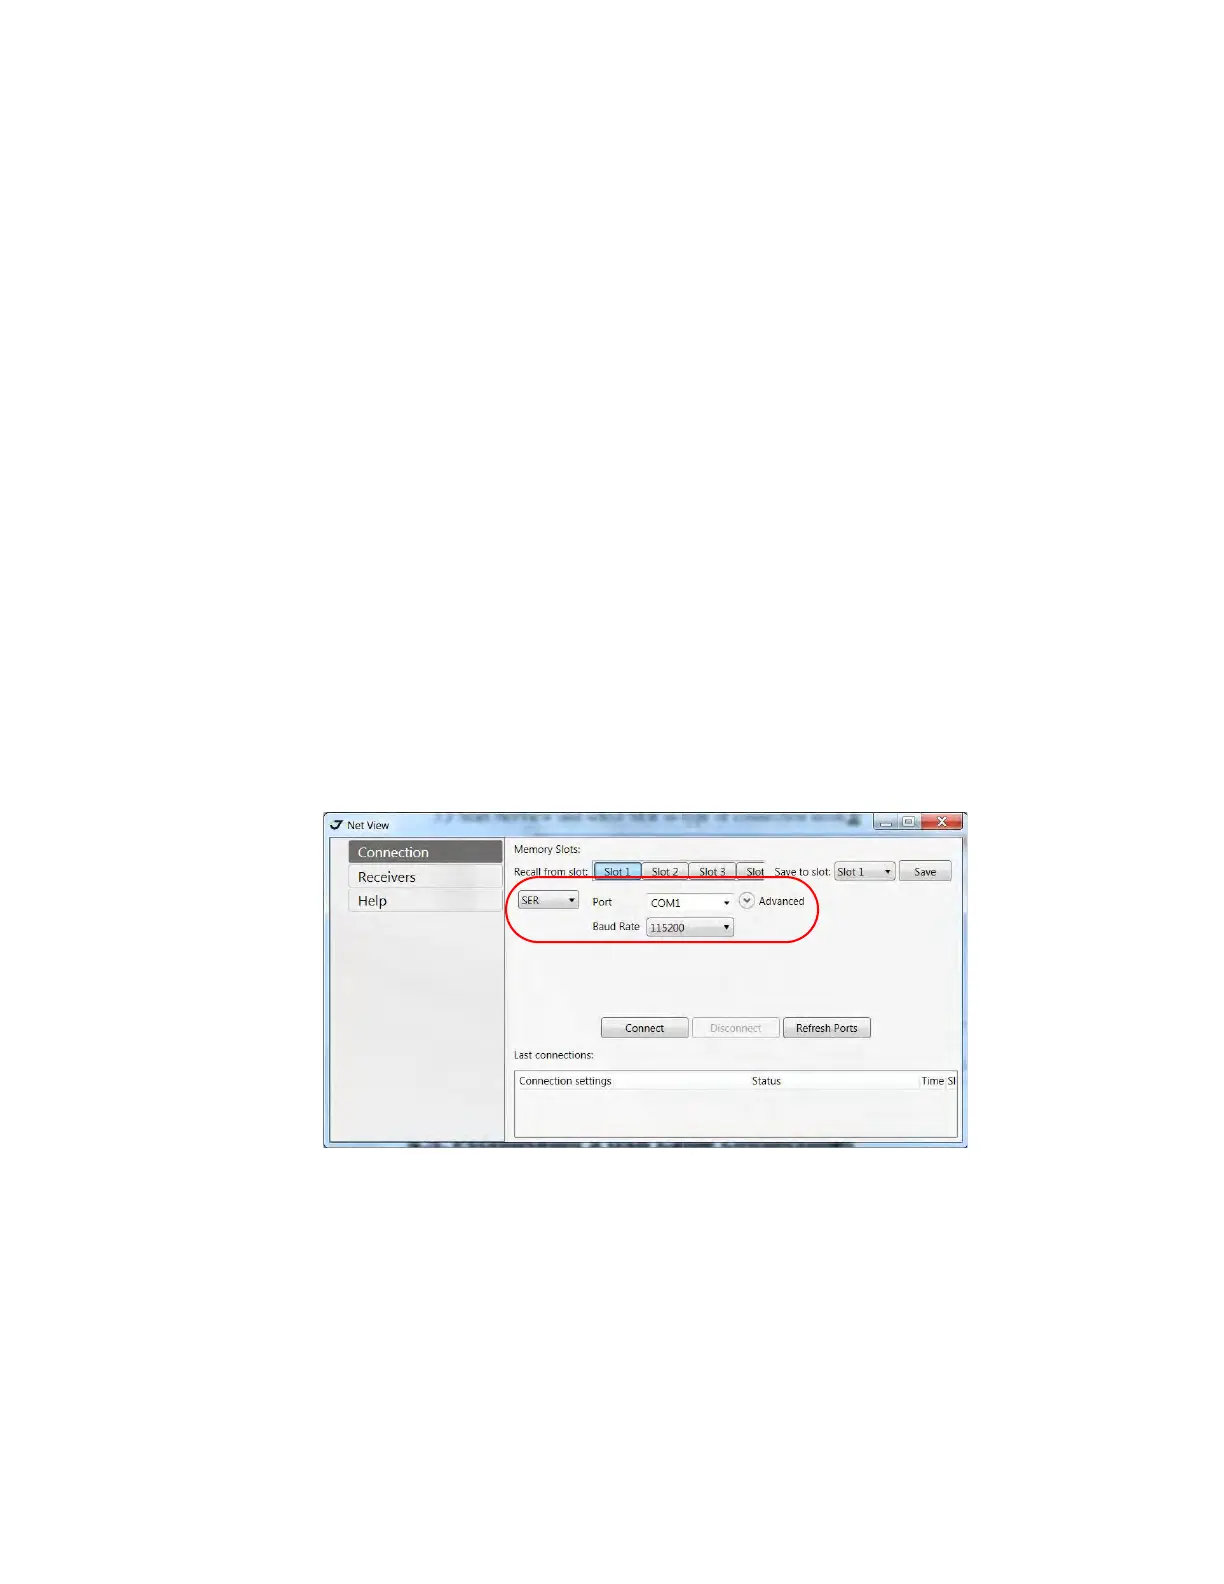
3. Start NetView, select SER as type of connection mode, and specify the port the receiver is con-
nected to.
Figure 1-5. NetView - Connection via serial port
1.4.5. Establishing a USB Cable Connection
Make sure the computer has JAVAD GNSS’s USB driver installed (available from www.javad.com)
before continuing.
1. Using the USB cable, connect the USB port on the receiver to a USB port on the computer.
2. Press the power buttons on the receiver and computer to turn them on.