Description and Operation
Setup and Measuring
TriPad Operation
29www.javad.com
• Slant – measured from the marker to the lower edge of the antenna slant height measure mark
(SHMM) located on both end panels of the receiver.
The point to which measuring with GNSS measures is called the Phase Center of the antenna. This is
analogous to the point at which a distance meter measures in a prism. A user must enter the prism offset
to compensate for this point not being at a physical surface of the prism. For a GNSS antenna, the offset
is entered depending on the type of measurement taken.
• For vertical, the offset is simply added to the measured vertical height to produce a “true” vertical
height.
• For slant height, the vertical height must first be calculated using the radius of the antenna, then
the offset can be added.
The offsets are different because of the difference in location between the slant measuring point and the
vertical measuring point.
1. Measure the antenna height above the control point or marker, either the slant height or the verti-
cal height.
2. Record the antenna height, point name, and start time in the field notes.
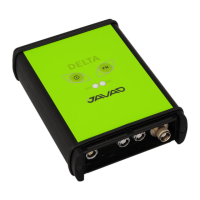
1.6.2. TriPad Operation
The TriPad is the receiver’s minimum interface used to display and control data input and output. See the
description of the TriPad on page 26.
To turn on/off the receiver, press the On/Off button (Figure ).
• When turning on, press the On/Off button until the TriPad’s LEDs briefly flash.
• When turning off, press the On/Off button until the LEDs go out, then release.
To start/stop logging data, press the FN button for 1–5 seconds (Figure ).
• During data recording, the REC LED is green. Use NetView to set the recording time interval.
• The REC LED blinks green each time data is written to the memory.
• If the REC LED is red, the receiver has run out of memory, has a hardware problem, or contains
an improper OAF.
Use NetView to enable the desired FN button mode in the receiver, either “LED blink mode switch” for
static measurings or “Occupation mode switch” for kinematic measurings.
Each time you turn off or on data recording, either a new file opens or data appends to a particular file.
To toggle between post-processing modes, press the FN button for less than 1 second when “Occupation
mode switch” has been enabled using NetView.
To change the information mode of the receiver, press the FN button for less than 1 second when “LED
blink mode switch” has been enabled using NetView.
To change the baud rate of the receiver’s serial port, press the FN button for 5–8 seconds. This is useful if
the data collector does not support the rate that the receiver port is set to. After about five seconds, the
REC LED becomes red. Release the FN button during the next three seconds.