Description and Operation
DELTA Configuration
TriPad Configuration
26 www.javad.com
1.5.1. TriPad Configuration
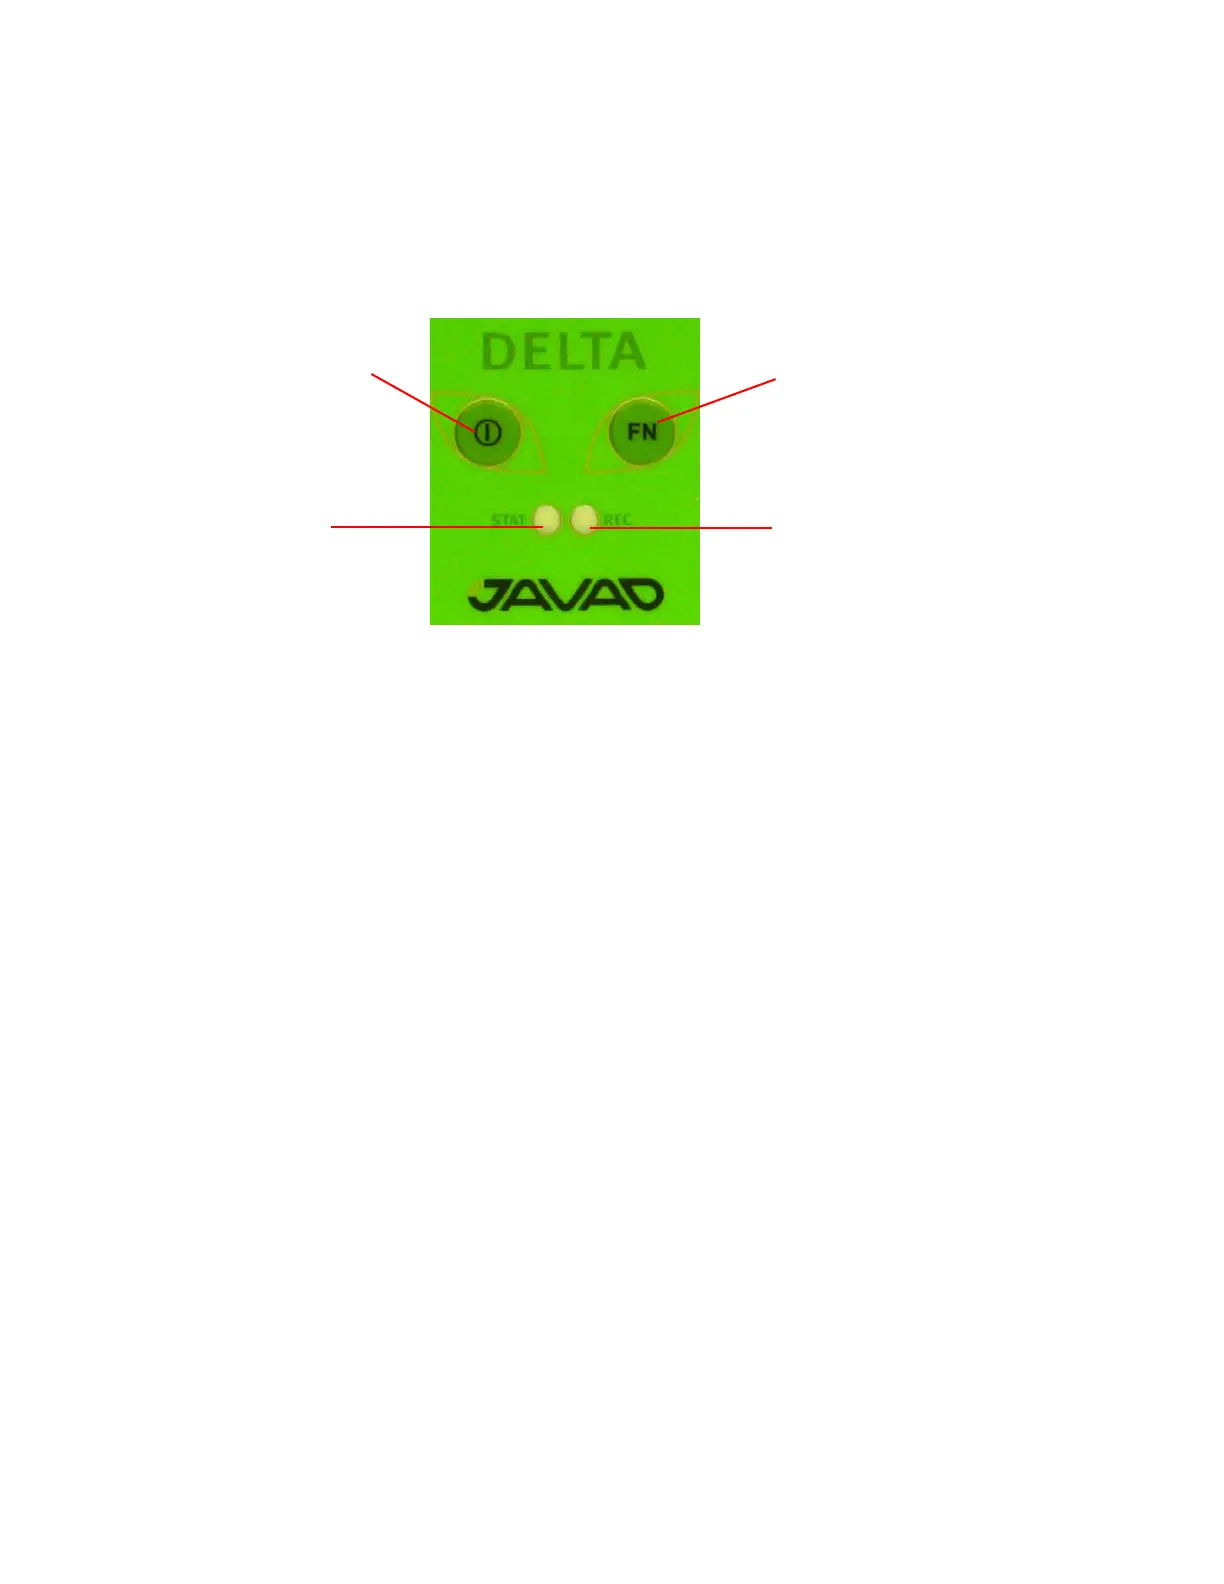
The DELTA’s simple user interface (TriPad) consists of two buttons (Power and FN) and up to six LEDs
that control and display the receiver’s operation (Figure 1-14).
Figure 1-14. TriPad
The TriPad performs numerous functions:
• Turn the receiver on/off.
• Turn data recording on or off (FN button).
• Show the status of satellites being tracked (STAT LED).
• Show data recording status (REC LED).
• Show each time data records to internal memory (REC LED).
• Show the status of post-processing mode (static or dynamic) when performing a Post-Processing
Kinematic measuring with the help of FN button (REC LED).
1. Connect the receiver and PC as described in “Connecting the Receiver and a Computer” on page
19. Start NetView. Establish connection with the receiver.
2. Open TriPad tab. Set the following parameters and click Apply:
• “File a, File b” on page 26
• “Function Key” on page 27
• “Automatic File Rotation Mode (AFRM)” on page 27
File a, File b
In the fields File a, File b can be specified current log-file name, message output period, etc.
• Current log-file edit box allows the user to specify the prefix of the log file, which will be saved
into receiver memory during survey.
•In the Output Epochs Counter box the number of outputted epochs is shown.
•In the Implicit Message Output Period edit box the output period for the implicit messages can be
specified. This parameter specifies the interval of outputting messages into the log-file when data
logging is activated with the TriPad or through the AFRM.
FN
REC LED
ON/OFF
button
button
STAT LED