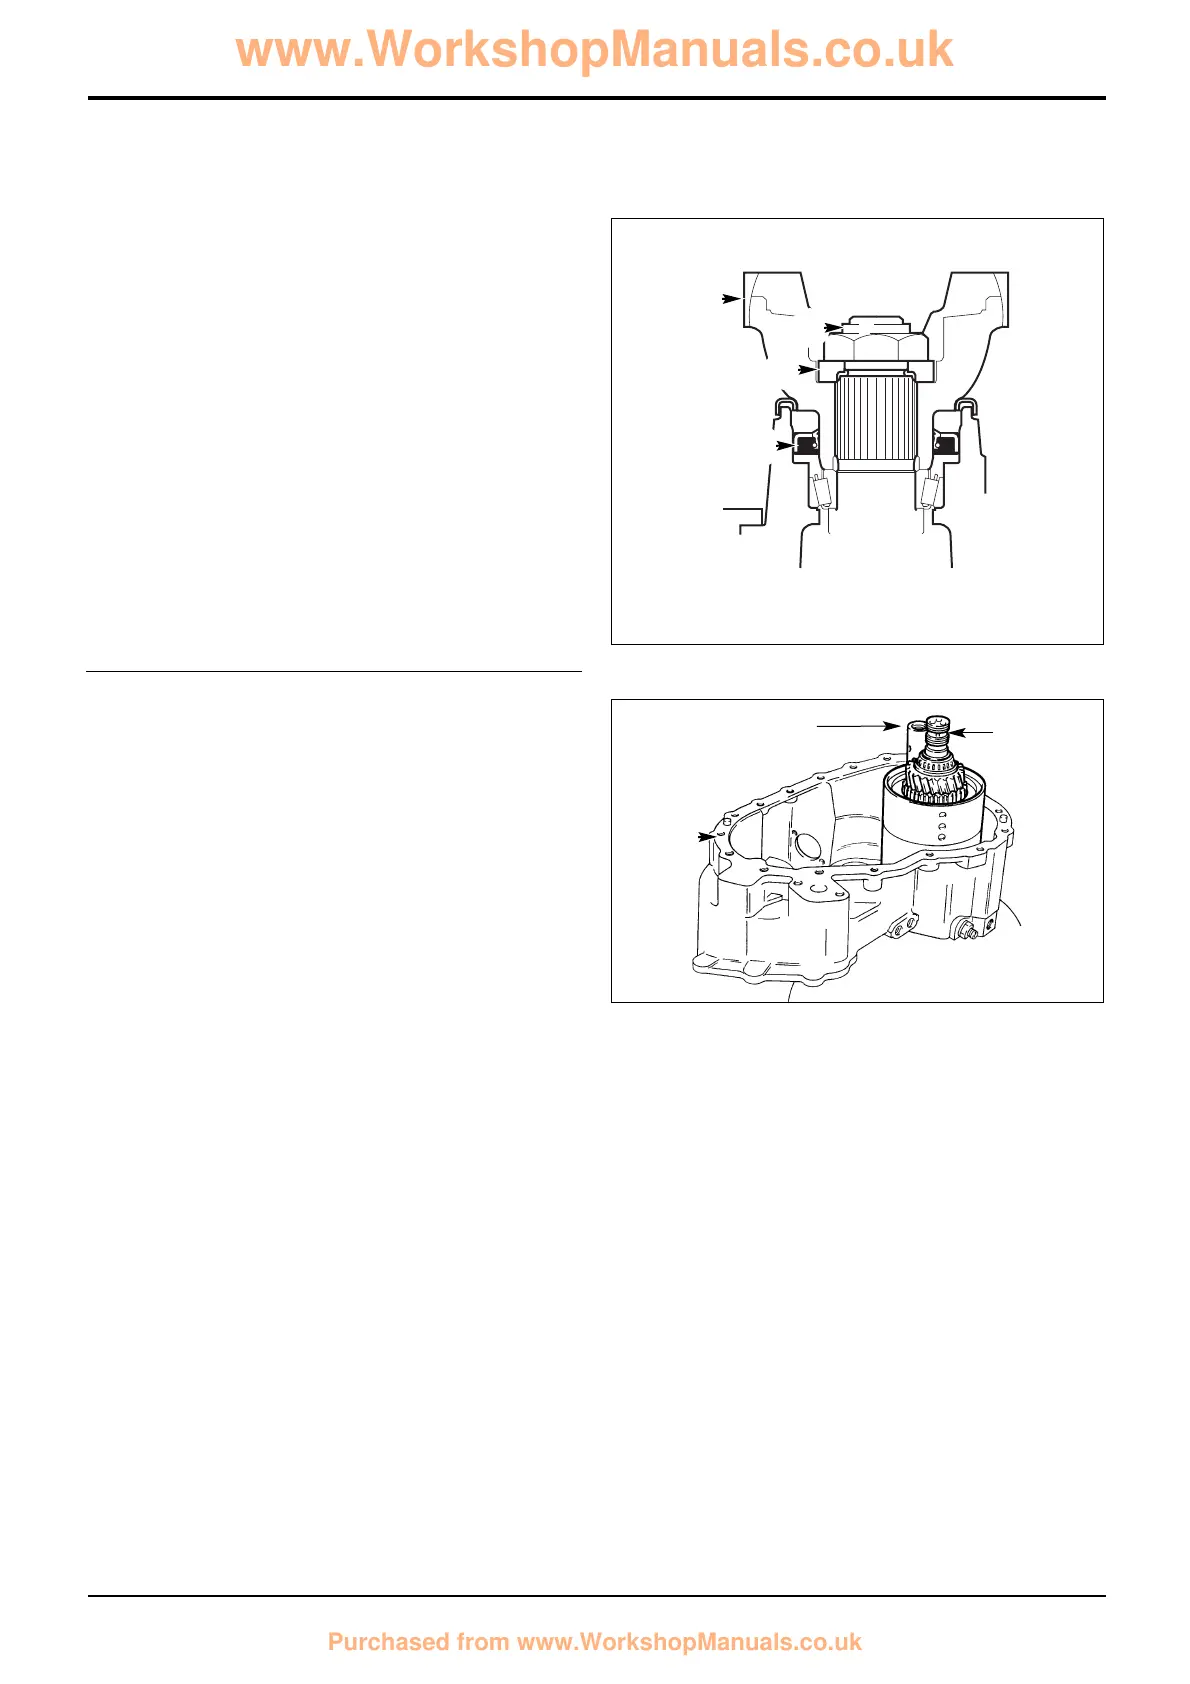
12 a Remove nut B and sleeve A. Fit new oil seal S,
grease between seal lips before fitting. Note that the
seal does not fix to the back of the housing - use
servicel tool to locate the seal. Fit the output yoke Y.
b Fit the stepped washer W the correct way round
with the plain face uppermost as shown.
c Fit NEW retaining nut T and progressively torque
tighten to 300 Nm (221 lbf ft). Provided the correct
size spacer has been selected, the rolling torque
should be 2.0 Nm (1.5 lbf ft) when nut T is fully
torque tightened.
Note: If the rolling torque measured is too high, fit the next
larger size spacer. If the rolling torque is too low, fit the next
smaller size spacer.
d Finally, carefully stake nut T into slot using a
square-ended staking tool.
13 Press idler gear spindle into front casing.
Note: Before proceding further, make sure that the 3 shaft
front bearing outer cups are correctly located inside the
casing V.
14 Grease forward reverse shaft front bearing, then
carefully lower forward/reverse unit into casing. Fit the
shaft sealing rings and smear with grease.
112-5
Section F Transmission
9803/3280
Section F
112-5
Issue 1
Synchro Shuttle Gearbox
Assembly (cont'd)
221180
14
13
T
Y
W
S
V