PS 760 - 2/4WD Clutch (Pressure ON)
- Assembly
Visually inspect the friction and counter plates:
Counter plates - light scoring/polishing is permissible,
plates that are not flat, worn or heavily marked or
scored must be replaced with a new set.
Friction plates - the cross hatching should be clearly
visible, plates that are not flat, have friction material
damage or scoring must be replaced with a new set.
DO NOT mix old, new and worn plates, if a plate is
damaged/worn fit a complete new set.
Needle roller bearings should slide into position freely, do not
bend or distort the cage to fit. If the cage has been distorted
fit new bearings.
Note: The piston incorporates a small check valve. Visually
inspect the piston to ensure the ball is in place and that the
seat is free from contamination. If necessary clean the valve
by blowing through with an air line. DO NOT use a wire rod
(or screwdriver) as damage to the valve seat could occure.
1 Fit new 'O' rings 17 and 18. Lubricate the piston 16 with
oil and press fully into bore of clutch housing.
2 Fit oil baffle 15A, piston spring 15, make sure the spring
seats in the piston.
3 Fit the spring retaining plate 14.
4 Compress the spring and secure with circlip 13.
5 Fit one counter plate 12 followed by one friction plate
11. Continue fitting alternate counter and friction plates,
finishing with a friction plate.
6 Fit the pressure end plate 10, do not fit shim 9 at this
stage. Make sure that the chamfered face is fitted
facing the clutch pack as shown at A. Make sure the
teeth are not aligned with the lubrication slots in the
housing.
7 Fit the clutch friction/counter plates retaining circlip 8.
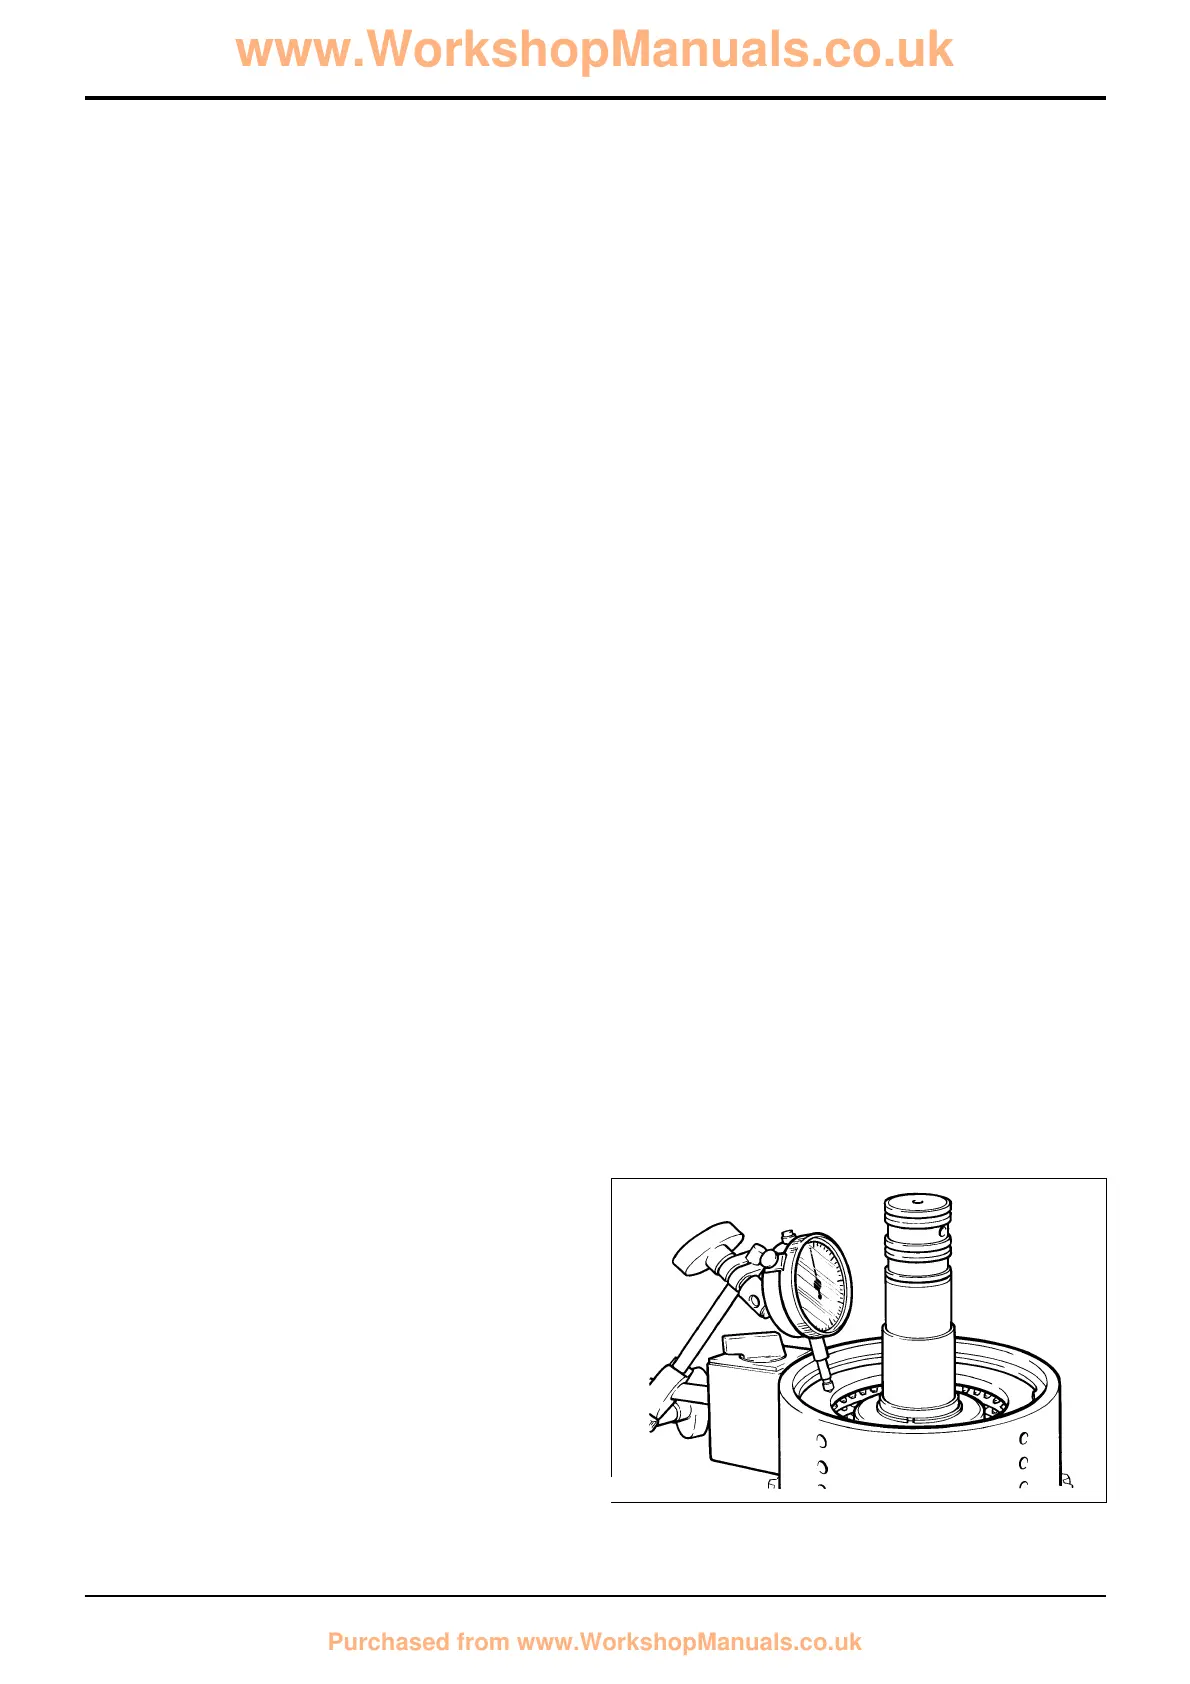
8 Using a dial test indicator as shown, measure the end
float of the pressure end plate 10, which should be 1.9
to 2.5 mm (0.075 to 0.098 in).
If it is necessary to adjust the end float to bring it within
tolerance, there is a choice of fitting a 6.0mm (0.23in) or
6.5mm (0.25in) thick pressure end plate 10, with either a
shim 9 or an extra counter plate 12 between the
retaining circlip 8 and pressure end plate 10.
Use an airline to check the operation of the clutch.
9 Fit thrust washer 7.
10 Carefully align the teeth of the clutch plates using a thin
rod (or screwdriver) and fit the 4WD gear and splined
hub 5, needle roller bearings 6 and thrust washer 4.
11 Smear the clutch end bearing 3 with gearbox oil and
press the bearing onto the shaft to seat on thrust
washer 4.
12 Fit piston ring seal 2, refer to Piston Ring Seals -
Fitting Procedure.
134 - 4
Section F Transmission
9803/3280
Section F
134 - 4
Issue 2*
Powershift Gearbox
217590
*