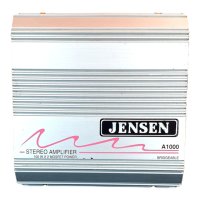
A
1000
Amplifier
Parts
and
Tools
Supplied
parts
and
fasteners:
• A drill and a 1/8" drill bit
•
A1000
amplifier
• Power, ground, speaker and sensing wire
High level input harness
•
Four
#6 3/4
screws
with washers and lock
washers
• Solder. a soldering gun and wire nuts
Of
electrical
tape
or
a set
of
crimp-on electrical terminals
for
wiring
connections
•
One
20
amp
fast blow AGC fuse
Other
tools
and
supplies
needed:
• A Phillips screwdriver
• A pocket knife
or
scraper to make a clean
connection for the ground wire
•
For
low level input connection you will need a
pair
of
shielded stereo audio cables with RCA type
jacks.
The
length
of
the cable and configuration
of
jacks
depends
on
your
particular installation.
If
mounted
under
the
dash near the radio, you will need a
pair
of
shielded
audio cables. Keep these cables as short as
possible
to
minimize the chance
of
picking
up
interference.
Installation
Instructions
Important:
,
The
first
installation
step
is to
disconnect
the
negative
terminal
of
the
car
battery.
For
your
safety,
do
not
bypass
this
step.
Make
sure
negative
battery
terminal
is
disconnected
before
making
any
wiring
connections.
Every installation will be a bit different based
upon
vehicle design and whether the A
1000
is a
new
or
..
replacement unit. For best results, read through all instruction steps before starting.
Check
all locations
and
placements carefully before making any cuts
or
connections.
1.
Disconnect negative tenninal
of
battery.
2.
Determine
location for amplifier, check fit and
spacing for wiring connections. When mounting
the amplifier in the trunk. route power and input
cables on opposite sides
of
the vehicle.
3. Drill holes
for
mounting the A 1000
(if
necessary).
4.
Connect wires
to
vehicle
as
shown
in
Wiring
Instructions
on page 6.
Troubleshooting
Problem
Cause
Does
not
operate
(Iiglt
No
power
to
yellow
power
wire
(12V
not
on)
lrom
battery)
No
powerto
blue
sensing
wire
(12V
with
radb
on).
Re¢8iver
volume
control
Input
Sense
adjustment
too
bw
must
ba
turned
up
too
high
Receiver
volume
control
too
Input
Sense
adjustment
too
high
sensrove
Sound
from
only
one
speaker
Poor
splice
in
speaker
eireutt
Sound
distorted
Input
sense
edjustment
too
high
Both
bwand
high
level
"'puts
used
Btov,s
tuse3
Bare
yelbw
power
wire
contacting
chassis
Speaker
wires
shorting
together
Can't find cause
of
problem
5
5. Reconnect the negative battery terminal.
6.
Adjust input sensitivity control.
Note: For
best results. adjust sensitivity to
the
lowest levels possible. Adjust for
best
desired
balance between front and rear speakers.
Installation
is complete.
Co<rection
Check
oonnecOOn
Check vehde
fuse
Check
connecOOn
to
receiver
(page
6)
Mjust
Input
Sense
(page
5)
Mjust
Input
Sense
(page
5)
Repair
splices
between
receiver
and
A 1000 amplifier
Repair
splices
between
A 1000
amplifier
and
speakers
Mjust
Input
Sense
(page
5)
Use
ooly
low
level
or
high
level
inputs. never
both
Locate
bare
wire
and
insulate
Separate
and
nsuiate speaker
wires
Call Jensen Technical Assistance
(1·800~323·0221
)

 Loading...