7
7. Setup and adjustments
General note:
Setup and adjustment work may
only be carried out after the
machine is protected against
accidental starting by pulling the
mains plug.
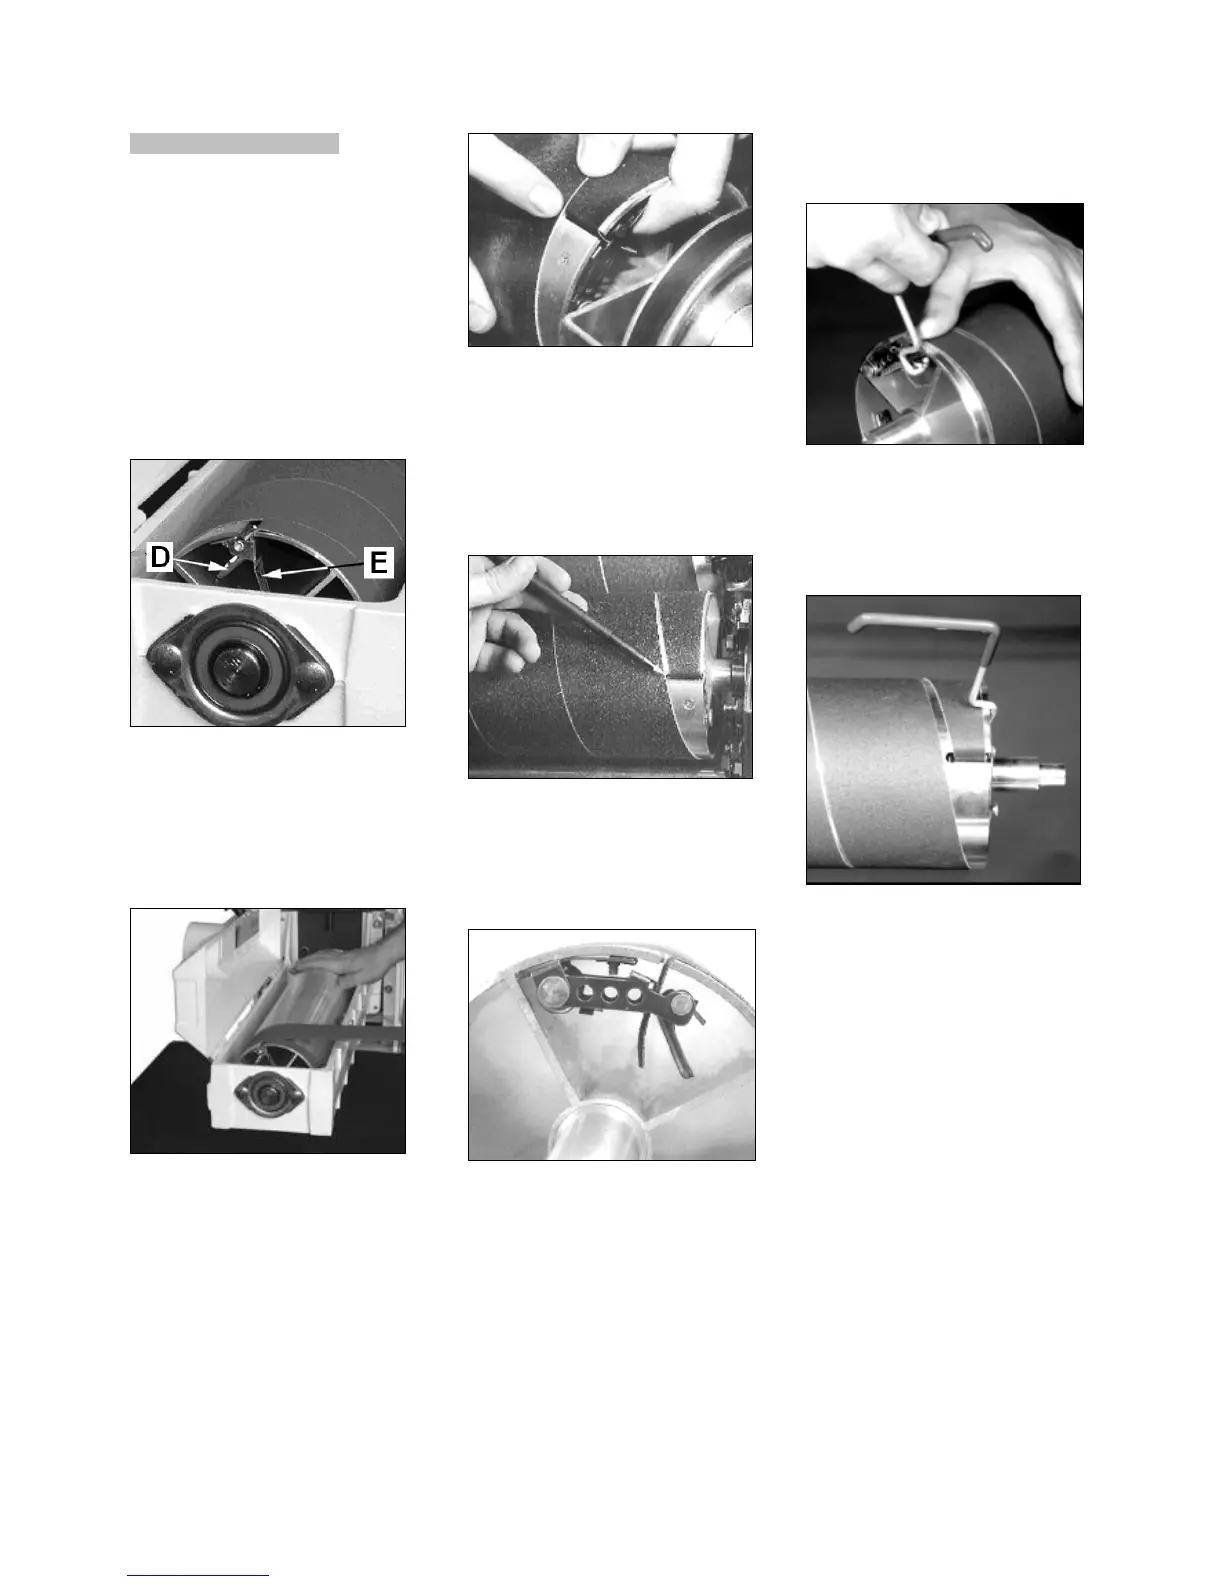
7.1 Wrapping abrasive strips
Disconnect the machine from the
power source (pull mains plug).
Raise the clip lever (D, Fig 6) on the
left (outboard) side of the drum.
Fig 6
Insert the abrasive strip (E) so that it
uses most of the width of the slot and
release the clip lever.
Wrap the strip around the drum, being
careful not to overlap the windings
(Fig 7).
Fig 7
Insert the tapered end into the inboard
take-up fastener (Fig 8) and release
the clip lever.
Fig 8
The take-up fastener is designed to
automatically take up any slack
caused by stretching of the abrasive
strip.
Note: Position the strip with enough
space to the inside of the slot (Fig 9)
to allow it to be pulled into the drum
as needed.
Fig 9
The abrasive strip may stretch in use;
a rising of the take-up lever clamping
position (Fig 10) may become
necessary when it contacts the drum
ground.
Fig 10
Make sure that the sanding paper is
running clear after every setup or
adjustment done.
TUF Tool:
To ease the abrasive strip insertion a
TUF Tool (Take-Up Fastener Tool) is
supplied with each machine.
Insert the hook into the outside hole in
the end of the take-up lever of the
fastener.
Fig 11
Lift the lever with the TUF Tool,
pulling the lever up until it touches the
inside of the drum, turn counter-
clockwise and clamp the sanding
paper.
Fig 12
Insert the tapered end of the abrasive
strip.
Release the lever on its proper
position.
Always remove TUF Tool from the
machine.
7.2 Selecting drum abrasives
It is important to select the proper grit
of abrasives for the type of sanding
being performed to achieve maximum
sanding results.
First begin sanding with coarser grit,
then progressively work towards finer
grits.
Never jump more than one grit grade.
Grits that are too fine and worn
sanding paper can burnish the wood.
Grit 36: Stock and glue removal.
Grit 60: Surfacing and dimensioning.
 Loading...