11
reconnection, the tool should comply with all local
codes and ordinances.
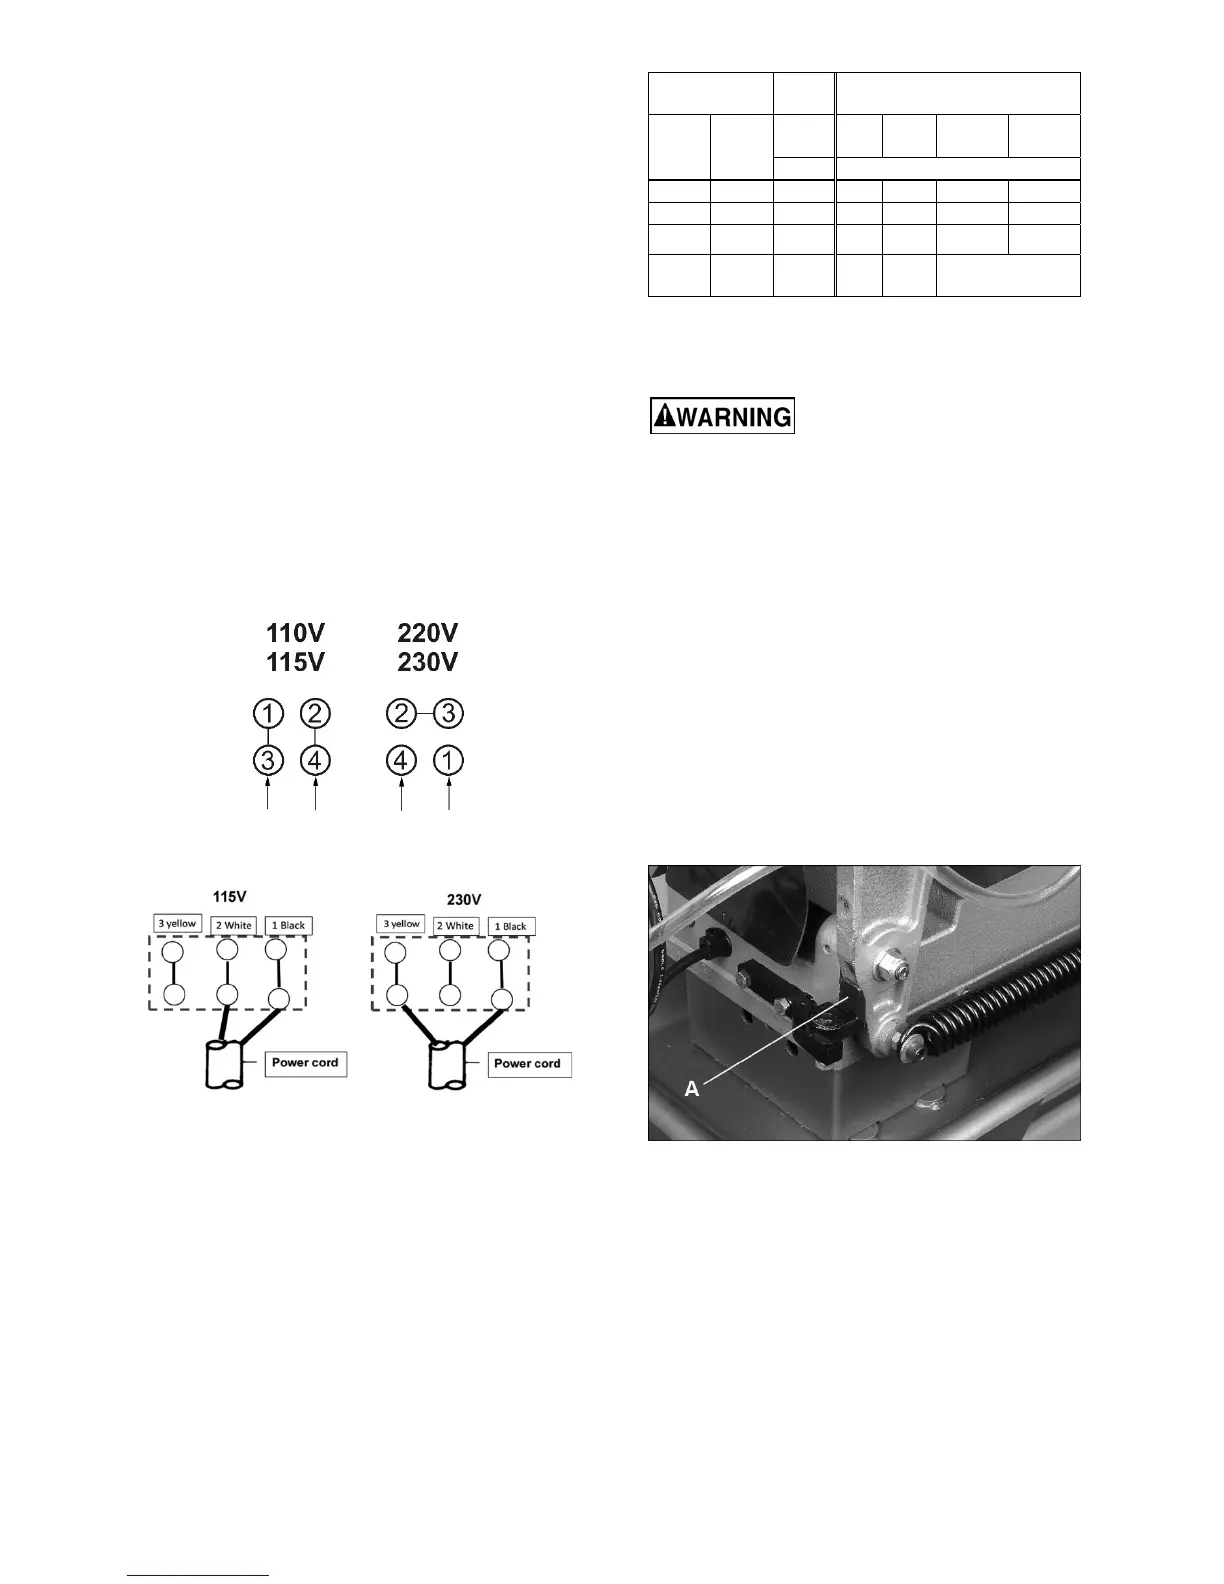
7.2 Voltage conversion
Conversion from 115V to 230V must be done by
a qualified electrician.
The Band Saw is prewired for 115 volt. To change
incoming leads for 230 volt operation:
1. Open main motor junction box cover, and
change leads based on wiring diagram inside
cover. This diagram is also shown in Figure 7-
2. (NOTE: In case of discrepancy, diagram
inside junction box cover takes precedence.).
Reinstall cover.
2. Remove pump motor junction box cover, and
change incoming leads for coolant pump, based
on diagram shown in Figure 7-3. Reinstall
cover.
3. The plug on end of power cord must be
replaced with a UL/CSA listed plug rated for 230
volt operation.
Figure 7-2: main motor wiring
Figure 7-3: coolant pump wiring
7.3 Extension cords
The use of extension cords is discouraged; try to
position machines near the power source. If an
extension cord is necessary, make sure it is in good
condition. When using an extension cord, be sure to
use one heavy enough to carry the current your
product will draw. An undersized cord will cause a
drop in line voltage resulting in loss of power and
overheating.
Table 1 shows correct size to use depending on
cord length and nameplate ampere rating. If in
doubt, use the next heavier gauge. The smaller the
gauge number, the heavier the cord.
Ampere
Rating
Volts
Total length of
cord in feet
More
Than
Not
More
Than
120
240
25
50
50
100
100
200
150
300
AWG
00 06 18 16 16 14
06 10 18 16 14 12
10 12 16 16 14 12
12 16 14 12
Not
Recommended
Table 1: Extension cord recommendations
8.0 Adjustments
Always disconnect band saw
from power source before making adjustments,
unless indicated otherwise.
8.1 Tools required for adjustments
(all may not be needed depending on adjustment)
#2 cross point screwdriver
Wrenches, 10/12/14mm
Hex keys, 3/4/6mm
Square
Straight edge
Clamp
8.2 Vertical bow position
1. Disconnect band saw from power source.
2. Rotate stop bracket (A, Figure 8-1) and hold it
out of the way, while lifting bow to upright
position. Pinch point – use caution!
Figure 8-1: disengaging stop bracket
Steps 3 through 6 are for Model 712D ONLY. For
Model 712, proceed to step 7.
3. The blade guide brackets can be rotated to
facilitate a more comfortable operating position
while in vertical mode. Remove screw (B,
Figure 8-2) with 6mm hex key and position
bracket in adjacent channel. Re-install screw.
4. Repeat above step for top blade guide bracket.
NOTE: Loosen set screw (C, Figure 8-3) and
slide coolant valve assembly out of slot to
access screw (B). When adjustment is
 Loading...