Figure 15
8.3 Table insert leveling
Refer to Figure 16.
The insert should be flush with the table surface:
1.
Remove the two screws beneath table inse
rt
(G
, Figure 16).
2.
Loosen any of the wing nuts (H) and rotate the
bolts (J) as needed until the insert is level with
the table surfac
e.
TIP: A s
traight edge clamped to the table and
across the insert will facilitate correct leveling
during this proc
edure.
3.
Tighten all four wing nuts.
4.
The two screws (G) may be reinstalled, if
desired, to retain insert in position.
Figure 16
8.4 Table slots
The table has four through-slots and two T-slots, for
attaching clamps, fence, or other accessories.
8.5 Chuck and arbor removal
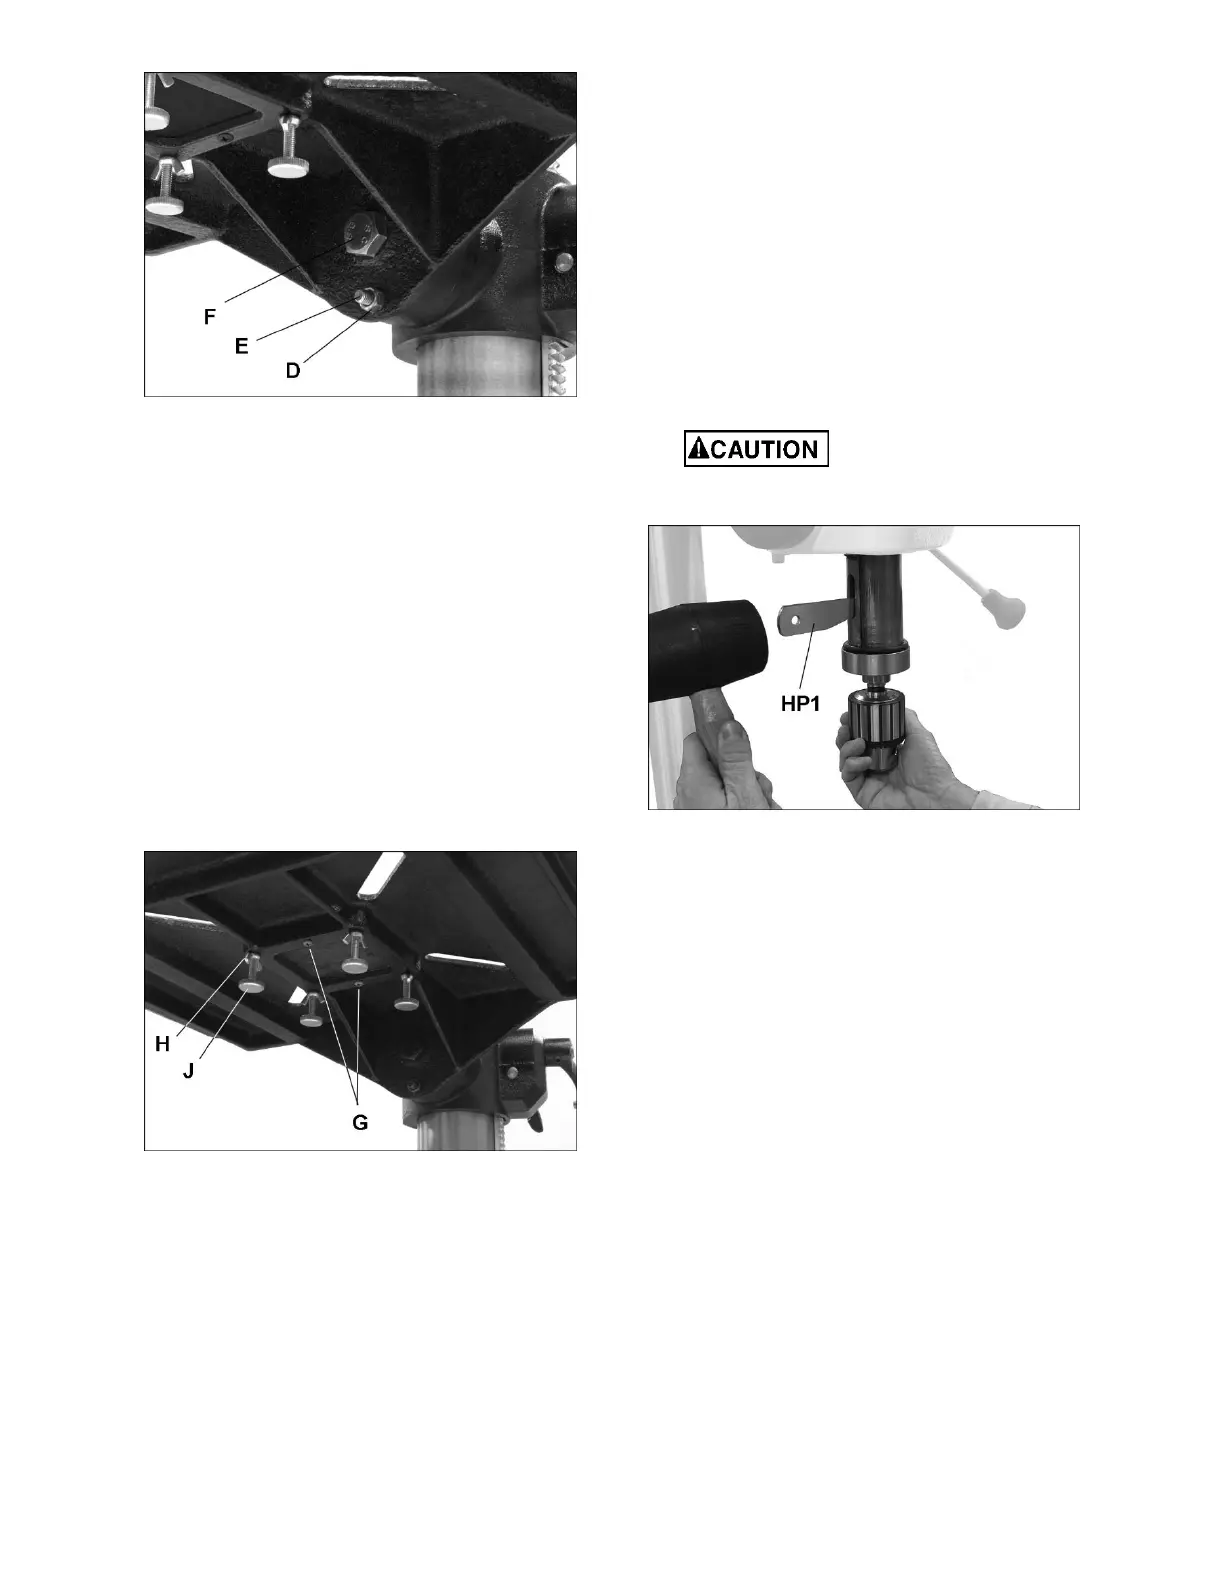
Refer to Figure 17.
1.
Disconnect machine from power source
.
2.
Lower the table to clear the chuck
area.
4.
Lower quill assembly with the downfeed
handles to expose slot and lock it in the
lowered
pos
ition (see sect. 8.5, Quill retraction lock).
While maintaining the lowered quill position,
rotate spindle by hand to align the slot in the
spindle with the slot in the quill.
5.
Insert drift key (HP1) into the aligned slots and
tap lightly. The chuck and arbor assembly
should fall from the spindle.
Prepare to catch the chuck
and arbor as it drops. Striking the floor
could damage tool.
Figure 17
8.6 Installing bits
The chuck accepts bits with a 5/8” or smaller shank.
1.
Insert bit (not provided) into chuck jaws
with
about 1” ins
ertion. When using a sm
all bit, do
not ins
ert it so far that the jaws touch the flutes
of
the bit.
2.
Make sure bit is centered in chuck before
tightening chuck.
3.
Turn chuck key clockwise to tighten chuck jaws.
See Figure 18. NOTE: Insert chuck key into
each of the three holes in the chuck
and tighten
to ens
ure tightness of each ja
w.
4.
The chuck key has a spring-loaded pin to
prevent it being left in the chuck. Howeve
r,
alway
s check the area and clear away any tools
before starting the drill press.
5.
Turn chuck key counterclockwise to loosen
chuck jaws and remove bit.
 Loading...