Exposed metal surfaces of table and base should be
kept clean and free of rust. Protective sprays or
paste wax are available from most hardware stores.
Note: Avoid wax that contains silicone or other
synthetic ingredients; these materials can find their
way into lumber and make staining and finishing
difficult.
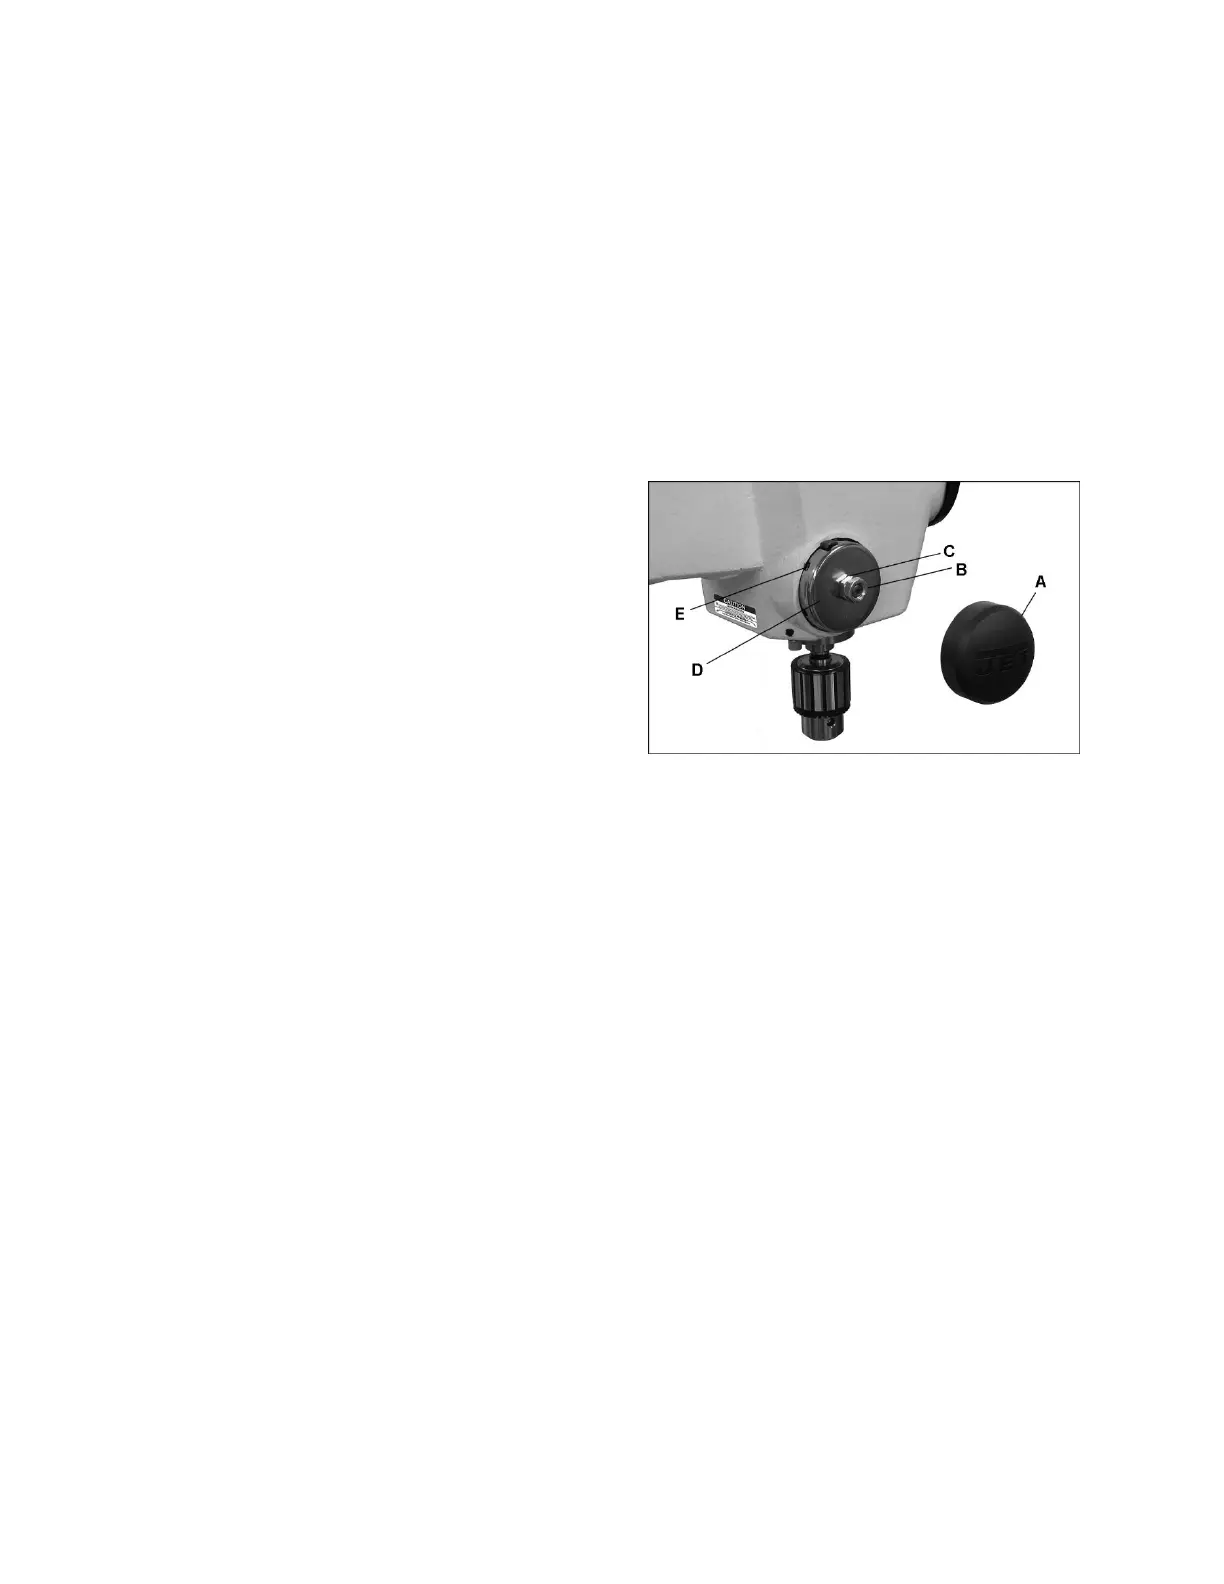
The quill return spring should receive SAE 20 oil
once yearly. Apply the oil beneath the spring
housing (D, Figure 31) using a squirt can.
If the drill press is not to be used for an extended
period, loosen the tensioner (B, Figure 19) to reduce
stress on the belts.
11.1 Belt replacement
To loosen and remove the existing poly-v belts, use
the same procedures described in sect. 8.7,
Changing spindle speeds.
11.2 Return spring
The tension of the return spring, which raises the
spindle after drilling, has been pre-set by the
manufacturer. No further adjustment should be
attempted unless absolutely necessary. Should
spindle retraction weaken after long-term use of the
drill press, tighten the spring tension as follows.
1.
Disconnect machine from power source
.
2.
Pull off c
ap (A, Figure 31).
3.
Loosen jam nut (B), and loosen inner nut (C) a
small amount. Do not remove the hex nuts. The
nuts should be backed off just
enough to allow
the s
pring housing (D) to be disengaged from
the pin on the head casting.
4.
Slightly pull out the spring hous
ing (D) while
f
irmly holding it. DO NOT allow the sp
ring
hous
ing to turn freely in your hand, or the spring
will unwind.
5.
Rotate spring housing until tab (E) on the spring
retainer engages the next notch in spring
housing. Rotate coil spring hous
ing
c
ounterclockwise to increase spring tension,
clockwise to decreas
e.
6.
Push spring housing back in. Make sure it has
re-engaged with the pin before releasing your
grip on the housing.
7.
Tighten inner nut (C) until it makes very
light
c
ontact with the spring housing. Do not
overtighten the inner nut, as it may caus
e
binding o
f the pinion shaft.
8.
Hold the inner nut with a wrench to prev
ent
f
urther movement, while tightening the jam nu
t
(B) against the inner nut.
9. Ins
tall cap
(A).
Figure 31
11.3 Additional servicing
Any other servicing of the drill press should be
performed by an authorized service representative.
 Loading...