14
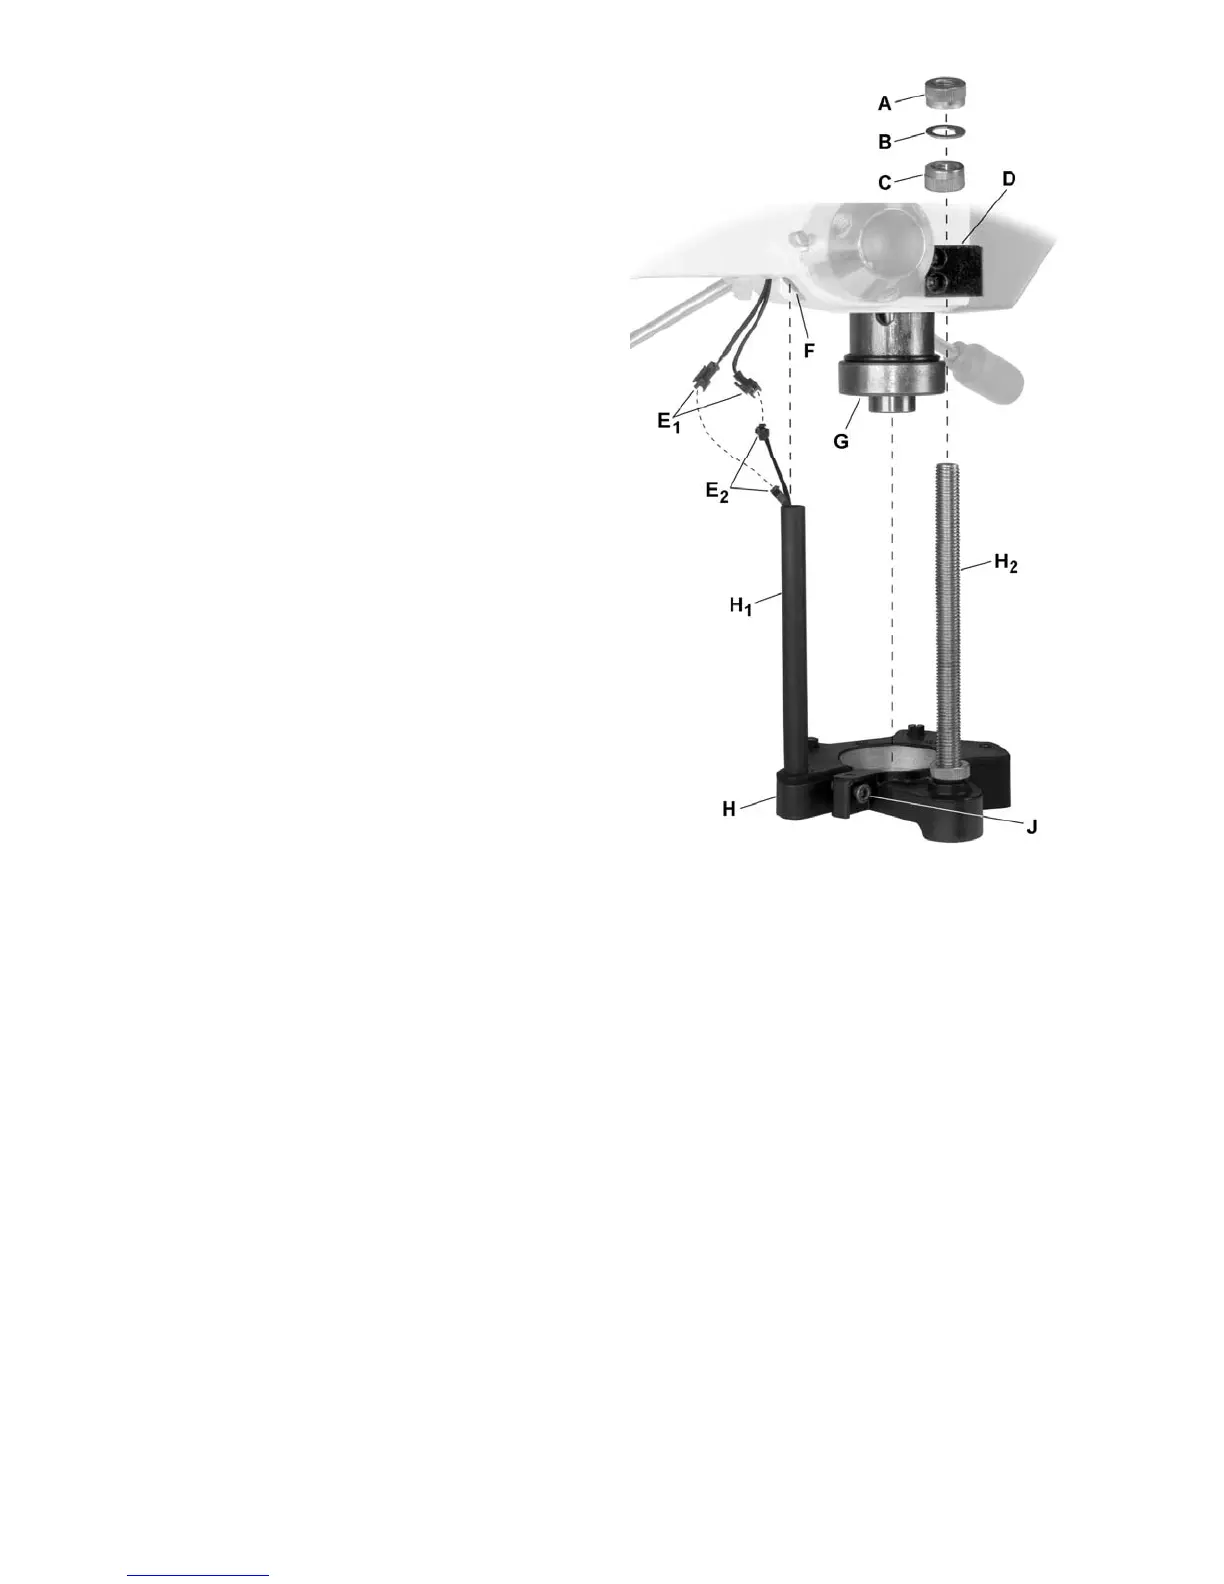
Laser Assembly Removal/Installation
The JDP-17DX drill press can be used as a
mortiser when fitted with a mortiser adapter (not
included). When used as a mortiser, the laser
assembly must be removed as follows:
Referring to Figure 14:
1. Unplug machine from the power source.
2. Remove the chuck and arbor assembly (de-
scribed on page 7).
3. Remove nuts (A, C), and washer (B) from the
depth set bolt (H
2
).
4. With a 5mm hex wrench, loosen the socket
head cap screw (J) on the laser housing (H)
and lower the assembly.
5. Disconnect wiring connectors E
1
, E
2
.
This completes the removal of the laser assembly.
To re-install the laser assembly:
1. Reconnect the wiring. Note that each E1
connector can be connected to any E2
connector (order is not important).
2. Install the laser by passing the sleeve (H
1
) and
depth seat bolt (H
2
) through the head casting
opening (F) and seat (D) respectively, then
seating the laser housing (H) onto the quill (G).
3. Secure assembly by tightening socket head
cap screw (J).
This completes the laser assembly installation.
Important: After installation, lasers must be
recalibrated as described in the Laser Adjustment
section (page 13).
Lamp
A light bulb is not included. If desired, insert a
standard 60W bulb into the socket accessible from
bottom of head.
Figure 14
 Loading...