8
7.4 Guide rail and fence
7.4.1 Installation
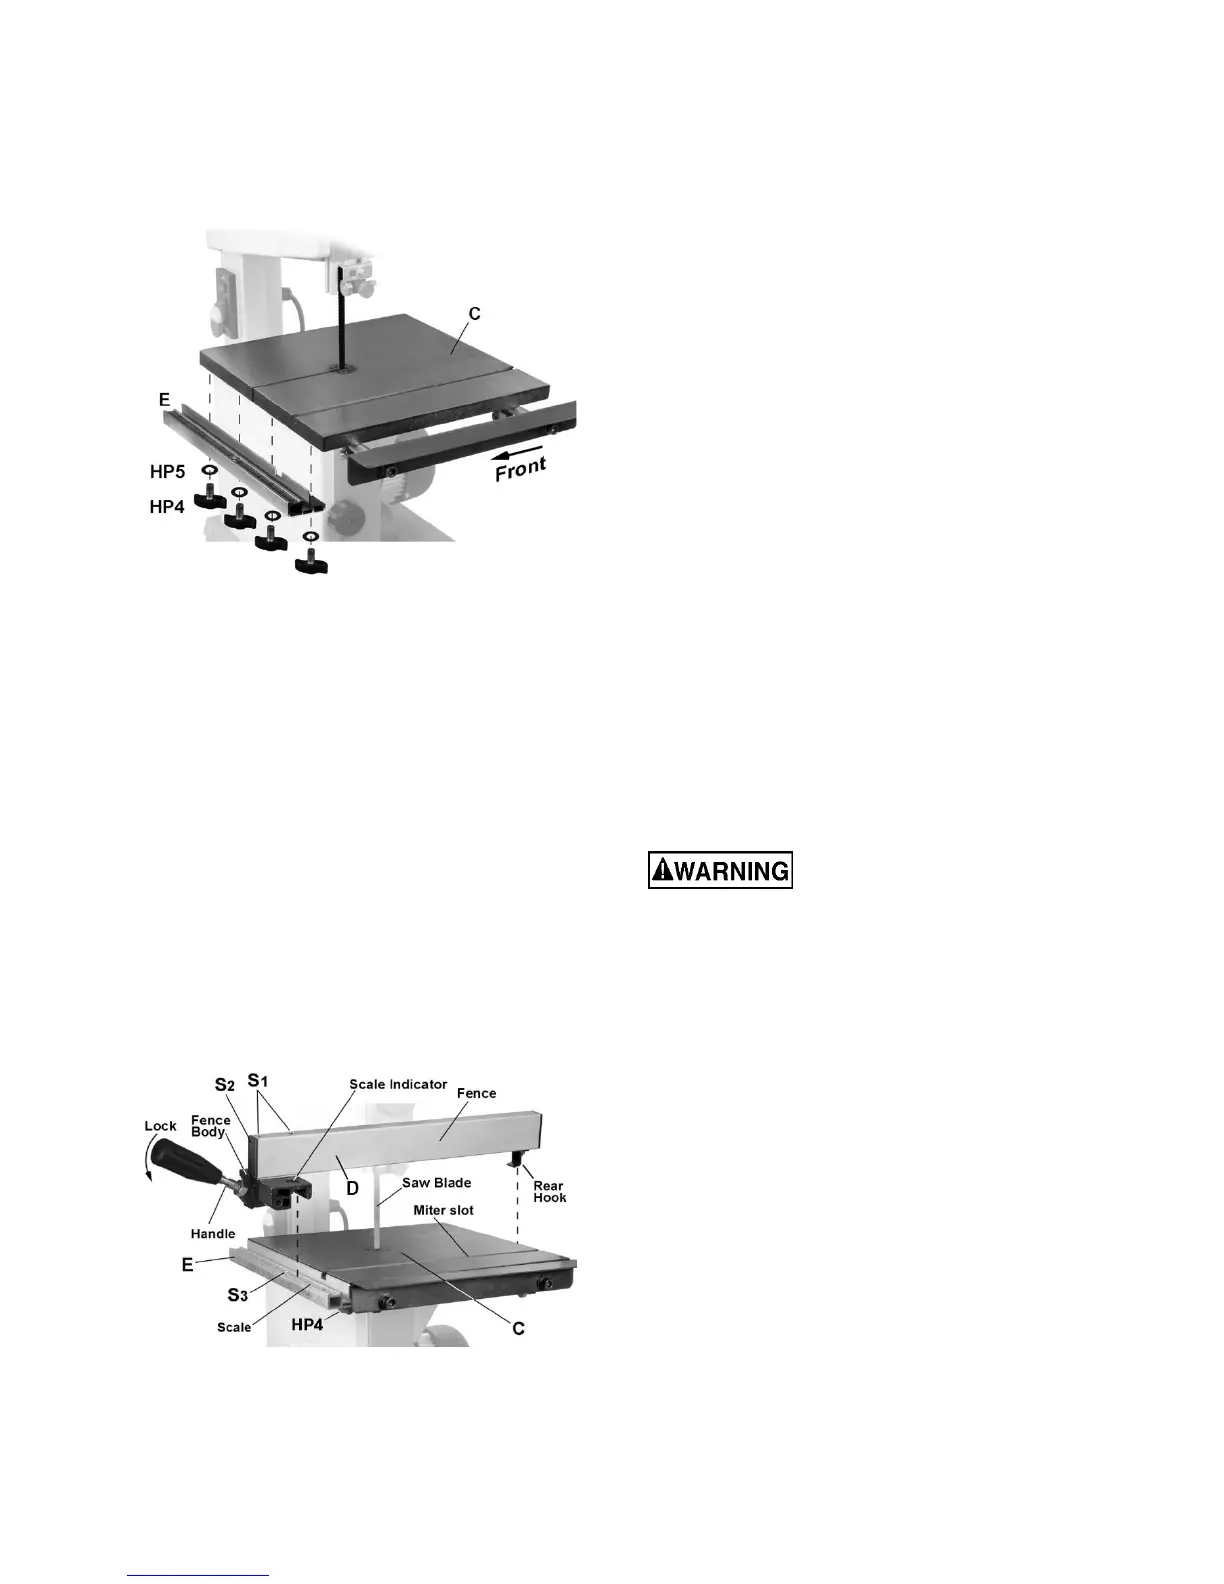
1. Attach guide rail (E, Figure 6) to front of table.
Secure with four wing screws (HP4) and flat
washers (HP5).
Figure 6
Refer to Figure 7:
2. Place fence assembly (D, Figure 7) onto
table at the miter slot.
The rear hook should engage the rear of the
table. The fence body should engage the guide
rail (E).
If the fence is not parallel to the miter slot:
3. Loosen two socket head cap screws (S1) with a
4mm hex wrench. End cap (S2) may need to be
removed.
4. Adjust fence so it is parallel to miter slot.
5. Lock the fence handle, securing it to the guide
rail (E), and verify that fence is still parallel to
miter slot.
6. Retighten two screws (S1) to secure fence to
the fence body and replace end cap (S
2).
Figure 7
7.4.2 Fence scale adjustment
Refer to Figure 7:
1. Place fence assembly (D) onto table (C)
against the saw blade. Lock fence.
If the hairline on the scale indicator does not point to
zero:
2. Remove fence assembly (D).
3. Loosen screw (S3) that secures scale to guide
rail (E).
4. Repeat step 1, then slide scale until hairline on
scale indicator points to zero.
5. Being careful not to move the scale, unlock and
lift fence from the table.
6. Tighten screw (S3) to secure scale in position.
If further adjustment is needed, wing screws (HP4)
can be loosened to allow adjustment of guide rail (E).
7.5 Quick-tension handle
Install quick-tension handle into hub on back of saw.
(see Q, Figure 12), and tighten using a wrench on
the flat of the shaft.
7.6 Dust collection
A dust port is located at the back of the band saw
for mounting a hose (not provided) to connect a dust
collector or shop vacuum.
8.0 Electrical connections
All electrical connections must
be done by a qualified electrician in compliance
with all local codes and ordinances. Failure to
comply may result in serious injury.
The JWB-10 is rated at 115-volt power. The band
saw comes with a plug designed for use on a circuit
with a grounded outlet that looks like the one
pictured in A, Figure 8.
Before connecting to power source, be sure switch
is in off position.
It is recommended that the band saw be connected
to a dedicated 15 amp circuit with circuit breaker or
fuse. If connected to a circuit protected by fuses, use
time delay fuse marked “D”. Local codes take
precedence over recommendations.
8.1 GROUNDING INSTRUCTIONS
This machine must be grounded. In the event of a
malfunction or breakdown, grounding provides a
path of least resistance for electric current to reduce
the risk of electric shock. This tool is equipped with
an electric cord having an equipment-grounding
conductor and a grounding plug. The plug must be
plugged into a matching outlet that is properly

 Loading...