Bareshaft Pump
23
Filter Cartridge Replacement
1. Relieve pressure from the housing using the
bleed valve then loosen the three eye-nuts
(Figure 18) on the lter cover.
2. Slowly open the cover and capture the spring
(Figure 19) and spring keeper.
3. Remove the lter cartridge.
4. Install the new lter cartridge onto the guide
rod. Ensure the guide rod is correctly seated
into the bottom of the housing.
5. Inspect the O-ring and install a new one if
necessary.
6. Place the spring keeper and spring into place
on the end of the lter cartridge.
7. Move the lter cover into position and tighten
the eye-nuts.
8. Prepare the pump for operation and start the
unit. Start a typical blast operation and record
the following:
• Engine rpm
• Gauge pressure on the secondary lter
9. Save this record for monitoring the status
of the secondary lter. Monitor the pressure
gauge as more hours of operation are ac-
cumulated on the lter cartridge. When the
pressure on the lter gauge has dropped ap-
proximately 7 to 10 psi (0.48 to 0.69 bar) (with
the unit operating at the same rpm as earlier
recorded), the lter must be replaced.
Switch Adjustment
The differential pressure switch will shut down the
unit when the pressure drop across the lter is
approximately 7 to 10 psi (0.48 to 0.69 bar). If the
switch doesn’t close within the 7 to 10 psi (0.48 to
0.69 bar) range, it may need to be adjusted. Contact
Jetstream for switch adjustment instructions.
Uni-Valve Life
The uni-valve seats can be damaged by dirty water.
It is important to change lters regularly to improve
pump performance and prolong valve life. (Nozzles
and bypass cartridges are also adversely affected by
dirty water).
Inspect uni-valve seats regularly to monitor condition
and lap the valve seats when necessary. Refer to
“Valve Lapping” on page 50 for lapping instruc-
tions.
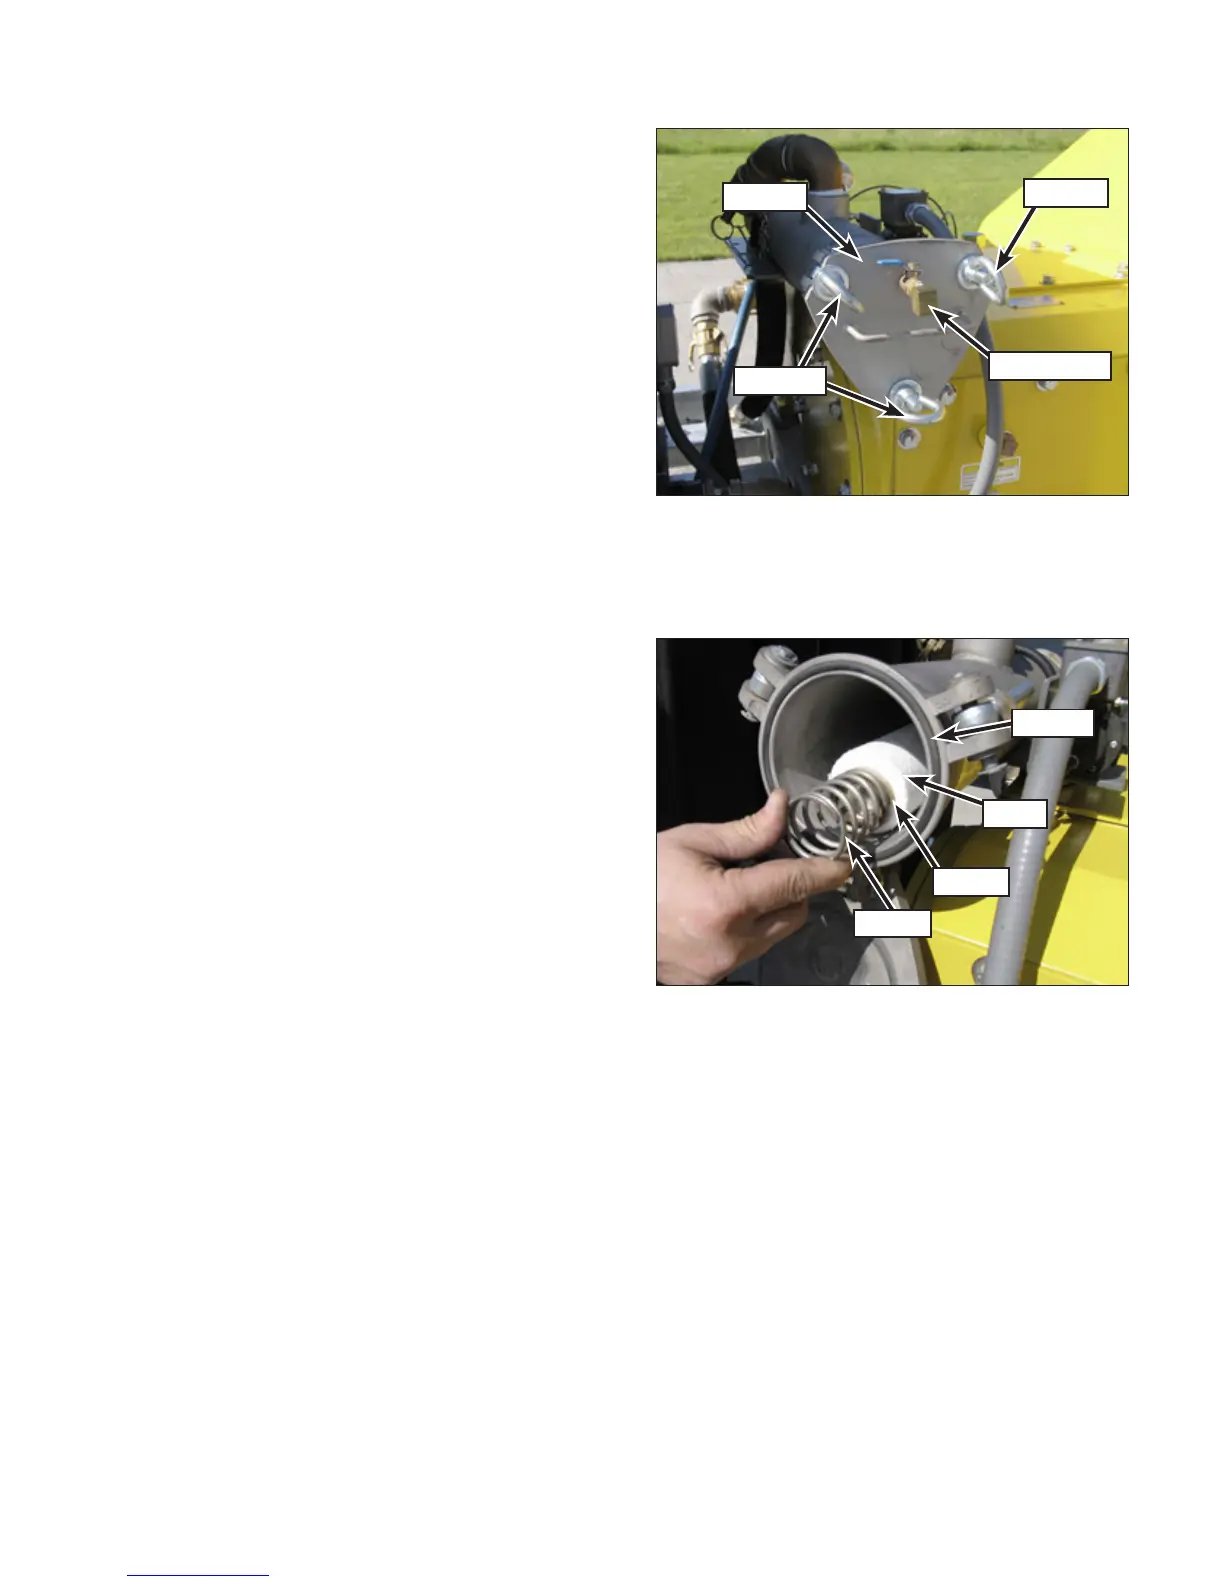
Figure 18: Filter Cover.
Eye Nut
Bleed Valve
Eye Nuts
Cover
Figure 19: Cartridge Removal.
Spring
Keeper
Filter
O-Ring