Do you have a question about the JETStream 3000 series and is the answer not in the manual?
Details the terms and conditions of the limited warranty for Jetstream products.
Outlines the sole and exclusive remedies for warranted product failures under the warranty.
Guidance for personnel on safe setup, operation, and maintenance of equipment.
Four-step plan for new owners/operators to understand Jetstream waterblast units.
Training covering skill levels, safety, application, troubleshooting, and field maintenance.
Information on additional certified training classes for safe and profitable operation.
Alerts users to potential safety risks via cautionary statements and safety decals.
Defines signal words (DANGER, WARNING, CAUTION) used to indicate hazards and risks.
Provides guidelines and instructions for maintaining a safe work environment.
Follow all manufacturer instructions before using waterblast products.
Check component condition prior to use; use only properly rated components.
Ensure all system components are rated for the intended operating pressure.
Two rupture discs are used for excess pressure protection; rated at 120% and 140%.
Verify thread condition and use Teflon tape/anti-seize for high pressure connections.
Properly tighten high pressure connections, using caution with pipe wrenches.
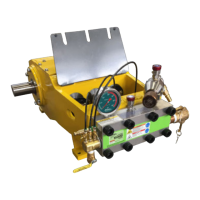
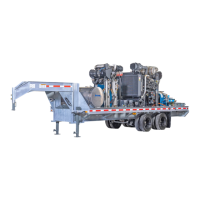
Describes the UNx pump, its power and fluid ends, and drive options.
Houses fluid end components like uni-valves; converts low to high pressure water.
Allows flushing of manifold before use and purging air during startup.
Provides water to lubricate and cool pump packing for optimal operation.
Monitors system pressure for the operator controlling the pump.
Details available horsepower ranges, pressure ranges, and geardrive options.
Specifies gravity feed minimums, pressure requirements, and water quality for 15K/20K/40K.
Discusses managing discharge line pulsation using flexible hoses or dampers.
Explains powerend lubrication with 80W90 gear oil and temperature requirements.
Requires 40-50 psi suction pressure; specifies lube water flow control valves.
Details ISO 320 gear oil requirements, temperature limits, and oil cooler operation.
Details recommended water quality levels for optimal pump performance and component longevity.
Discusses pump design for water and considerations for other fluids, noting warranty voidance.
Checks for power end oil level, gland nut torque, water lubrication, and rupture discs.
Includes uni-valve inspection and inspection of the pump breather.
Initial power end oil change and initial stuffing box lubrication check.
Regular power end oil change and stuffing box lubrication check.
Journal bearing inspection.
Covers checking bolt torque, gland nut torque, rupture discs, and packing replacement.
Includes oil checks, oil changes, pony rod seals, journal bearings, and assemblies.
Step-by-step guide to remove O-rings, backup rings, spring retainers, and valves.
Procedure to correctly install discharge valve, springs, suction valve, O-rings, and backup rings.
Steps to remove O-rings, retaining rings, and cup seals from the 40K uni-valve.
Procedure for installing discharge valve, springs, suction valve, keepers, and seal rings.
Method to check oil level when unit is on level ground and has been at rest for 5-8 hours.
Provides methods for checking oil level when the unit is at operating temperature or recently run.
Steps to remove capscrews, rubber deflector, rod box cover, and set screws.
Procedure for installing seal plates, seals, O-rings, deflector, and covers.
Procedure to remove back plate, rod cap capscrews, and rod caps from the crankshaft.
Using plasti-gauge to measure bearing clearances and determine if bearings can be reused.
Steps for installing new bearings, lubricating them, and seating them in the connecting rod and cap.
Lifting crosshead/connecting rod assemblies from the crankcase.
Removing set screws, pins, and connecting rods from crossheads.
Measuring pin and bushing diameters to determine if bushing replacement is needed.
Cleaning, inspecting, lubricating, and installing pins, connecting rods, and set screws.
Steps to disconnect hoses, switches, belts, and mounting hardware for pump removal.
Placing pump, installing hardware, belts, guards, and connecting hoses and switches.
Removing pump, plunger couplings, rod end caps, covers, and crankshaft from power frame.
Heating and installing bearings, crankshaft, side plates, and covers.
| Brand | JETStream |
|---|---|
| Model | 3000 series |
| Category | Water Pump |
| Language | English |