Operation Manual
56
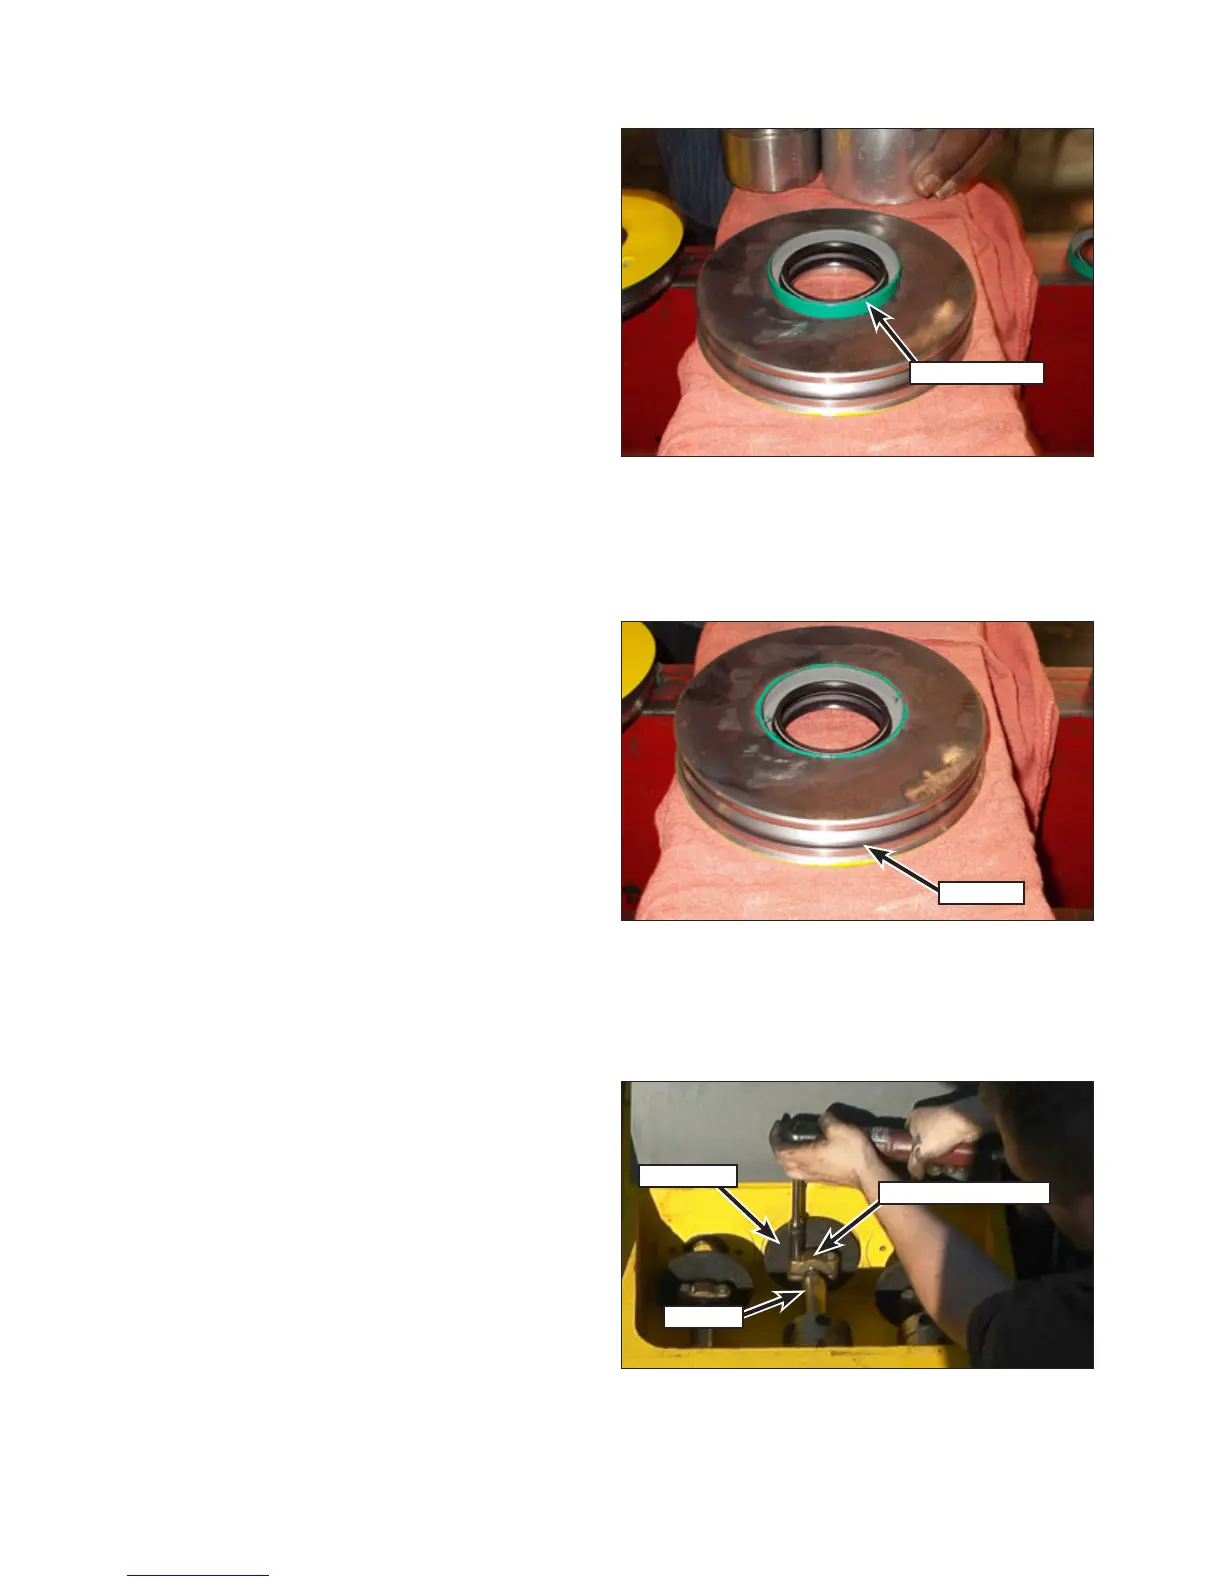
3. Place the green inboard seal into position on
top of the outboard seal and orient the seal
(Figure 105). Press the seal into the plate
until it is ush with the face of the plate. Use
caution to avoid damaging the seal.
4. Install a new O-ring (Figure 106) onto the seal
plate. Lubricate the O-ring with O-ring lubri-
cant.
5. Lubricate the inner seals with clean oil.
6. Repeat the prior steps for the remaining seal
plates, if necessary.
7. Clean the seal plate bore and chamfer with
emery cloth. Smooth any rough edges that
can cut or damage the O-ring.
8. Carefully install the seal plate onto the pony
rod and into the bore using hand pressure
only. Do not hammer the plate into place. The
plates must be ush with the frame.
9. Using a 1/4” hex drive, tighten the set screw
that secures the plate to 15 in.-lb. (1694
mN·m) inside the access holes.
10. Install the deector (Figure 107) onto the pony
rod.
11. Extend the plunger from the stufng box to
meet the pony rod.
12. Place the plunger coupling into position and
install the capscrews that secure the plunger.
Tighten to 20 ft.-lb.(27 N·m).
13. Place the rubber washers into position on the
frame and then place the cover into position.
Install the three capscrews and washers that
secure the cover.
14. Add oil to the crankcase as outlined in “Chang-
ing the Power End Oil” on page 53.
Figure 105: Inboard Seal Installation.
Inboard Seal
Figure 106: O-Ring Installation.
O-Ring
Deflector
Plunger Coupling
Plunger
Figure 107: Plunger Connection.