WARNING
This is not a backseating valve. The service access port has a valve core. Opening or closing the valve
does not close the service access port. If the valve stem is backed out past the chamfered retaining wall,
the O-ring can be damaged, causing leakage or system pressure that could force the valve stem out of
the valve body, possibly causing personal injury.
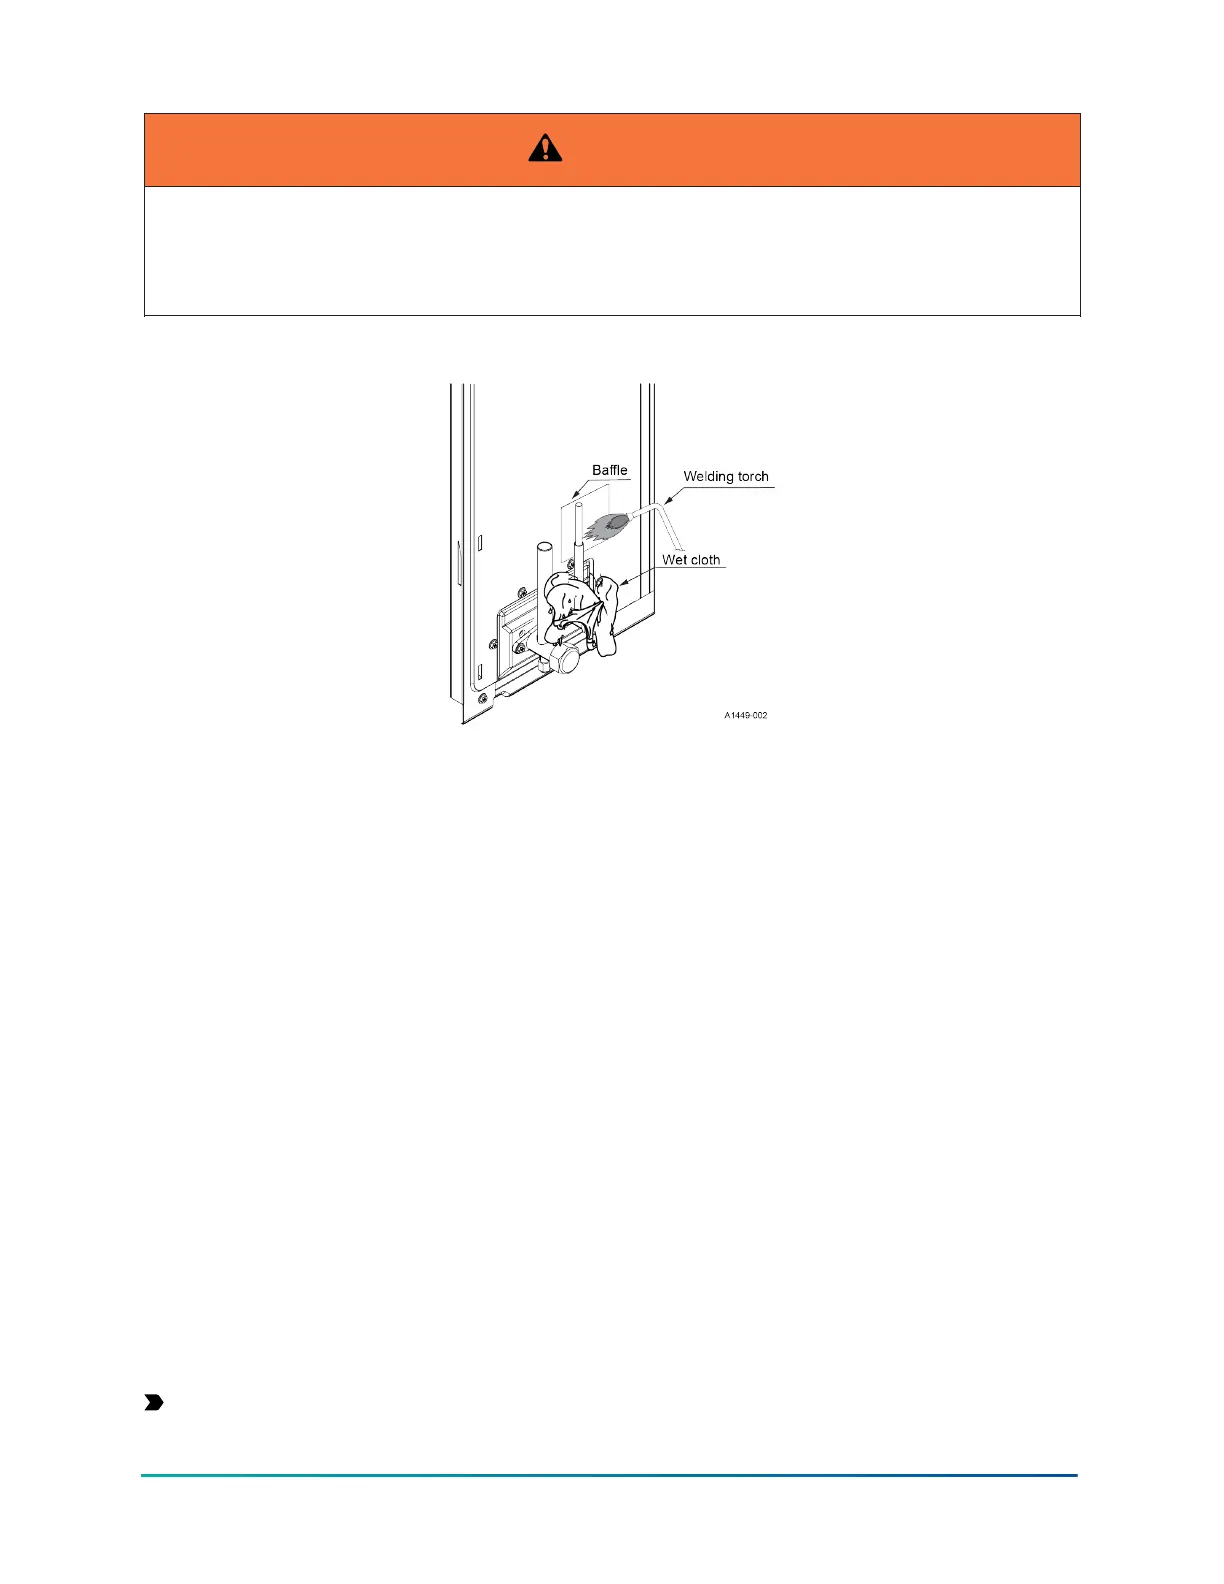
Figure 9: Brazing the service valves
To braze the refrigerant lines and service valves, do the following:
1. Remove the cap and Schrader core from both the liquid and vapor service valve service ports
at the outdoor unit.
2. Connect low pressure nitrogen to the liquid line service port.
3. Braze the liquid line to the liquid valve at the outdoor unit. Ensure to wrap the valve body with
a wet rag. Allow the nitrogen to continue flowing.
4. Carefully remove the plugs from the liquid and vapor connections at the indoor coil.
5. Braze the liquid line to the indoor coil liquid connection. Nitrogen should be flowing through
the indoor coil.
6. Slide the grommet away from the vapor connection at the indoor coil. Braze the vapor line
to the indoor coil vapor connection. After the connection has cooled, slide the grommet back
into its original position.
7. Protect the vapor valve with a wet rag and braze the vapor line connection to the outdoor
unit. The nitrogen flow should be exiting the system from the vapor service port connection.
After this connection has cooled, remove the nitrogen source from the liquid fitting service
port.
8. Replace the Schrader core in the liquid and vapor valves.
Installing the thermostatic expansion valve (TXV)
About this task:
This is a basic overview of the procedure, for detailed instructions, refer to the Installation Manual
accompanying the TXV kit and the indoor coil. Install the TXV kit as follows:
Important: Refer to the Technical Guide or Tabular Data Sheet for the unit to determine the
correct TXV kit to use on this product.
27Installation Manual: R-454B Outdoor Split-System Air Conditioner
Johnson Controls Ducted Systems