19
Starter unit
2
!
!
!
!
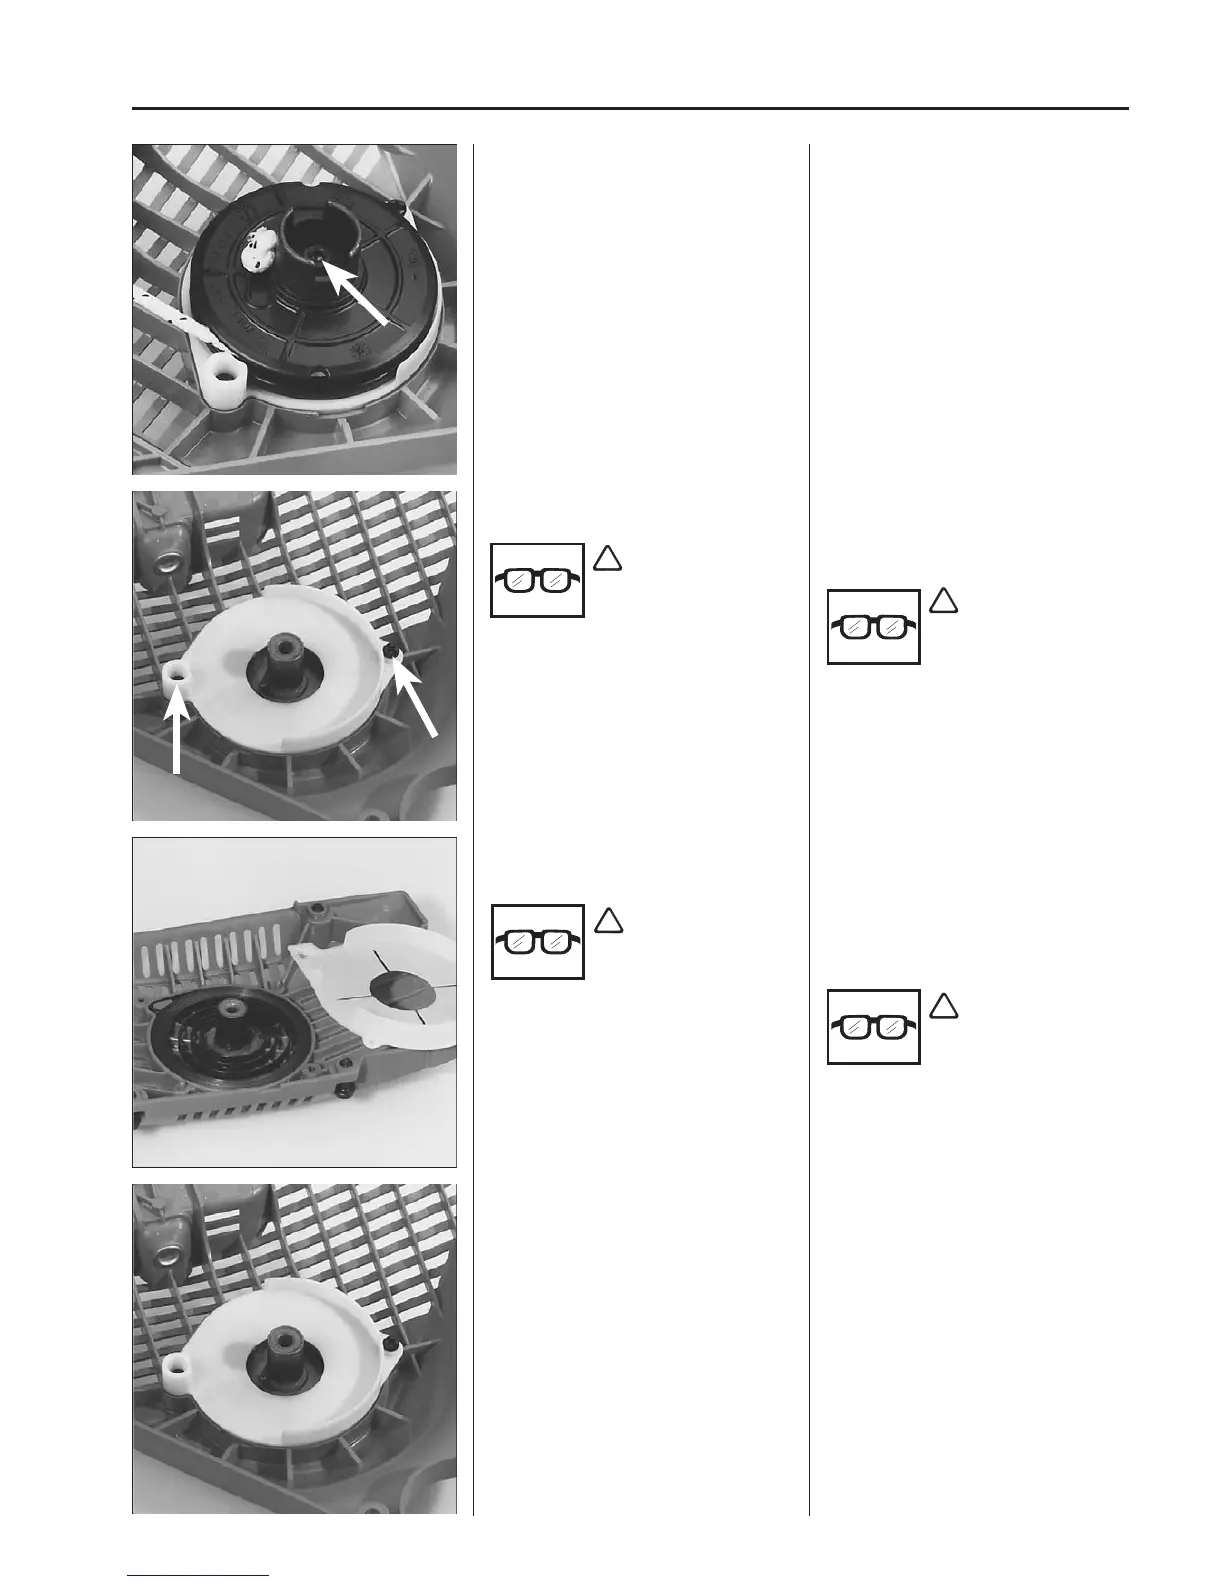
4. Remove the screw and the washer.
5. Remove the pulley and spring cass-
ette, and return spring.
4. Remove the screw and washer in the
centre of the pulley.
5. Lift off the pulley carefully.
6A.Remove the screws which hold the
spring cassette and lift off.
WARNING!
Wear protective glas-
ses. The return spring
can fly out and cause
injury.
WARNING!
Wear protective glas-
ses.
6B.Remove the screws which hold the
cover disc over the return spring.
Dismantle the spring by giving the
starter housing a sharp tap against
the work bench with the spring turned
downwards.
WARNING!
Wear protective glas-
ses.
WARNING!
Wear protective glas-
ses. The return spring
can fly out and cause
injury.
Replacing return spring
Dismantle the pulley as described above.
A. Fit a new spring cassette.
Replacing return spring
Dismantle the pulley as described above.
A. Place a new spring cassette in the
starter housing and tighten the
screw(s).
6. Dismantle the cover disc and return
spring from the starter unit housing.
 Loading...