10
138344_Rev_D - C450 Kennebec 8.2.10
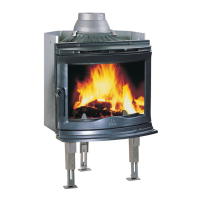
Locking
Bracket
Damper
Frame
Adjustable
Sealing Plate
Flex
Connector
Flex Connector
Pipe extends into
the flue tile
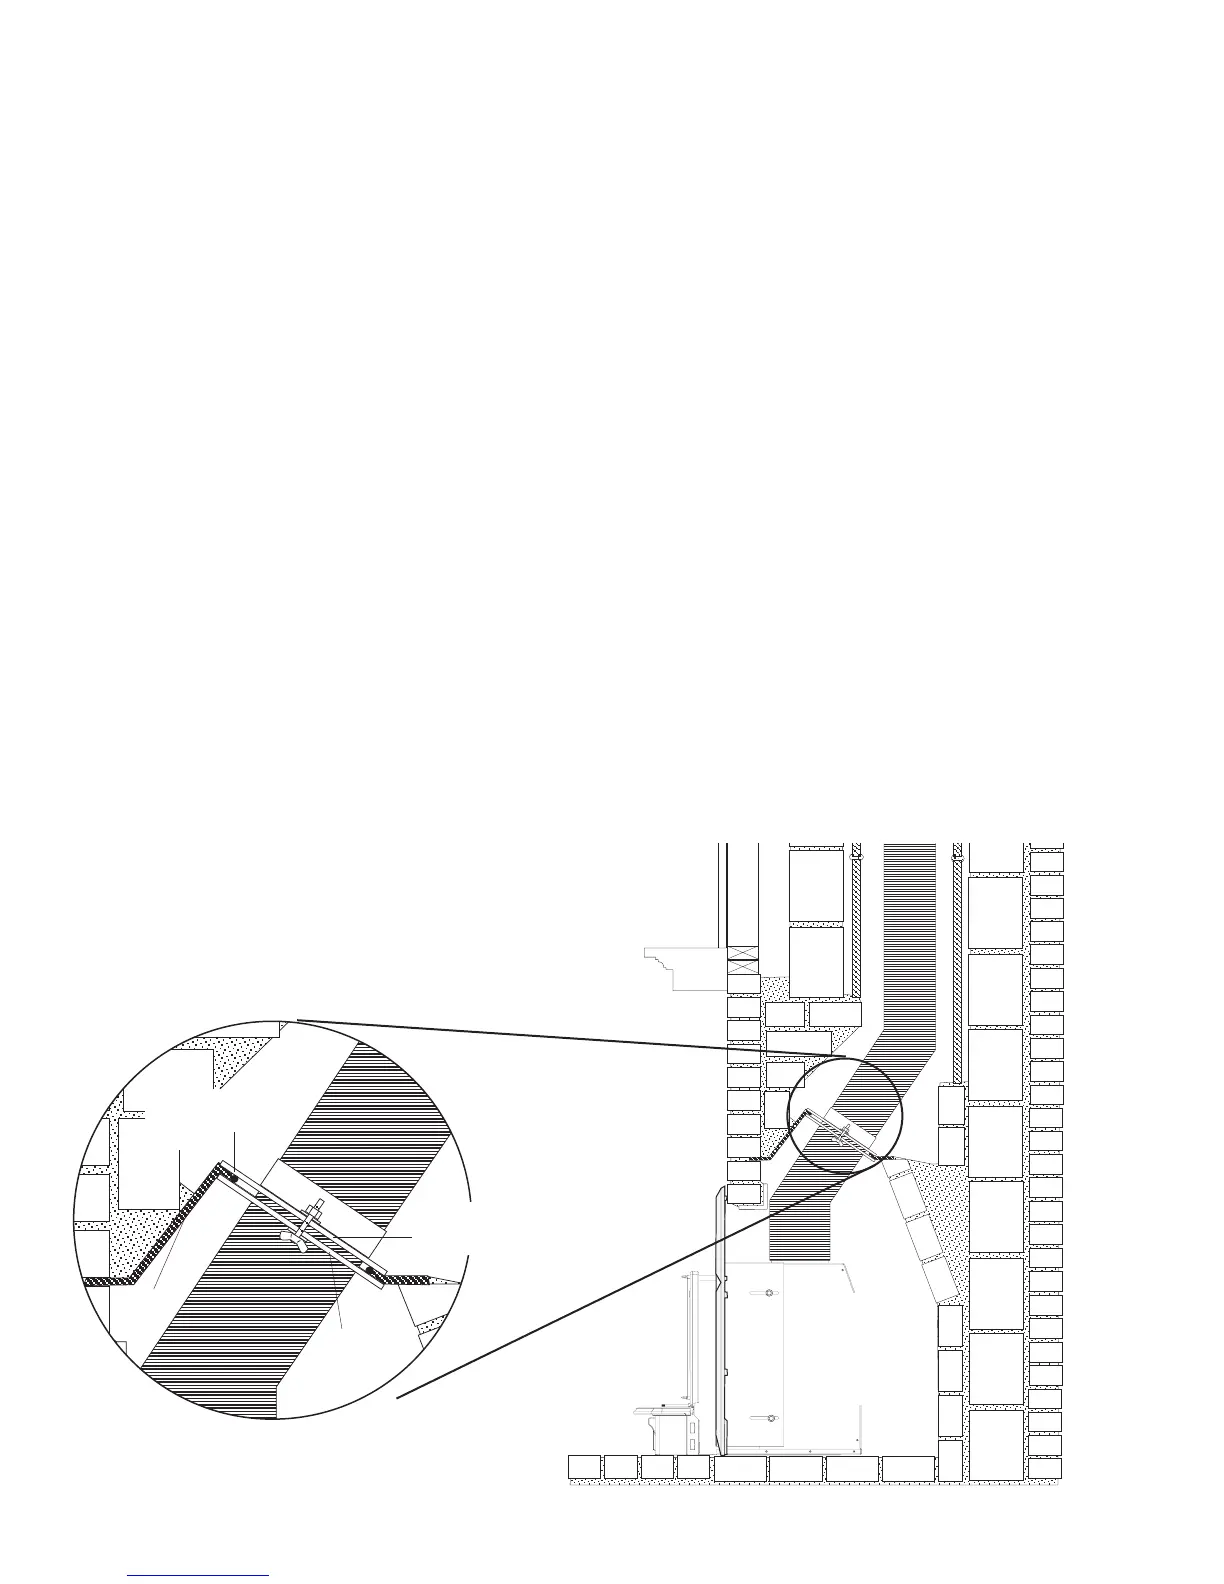
Figure 11. Positive Chimney Connection - U.S.
Attach Fireplace
Conversion
Notice Plate
to Rear Wall of
Fireplace
Chimney Connection
A positive connection must be made between the fire-
place insert and the chimney by one of the following
approved methods.
In the U.S:
The insert is connected to a listed stainless steel flexible
connector that extends beyond the chimney flue tile
liner. A sealed block-off plate must be installed at the
damper area of the existing fireplace. See fig. 11.
For internal chimneys, (no sides of the chimney
exposed to the outside below the roofline,) a positive
connection to the first flue tile is acceptable provided the
tile is no larger than 8” x 12”. For external chimneys, (one
or more sides are exposed to the outside below the roof
line,) a positive connection to the first flue tile is accept-
able provided the tile is no larger than 8” x 8”.
A 6”, 7”, or 9” stainless steel liner, extending the full
height of the chimney, is required for all installations
where the flue tile is greater than 8” x 12” for internal
chimneys, or 9” x 8” for external chimneys.
In Canada:
The insert must be installed with a continuous chimney
liner of 6” (152 mm) diameter extending from the fire-
place insert to the top of the chimney. The chimney liner
must conform to the Class 3 requirements of CAN/ULC-
S635, Standard for Lining Systems for Existing Masonry
or Factory-Built Chimneys and Vents, or CAN/ULC-S640,
Standard for Lining Systems for New Masonry Chimneys.
See fig. 11a.
Do not use aluminum or galvanized steel pipe for chim-
ney connection components - these materials are not
suitable for use with solid fuel.
Installation
1. Remove the existing damper and linkage compo-
nents from the fireplace. Alternatively, you can
wire the damper plate to lock it in the open posi-
tion. Thoroughly clean the firebox and smoke shelf
area with a wire brush.
2. If the fireplace has been modified to accommo-
date installation, use anchors or masonry nails to
attach the metal Fireplace Conversion Notice Plate
(PN 220508) to the back wall of the masonry fire-
place firebox where it will be readily seen should
the insert be removed.
3. Install the Flex Connection plate according to the
manufacturer’s instructions. The sealing plate may
require trimming to accommodate your specific
fireplace damper.
 Loading...