13
138344_Rev_D - C450 Kennebec 8.2.10
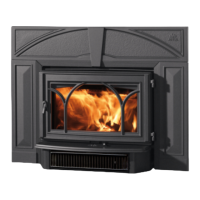
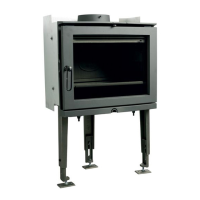
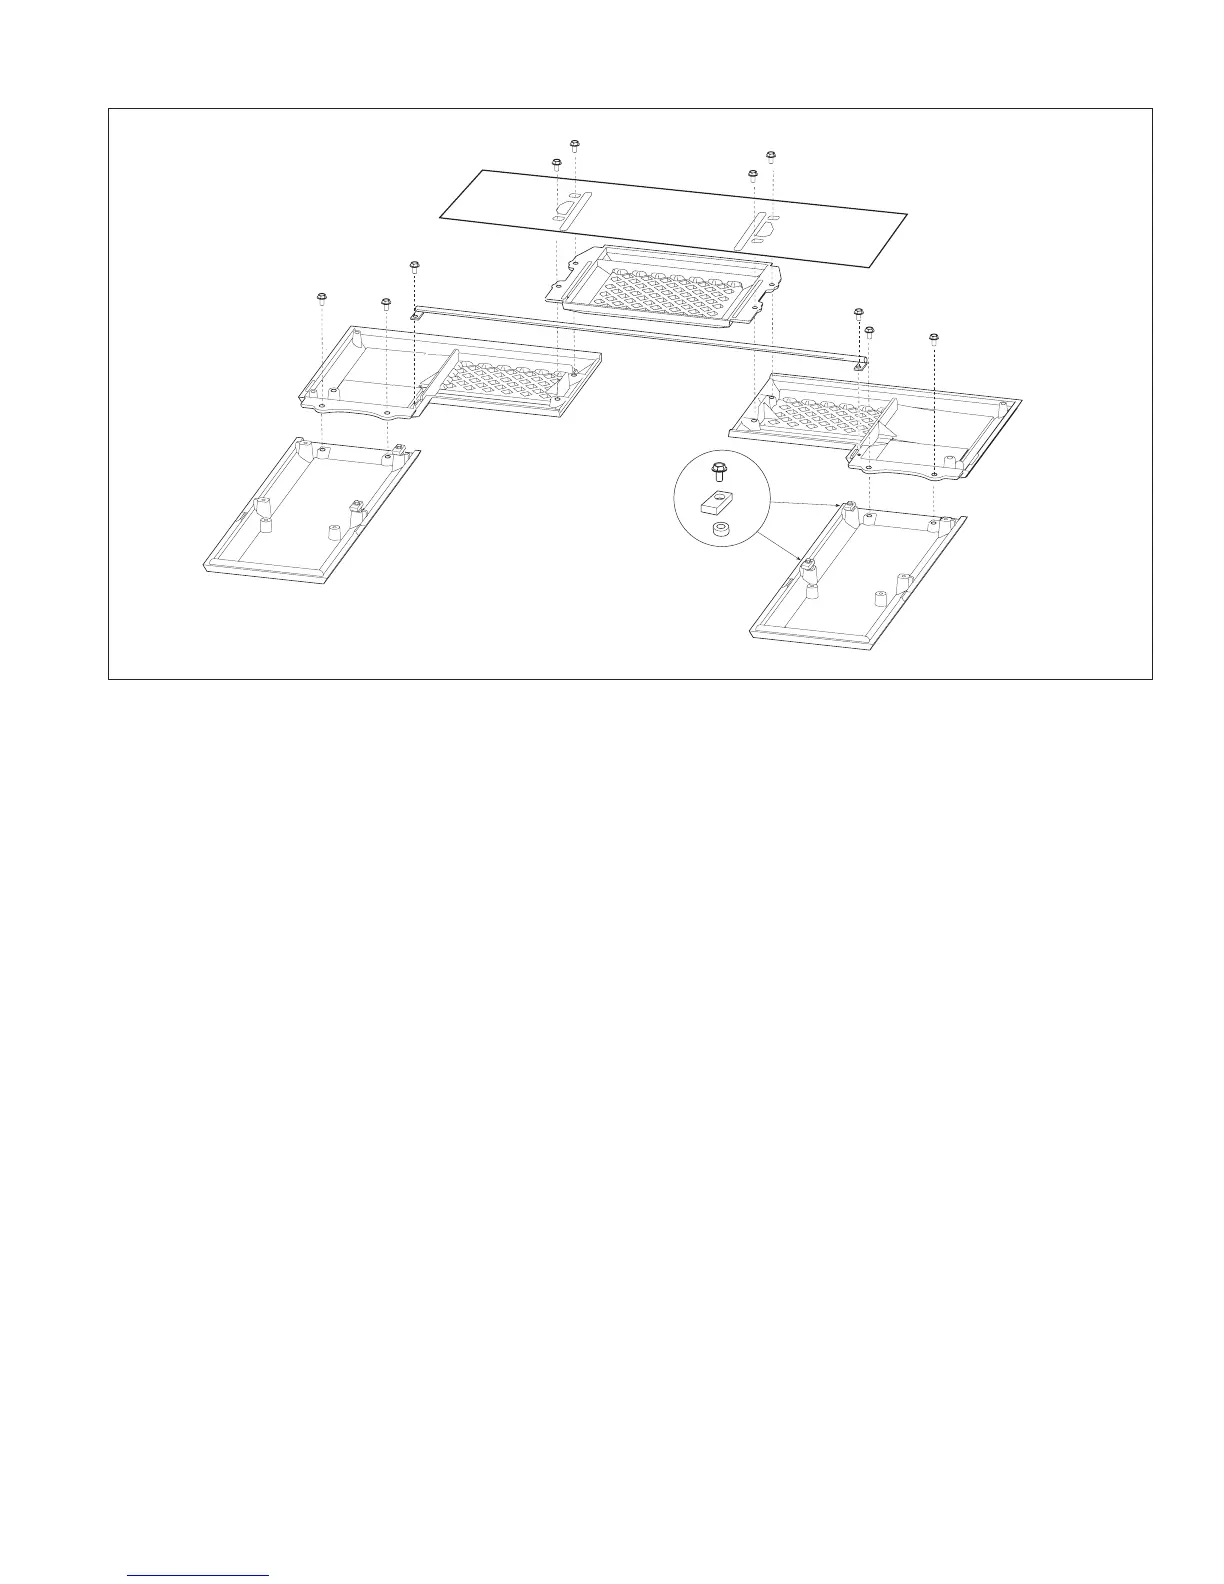
Figure 12a. Tamarack Lattice Surround Panel Assembly
Grille Shade
M6x16 Hex Head Bolts
Center Breast-
plate
Right Breast-
plate
Left
Breastplate
Right Leg
Left Leg
Hang Tab
should point
straight down
Trim Rod
Tamarack Surround Assembly
All fasteners have already been installed in the appro-
priate locations at the factory. You will need to remove
them, attach the parts together as described below and
re-install the fasteners at those locations.
1. Layout the parts. Place the castings face down on a
protective surface such as carpeting, blankets or a
sheet of cardboard. See fig. 12a, above.
2. Attach the optional Grille Shade (if desired), and
Breastplates.
• Align the Center Breastplate bolt holes with the
Right and Left Breastplates.
• Place the Grille Shade in position, painted side out,
and secure the whole assembly with four M6 x 16 hex
head flange bolts, at the same locations from where
they were removed.
3. Attach the Leg plates. The Legs must be oriented with
the Hang Tabs on the inside edges as shown in fig. 12a.
Use the four remaining M6 x 16 hex head flange bolts
to attach the Legs to the Breastplates.
4. Install the Trim Rod, using the two M6 x 16 bolts at
those locations.
5. Optional: Install the Wide Surround. If you will be
installing the optional Wide Surround Panels, use the
instructions included with that kit. The mounting
bolts are already installed on the inner surround legs.
6. Attach the Assembly to the Firebox. Lift the entire
assembly upright and position it in front of the insert
firebox. DO NOT LIFT THE ASSEMBLY BY THE TRIM ROD.
The four Hang Tabs on the surround legs must engage
with the adjacent holes in the two brackets on either
side of the firebox opening. The surround will easily
engage with these brackets if the firebox is slightly
proud of the fireplace opening.
Hang the surround assembly on the firebox and push
the entire unit into position so that the surround is
flush against the fireplace face.
Final leg panel alignment can be adjusted by slightly
loosening or tightening those attachment bolts as
necessary.
Tools Required:
• 10 mm socket or wrench
 Loading...