16
Configuring your Alexa Devices
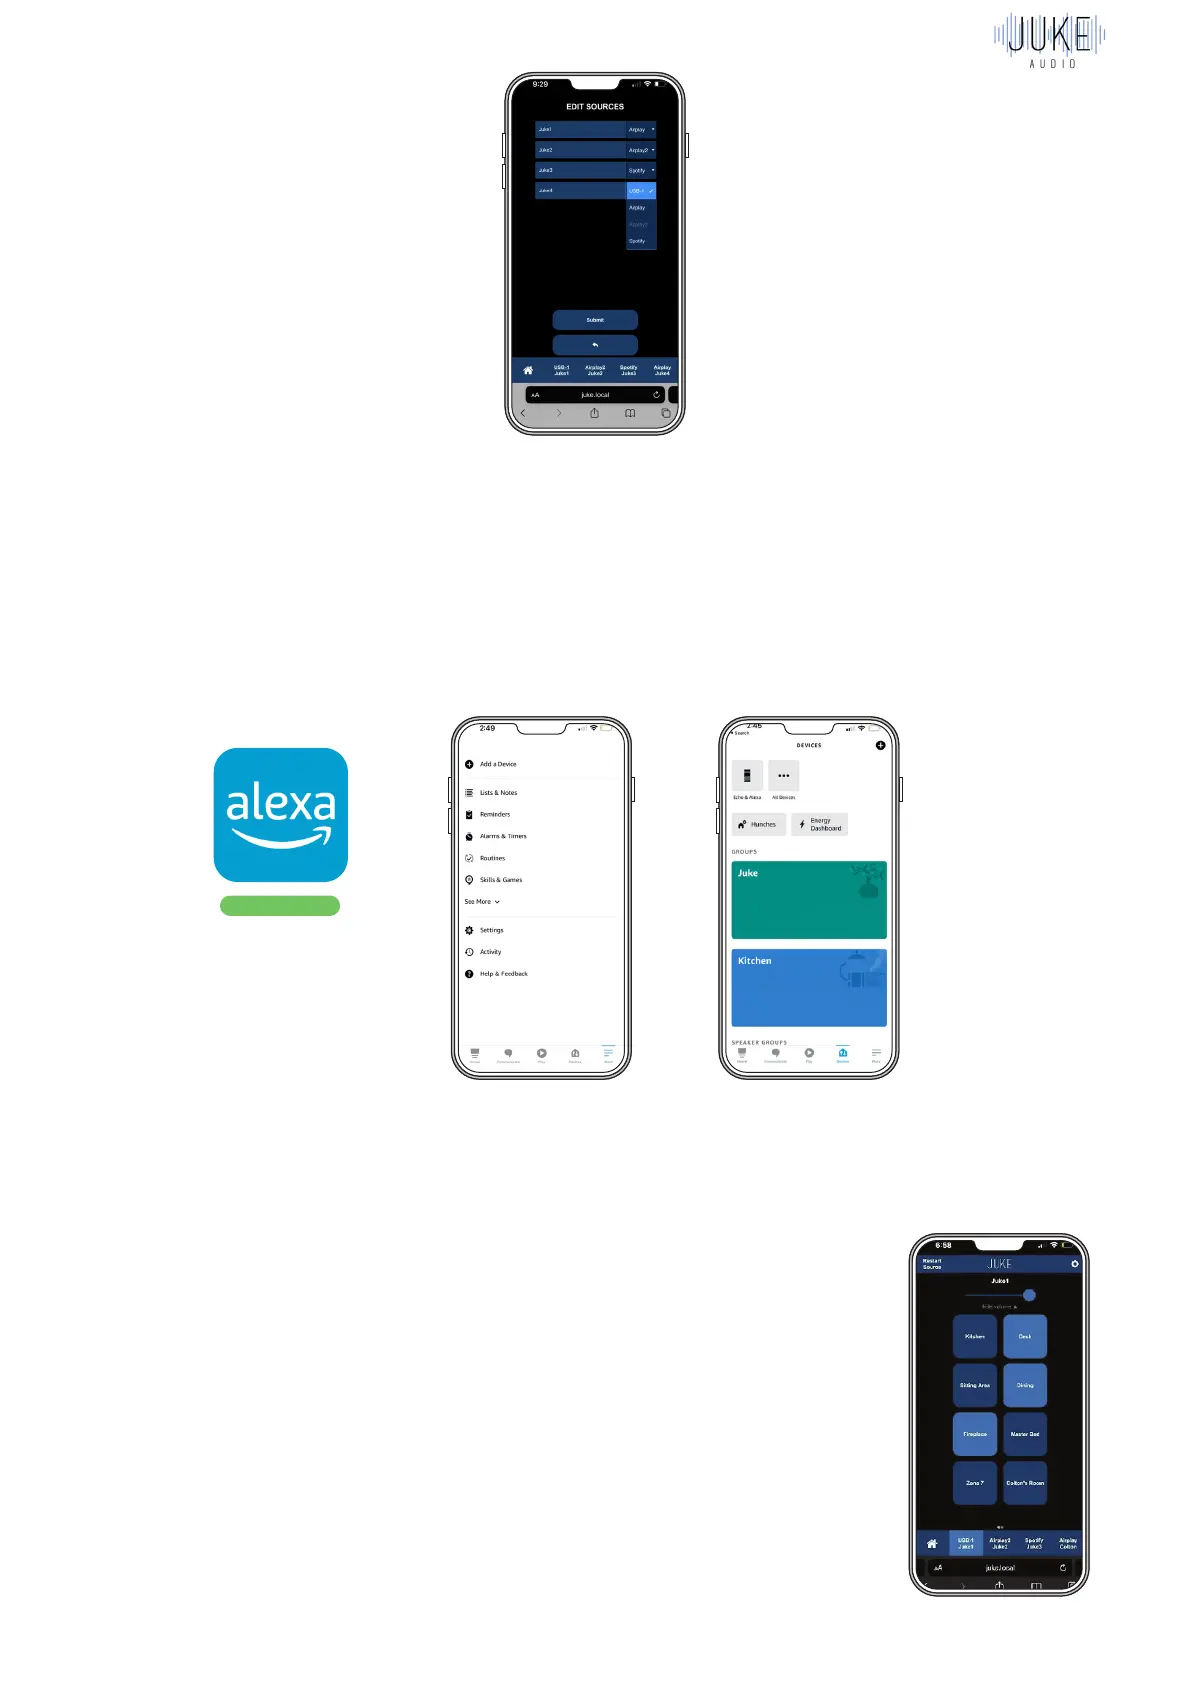
First download the Amazon Alexa App in Apple’s App store or the Google Play store
Once in the app, hit the “more” tab seen in the bottom right. Then hit add device at the top
of the screen to set up your connected devices. Within the setup ensure that all your Alexa
devices are on the same Wi-Fi so they can communicate with each other. Each device can be
given a specific room name, and in the case of the echo that you connected to Juke, it would
make sense to be called “Juke” “Juke Room” “Closet” or any other name of your choosing.
Sending Voice Commands
Once you have your devices configured, you can then issue a voice command to any of the
Alexa devices across your house and have it send audio to the Alexa device hard-wired to the
Juke which in turn will then send it to the connected speakers.
The voice command you’ll say is “Play music in the (name of the room
you assigned to the device wired to the Juke” In my picture for example, it
would be “Play music in the Juke”
Volume and Zone Control
Within side of the Juke web app, you’ll need to make sure you have the
zones turned on for the USB input. In the picture below, you’ll see that
I have the Fireplace, Dining, and Deck turned on for the USB input, and
therefore those will be the zones that start playing audio when I send a
voice command to that connected Alexa Device.
You’ll also be able to control the volume with the slider listed at the top of
the screen.
Download