05
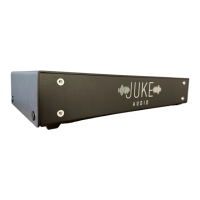
Each of Juke’s zone outputs has a positive and negative connector for a left speaker, and the
same for a right speaker (4 connectors in total: left positive, left negative, right positive and right
negative). In typical applications, a single speaker is connected to each terminal pair such that
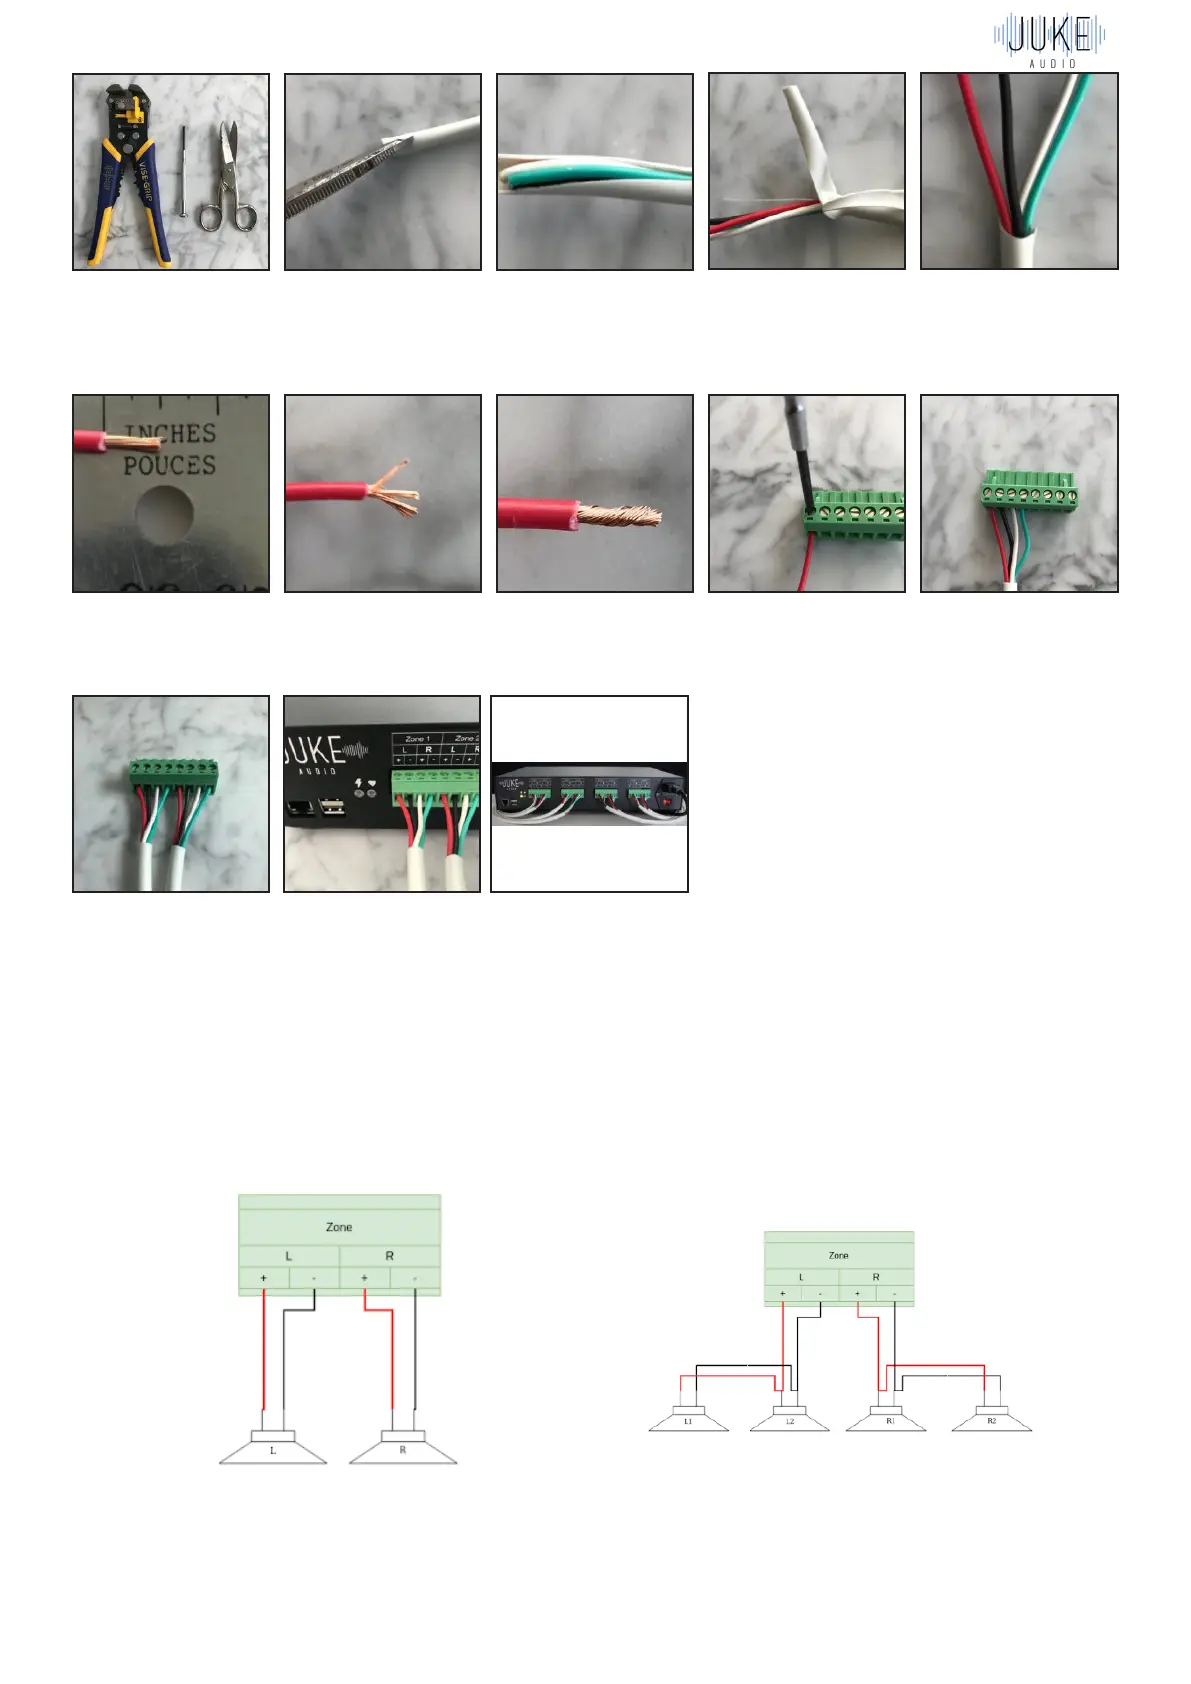
each zone has a left and right speaker. However, up to two of Juke’s eight zones can power four
speakers: two left, and two right, as long as each speaker connected in that zone is 8 Ohms.
Tools required (not
included): wire strippers,
scissors and small blade
screwdriver
Cut a small amount of the
insulation covering the
speaker wires
Peal back the insulation
to expose 2 or 3 inches
of wire
Peal it like a banana Cut off the excess
insulation
Strip about 1/4 inch of
insulation from each wire
Fan out the wire strands Twist the wire strands
and make sure none are
sticking out
Insert each wire in the
terminal block and tighten
the screw
Repeat the steps for the
remaining wires
Repeat the steps for the
remaining wires
Repeat these steps for all
of the zones
Plug each connector
firmly into the Juke until it
locks in place
Standard Wiring – 2 speakers (L+R) run in parallel per
zone
Doubling Up a Zone – 4 speakers into one zone (must
be 8ohm speakers and can only be done on 2 zones per
Juke)