– 10 –
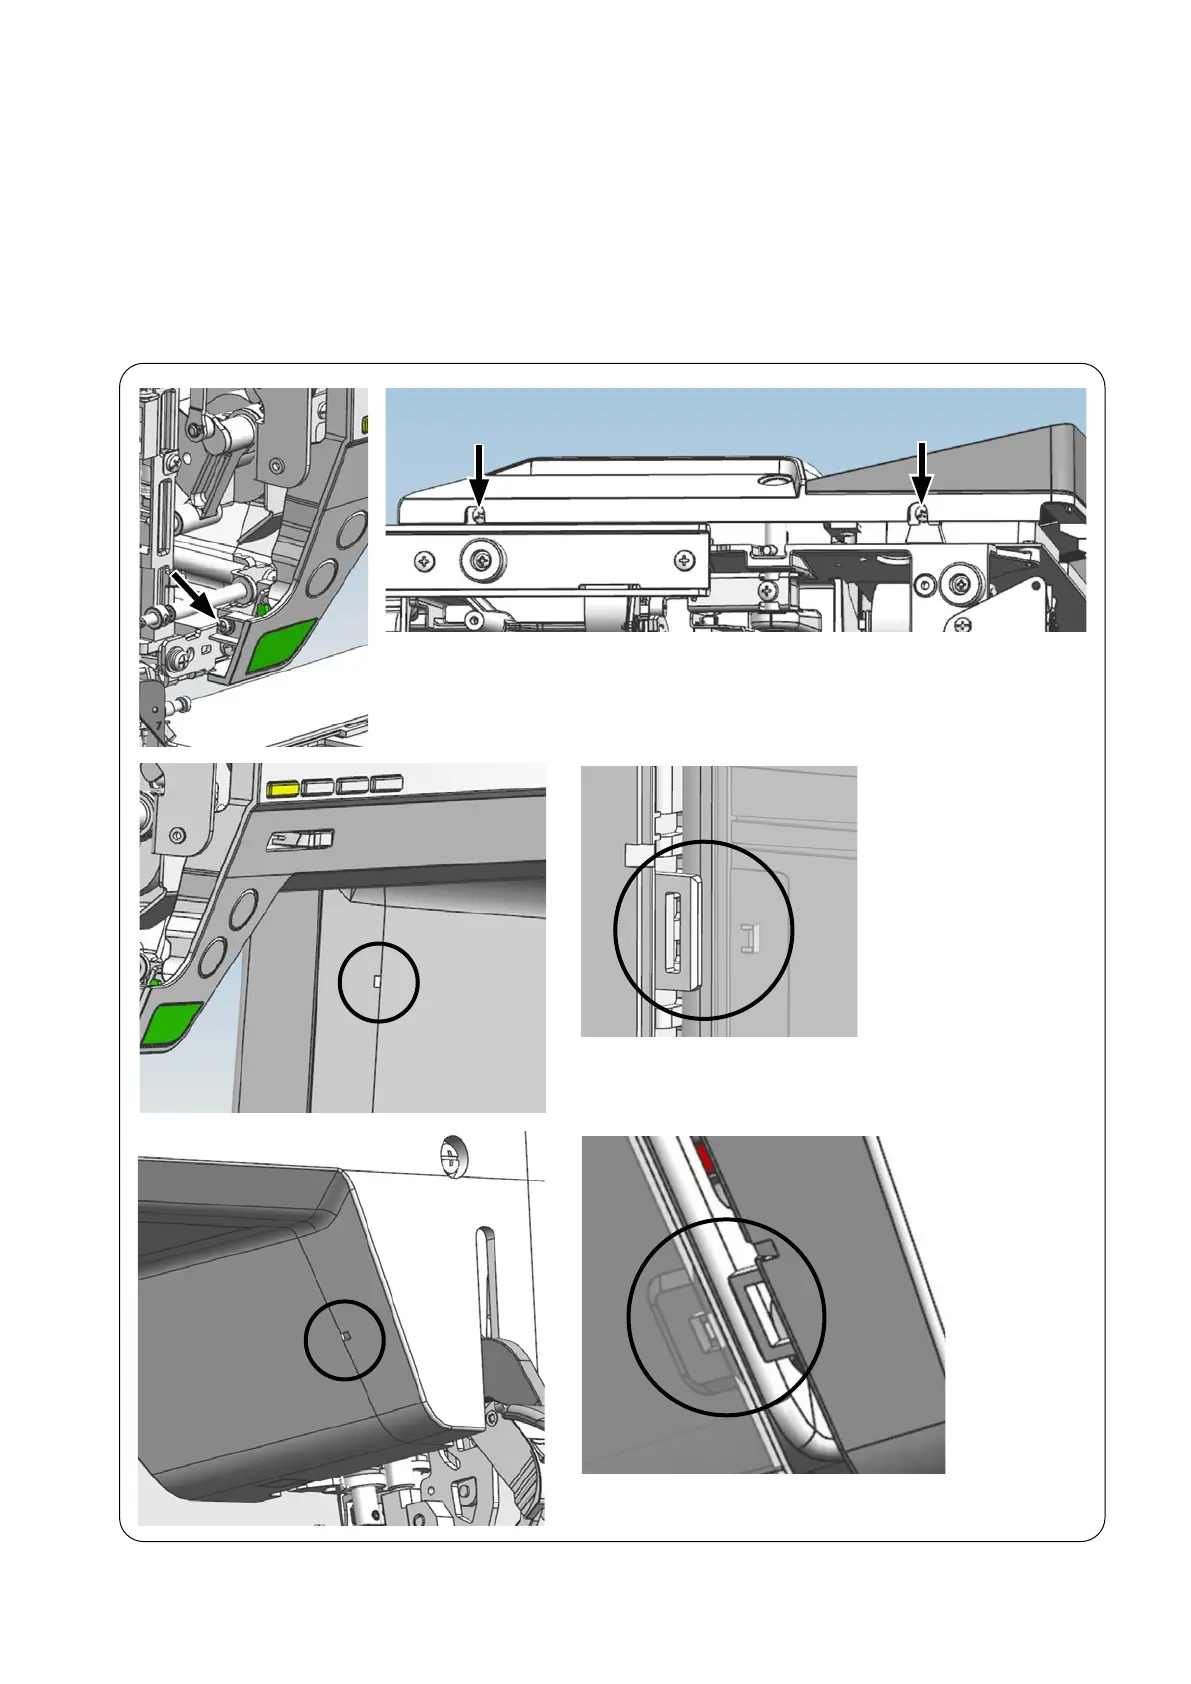
10) Front panel
○
Remove setscrews
to
from the front panel.
○
Put a thin screwdriver in the notch (
D
section) in the rising section under the
armandpryothefrontpanelandhook(
E
section) of the rear panel.
○
Put the thin screwdriver in the notch (
F
section)inthejawsectionandpryo
the front panel and the hook (
G
section) of the rear panel.
○
If needed, detach the connectors (CN17 and CN18) of the switch / slide VR,
the connector (CN19) of the panel I/F, and the connectors (CN35, CN36 and
CN37)oftheLEDfromthemainPCB,andalsodetachthejunctionconnector.
D
F
E
G
 Loading...