– 8 –
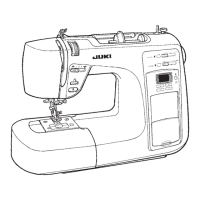
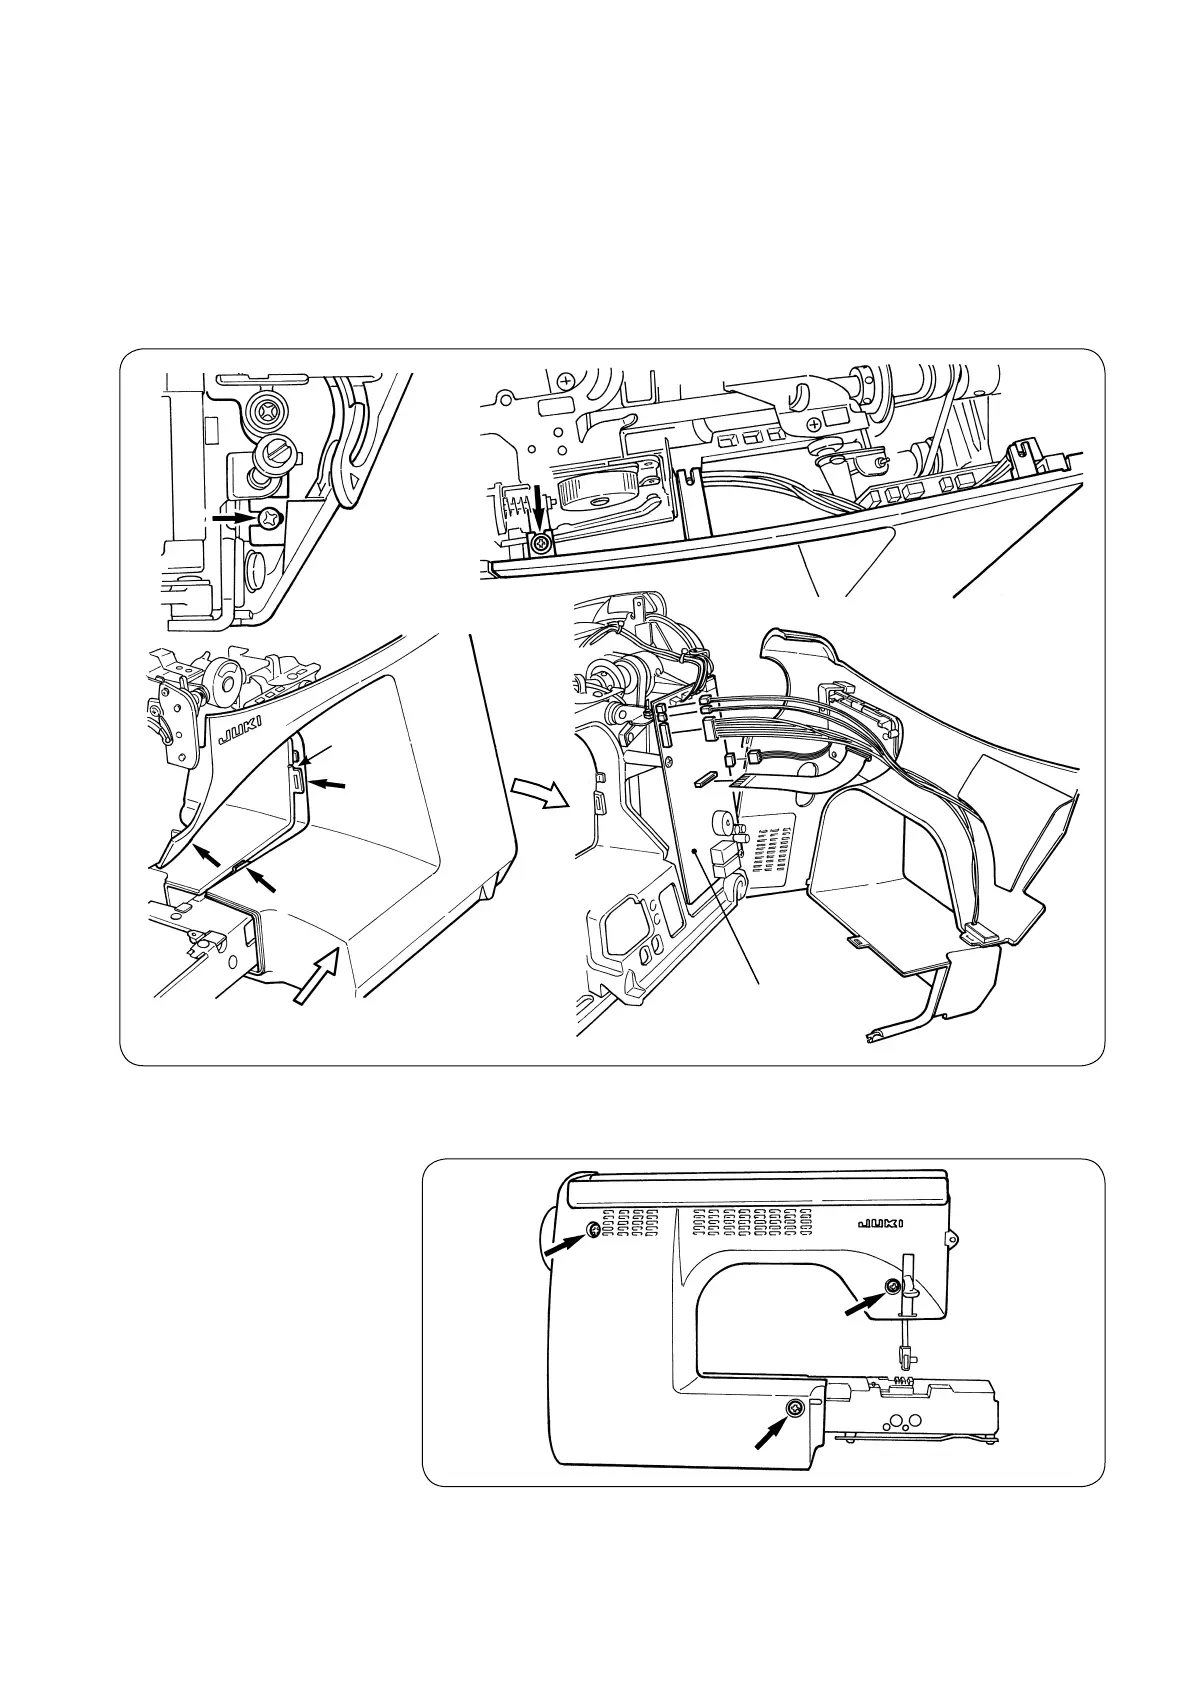
9) Front panel
○
Remove setscrews
@2
and
@3
from the front panel.
○
Put a thin screwdriver in the notch in the rising section under the arm and pry
off the front panel and hook
A
of the rear panel.
○
Opening the right side of the front panel in the direction of the arrow, tap
Z
section with your hand to remove hook
B
locatedatthebedsurface.
○
Lastly, remove hook
C
locatedatthelowersideofthemachinejaw.
○
Remove connectors for SUMI-card, start switch, LED lamp and microcomputer
panelI/FcablefromthemicrocomputerPCBwhennecessary.
@4
@5
@6
10) Rear panel
○
Remove setscrews
@4
,
@5
and
@6
from the rear panel.
Remove the rear panel with the presser foot lifting lever raised.
@3
@2
Notch
A
B
C
Z
Open
Microcomputer PCB
 Loading...