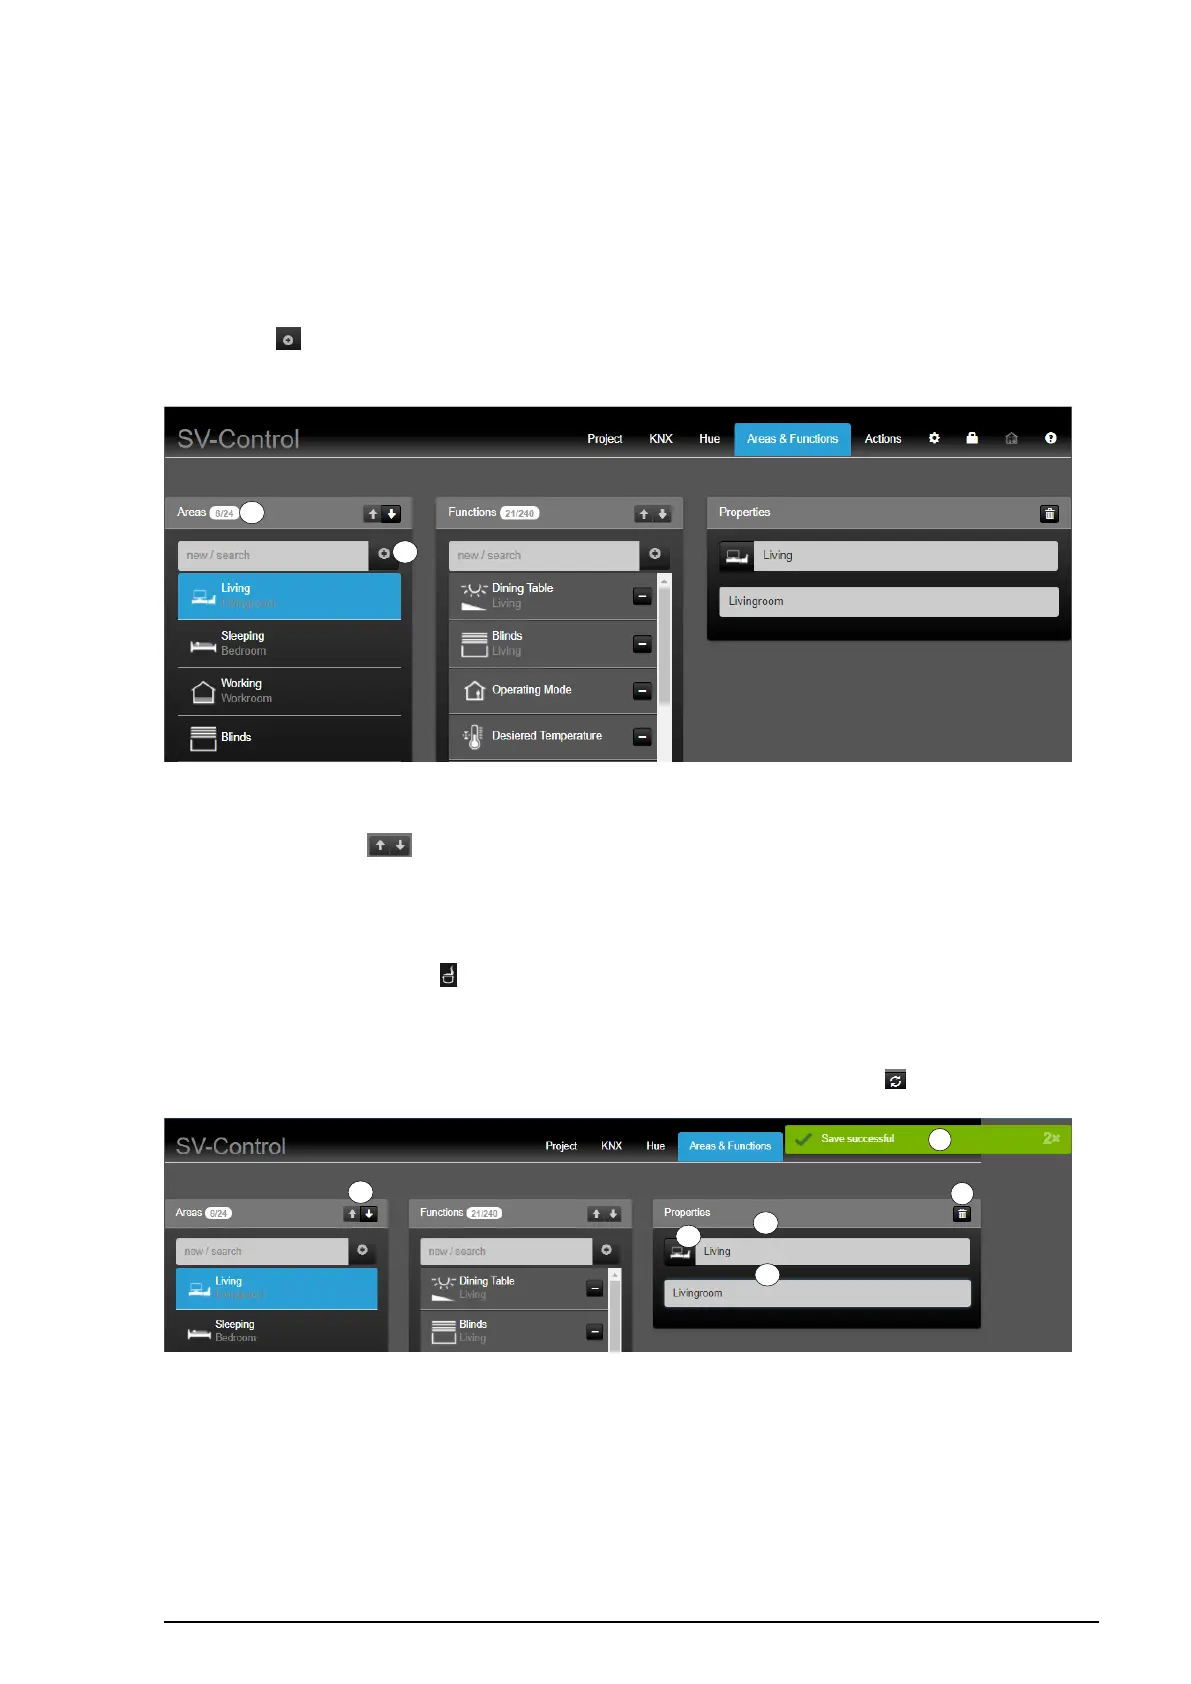
8.4.1 Creating a new area
The up to 24 areas can be given individual names, icons from the SV-Server library or
additional descriptions. The "User" and the "Administrator" have identical access rights
within the "Areas" column.
To create a new area, enter the name of the new area in the "Areas" column (1) and then
press the " " button (2). The new area is added to the area list with its name and is
selected automatically.
Figure 79: Creating new areas
The arrow buttons " " (3) allow you to change the order of the areas and thus the
position in SV-Home. The top area in the SV-Control (from top to bottom) is displayed as
the first area in SV-Home (from left to right).
In the "Properties" column, it is possible to assign an icon to the selected area by pressing
the currently selected icon " " (4) edit the name of the area (5) and, beneath that, add a
description (6).
The changes are saved automatically and briefly displayed by a green display (7) "Save
successful". The most recently saved properties can be restored with the " " button (8).
Figure 80: Individualising created areas
 Loading...