6. Ensure that the power supplies are fully inserted in the switch.
7. Connect the power cord to the AC power socket on the power supply:
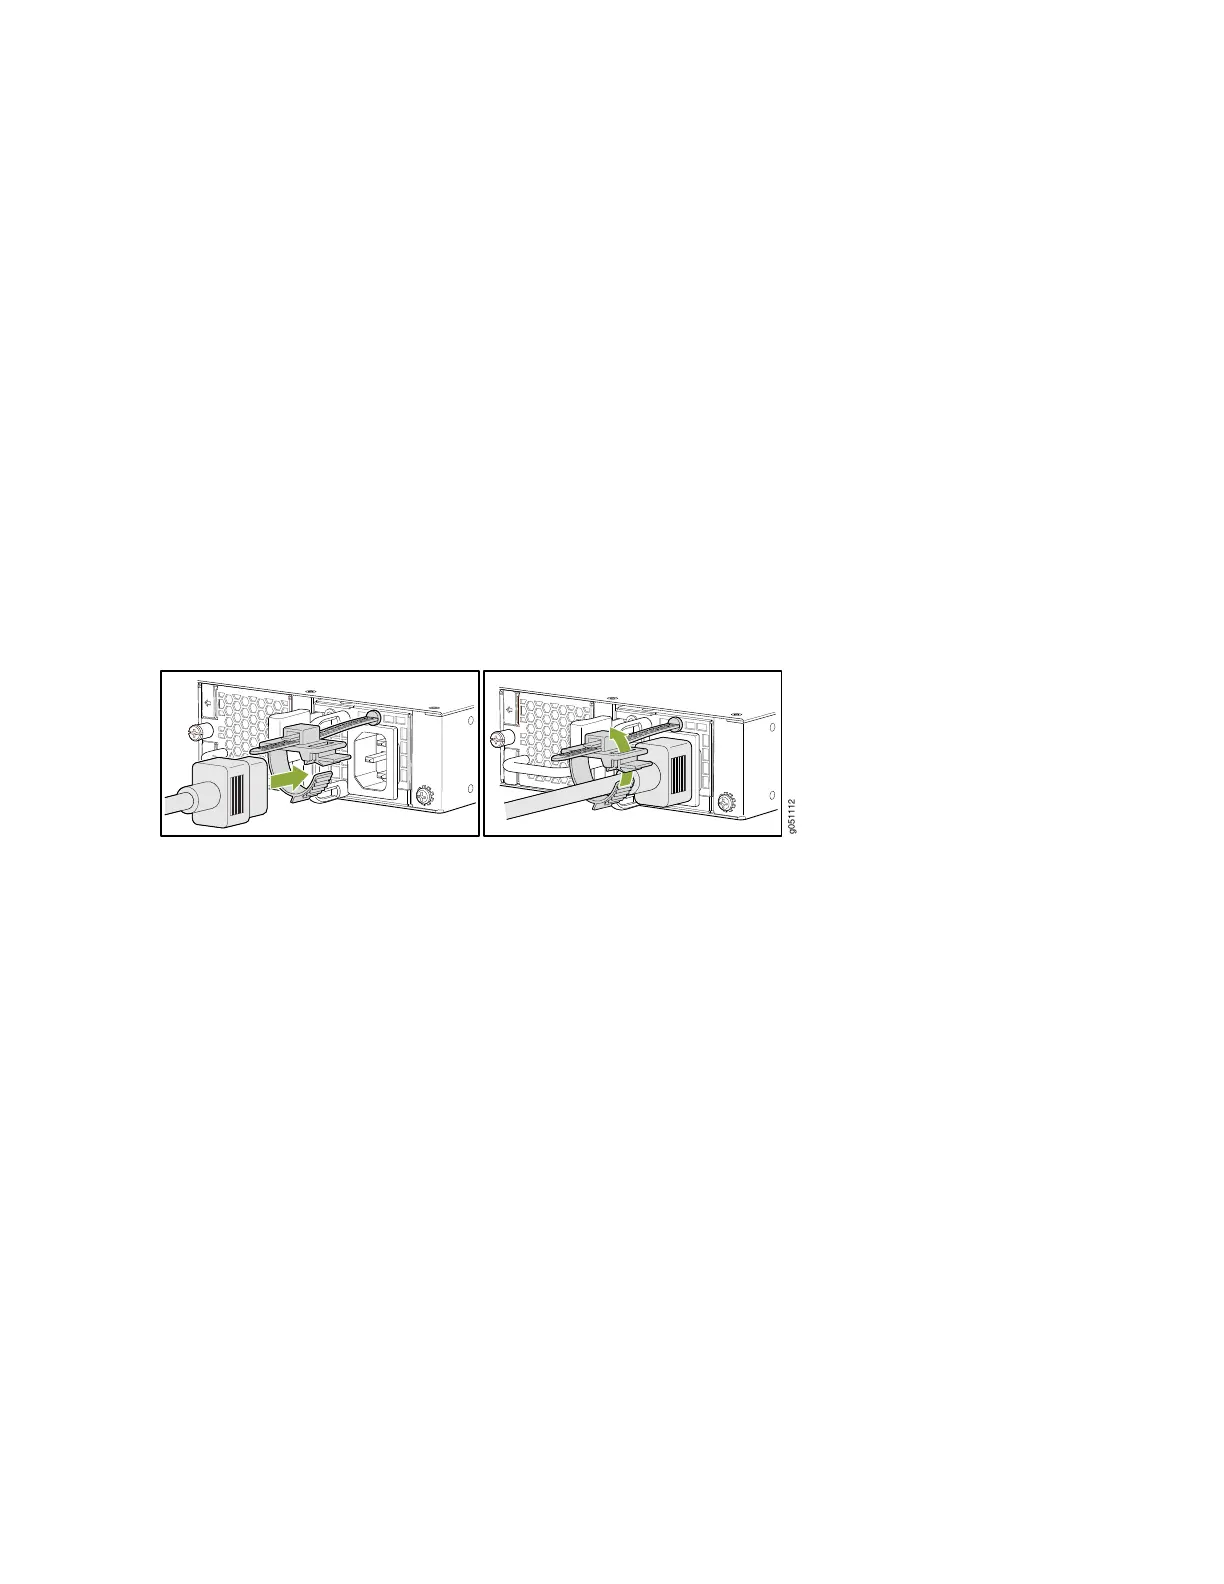
a. Push the end of the retainer strip into the hole next to the AC power socket until it snaps into place.
b. Ensure that the loop in the retainer strip faces the power cord.
c. Press the small tab on the retainer strip to loosen the loop. Slide the loop until you have enough space to plug the
power cord into the switch.
d. Plug the power cord into the switch.
e. Slide the loop toward the switch until it is snug against the base of the power cord coupler.
f. Press the tab on the loop, and draw out the loop into a tight circle.
8. If the AC power source outlet has a power switch, turn it off.
9. Plug in the power cord to the AC power source outlet. The switch powers on as soon as you plug it in. There is no
power switch on the QFX5120-32C.
10. If the AC power source outlet has a power switch, turn it on.
11. Verify that the LED on the power supply is lit steadily green. If the LED is lit steadily red or is blinking red, disconnect
the power supply from the power source, and replace the power supply (see Maintain the QFX5120 Power System in
the QFX5120 Switch Hardware Guide).
12. Repeat steps 7-11 to power on the second power supply.
6