7. Have the second person secure the switch to the rack by inserting the screws appropriate for the rack through the
bracket and the threaded holes on the rack. Tighten the screws.
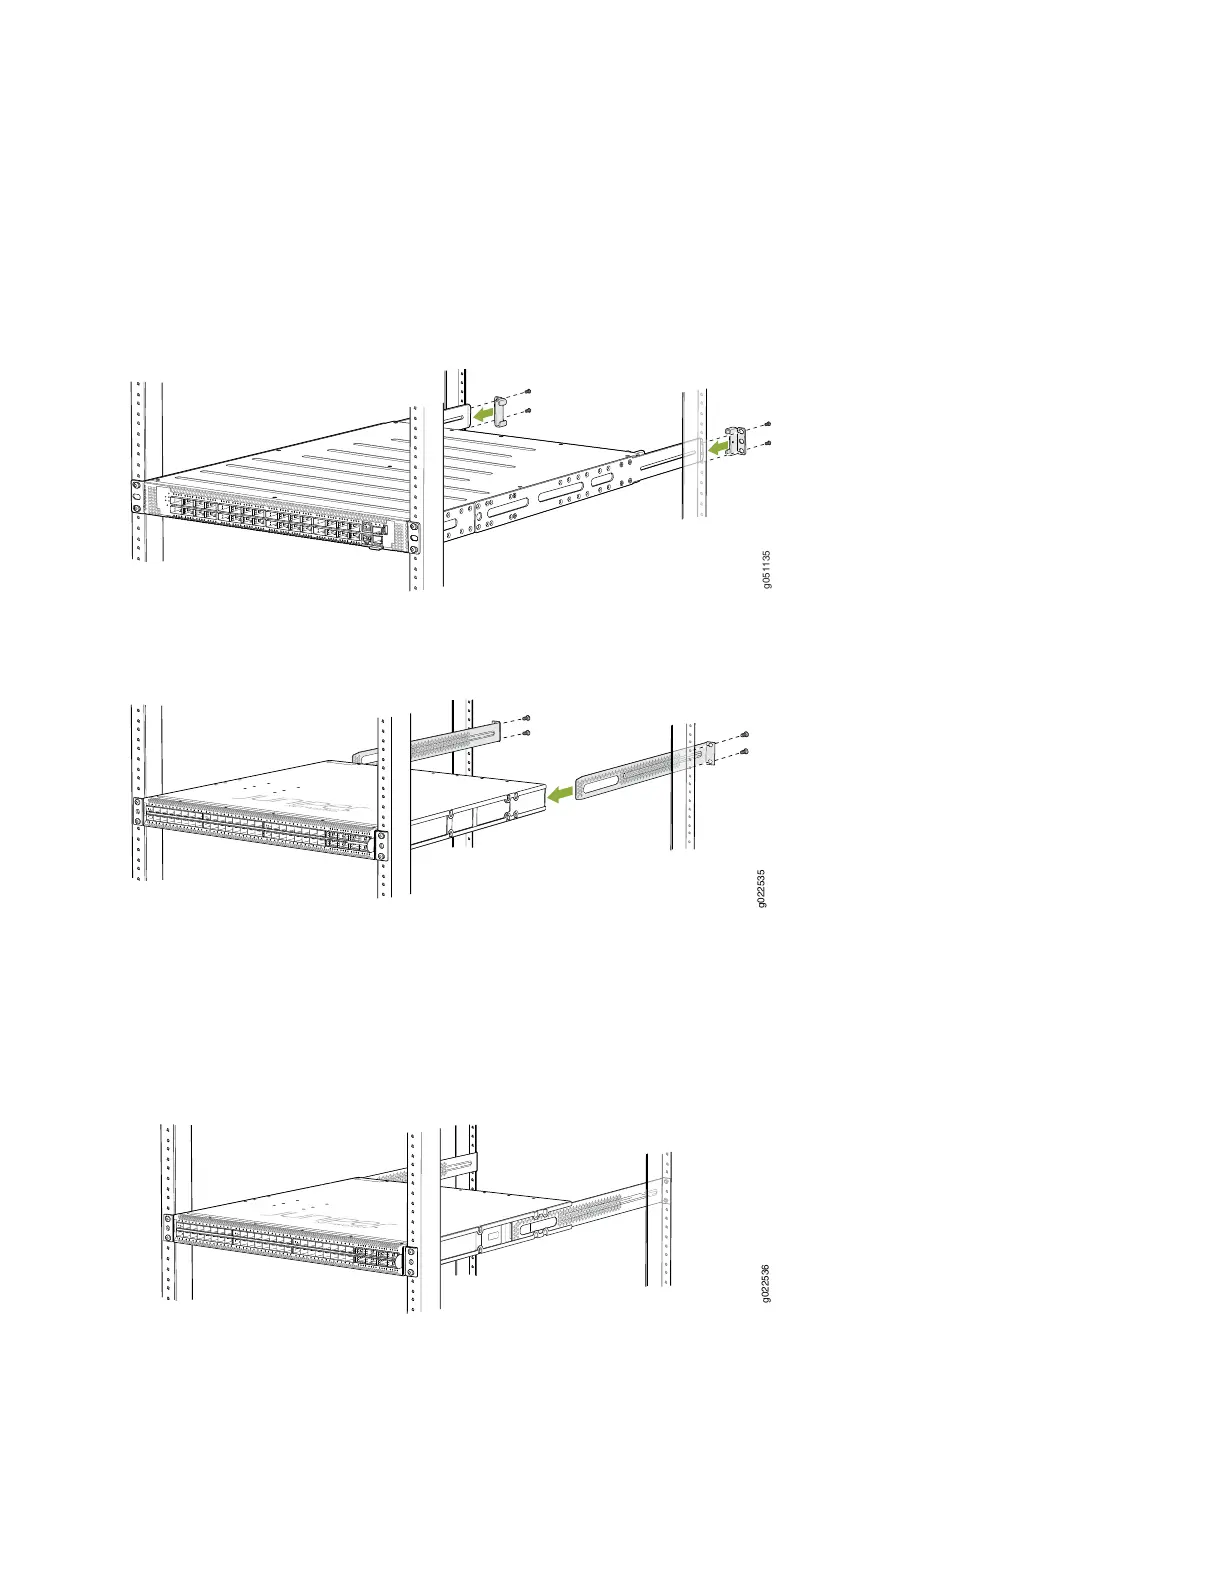
8. On the rear of the switch chassis, slide the rear-mounting brackets into the front-mounting brackets on either side of
the chassis until the rear-mounting brackets contact the rack rails (see Figure 12 and Figure 13).
Figure 12: Connecting the Rear-Mounting Brackets to the QFX5120-32C Switch
Figure 13: Connecting the Rear-Mounting Brackets to the QFX5120-48Y Switch
9. Secure the rear-mounting brackets to the rear posts by using the screws appropriate for your rack.
Figure 14: Securing the Rear-Mounting Brackets to the Rear Posts
10. Ensure that the chassis is level by verifying that all the screws on the front posts of the rack are aligned with the screws
on the rear posts of the rack.
9
 Loading...


