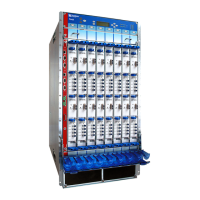
Reinstalling Components
NOTE: For complete instructions on reinstalling router components after
you have installed the router without a mechanical lift, see the T640 Core
Router Hardware Guide.
1. Slide each component into the chassis evenly so that it does not become stuck or
damaged.
2. Tighten the captive screws for each component.
3. Make sure that all empty slots are covered with a blank panel before operating the
router.
Step 4: Connecting the Grounding Cable
You ground the router by connecting a grounding cable to earth ground and then attaching
it to the chassis grounding points with two screws. You must provide the grounding cable
(a cable lug is supplied with the router). To connect the grounding cable (see
Figure 8 on page 19):
1. Attach an electrostatic discharge (ESD) grounding strap to your bare wrist, and connect
the strap to an approved site ESD grounding point. See the instructions for your site.
2. Make sure that grounding surfaces are clean and brought to a bright finish before
grounding connections are made.
3. Connect the grounding cable to a proper earth ground.
4. Verify that a licensed electrician has attached the cable lug provided with the router
to the grounding cable.
5. Attach an electrostatic discharge (ESD) grounding strap to your bare wrist, and connect
the strap to one of the ESD points on the chassis.
6. Place the grounding cable lug over the grounding points. The left pair is sized for M6
screws, and the right pair is sized for UNC 1/4-20 screws.
7. Secure the grounding cable lug to the grounding points, first with the washers, then
with the screws.
8. Verify that the grounding cabling is correct, that the grounding cable does not touch
or block access to router components, and that it does not drape where people could
trip on it.
Copyright © 2015, Juniper Networks, Inc.18
T640 Core Router Quick Start

 Loading...