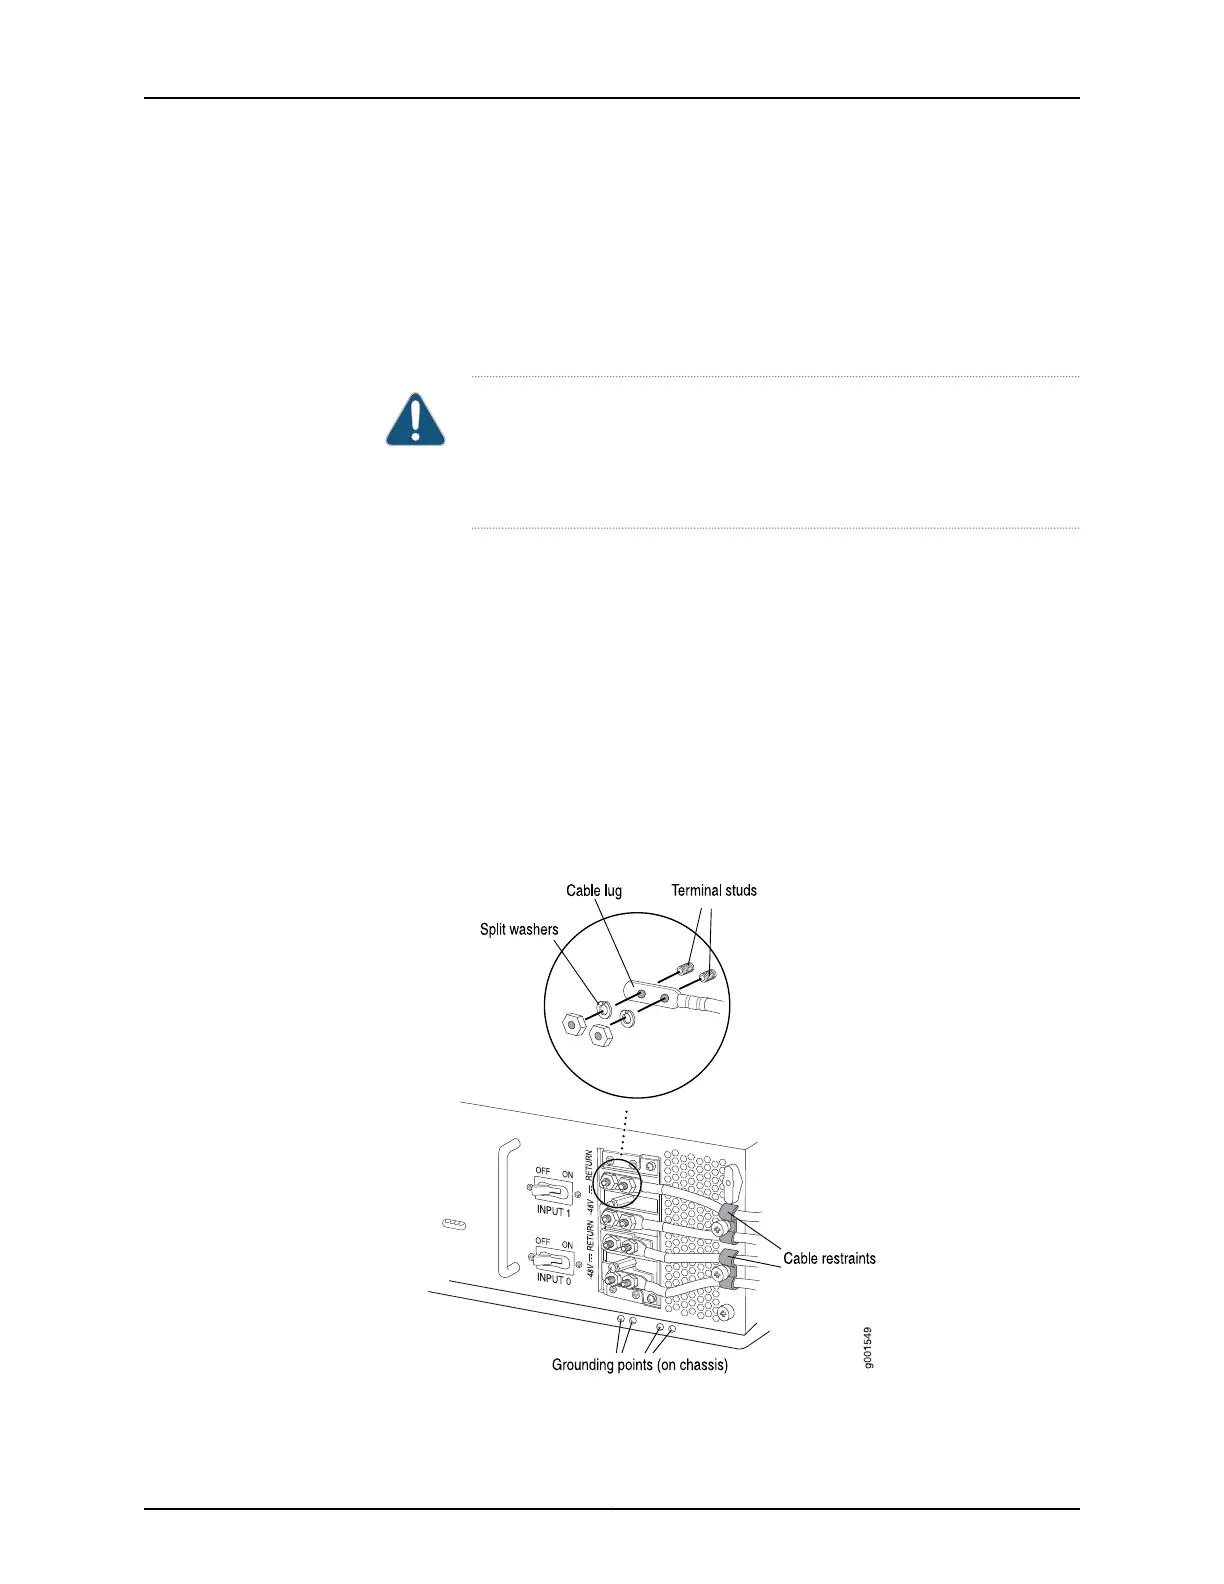
8. Remove the nut and washer from the power terminal studs for INPUT O and INPUT 1.
9. Attach each power cable lug to the correct terminal stud on the power supply
faceplate, and secure the cable lug first with washer, then with the nut. Use a 7/16-in.
(11 mm) nut driver or wrench to tighten the nut. Apply between 23 lb-in. (2.6 Nm) and
25 lb-in. (2.8 Nm) of torque to each nut. (See Figure 10 on page 23, Figure 14 on page 28,
or Figure 15 on page 30.
CAUTION: You must use an appropriate torque-controlled tool to tighten
the nuts. Applying excessive torque damages the terminal studs and the
power supply. The absolute maximum torque that may be applied to this
nut is 45 in-lb (5.0 Nm).
a. Attach and secure the positive (+) cable lugs to the RTN (return) terminals.
b. Attach and secure the negative (–) cable lugs to the -48V (input) terminals.
10. Verify that the positive and negative power cables are connected to the correct terminal
studs.
11. Route the DC power cables through the cable restraint or restraints.
12. Tighten the cable restraint captive screw or screws to hold the power cables in place.
13. Replace the clear plastic cover on the power supply.
14. Repeat the procedure for the remaining power supply.
Figure 10: Connecting Power to a Two-Input 160-A DC Power Supply
23Copyright © 2015, Juniper Networks, Inc.
Connecting Power to a T640 Router with Two-Input 160-A DC Power Supplies