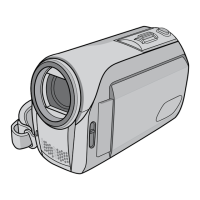
Power Supply
To use this camera recorder, you can attach a
battery pack or connect an AC adapter to it.
(A P35 [Using a Battery Pack] )
(A P36 [Using AC Power (DC IN Power)] )
Caution :
0
Set the [
POWER ON/OFF] switch to “OFF”
before changing the power supply that operates
this camera recorder.
0
To charge the battery using a battery charger,
purchase a genuine charger that can charge the
recommended battery.
Using a Battery Pack
Charging the Battery
Charge the battery immediately after purchase or
when the battery power is running low.
* The battery is not charged when purchased.
.
1
Hold down the lock button (blue) at the
center of the [POWER ON/OFF] switch to set
to “OFF”.
2
Attach the supplied battery.
Slide it in until you hear a click.
3
Connect the supplied AC adapter to the
[DC] terminal.
Open
the cover of the [DC] terminal and connect
as shown in the diagram.
4
Connect the AC adapter to a power outlet.
0
The [POWER/CHARGE] lamp blinks during
charging and will go out after charging is
complete.
0
Remove the AC adapter after charging is
complete.
Memo :
0
Blinking of
the [POWER/CHARGE] lamp during
charging indicates the charge level.
[POWER/CHARGE] Lamp
during “POWER.OFF”
Charge Level
Alternates between a blinking
orange light (4 times) and
light off (1 second)
Less than 25 %
Alternates between a blinking
orange light (3 times) and
light off (1 second)
Less than 50 %
Alternates between a blinking
orange light (2 times) and
light off (1 second)
Less than 75 %
Alternates between a blinking
orange
light
(blinks once) and
light off (1 second)
Less than 100 %
Light goes out Fully charged
0
You can charge the battery even when operating
the camera recorder using the AC adapter. The
lamp lights up in green during “POWER.ON”.
Removing the Battery
.
1
Hold down the lock button (blue) at the
center of the [POWER ON/OFF] switch to set
to “OFF”.
2
While pressing and holding the [BATT.
RELEASE]
button, push up and remove the
battery in the direction of the arrow.
Caution :
0
Do not remove the battery when the [POWER
ON/OFF] switch is “ON”.
0
Leaving the camera recorder unused with the battery
attached will deplete the battery power even when
you set the [POWER ON/OFF] switch to “OFF”.
Remove the battery if you are not using the camera
recorder.
Power Supply
35
Preparations

 Loading...