Why does digital zoom not work on my JVC Camcorder?
- GgibsonhollyAug 31, 2025
If the digital zoom is not working on your JVC Camcorder, change [ZOOM] to [40x] or [200x]. Also, deactivate any effect and/or focus assist features that are enabled.
Why does digital zoom not work on my JVC Camcorder?
If the digital zoom is not working on your JVC Camcorder, change [ZOOM] to [40x] or [200x]. Also, deactivate any effect and/or focus assist features that are enabled.
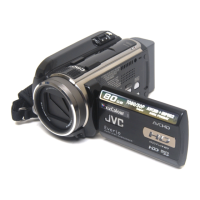
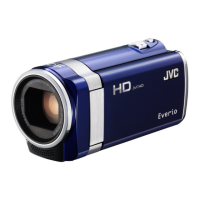
How to fix JVC Everio GZ-HD10 when no power is supplied?
If your JVC Camcorder isn't getting power, try these steps: First, ensure the AC adapter is correctly connected. If that doesn't work, try recharging the battery.
Why does the LCD monitor appear blank on my JVC Everio GZ-HD10?
If the LCD monitor on your JVC Camcorder appears blank, try operating the camera. If the camera hasn't been used for a while when connected to the AC adapter, it might be in sleep mode, which turns off the LCD monitor.
Why does the LCD monitor on my JVC Camcorder appear blank?
If the LCD monitor on your JVC Camcorder appears blank, try operating the camera. If you are using the AC adapter and the camera hasn't been operated for a while, it may have entered sleep mode, turning off the LCD monitor.
Why do images from my JVC Camcorder look unnatural on the TV?
If images from your JVC Camcorder appear unnatural on the TV (e.g., long and thin), change the VIDEO OUTPUT setting in the BASIC SETTINGS to match your TV.
Why does my JVC Everio GZ-HD10 recording stop by itself?
Your JVC Camcorder might stop recording automatically due to several reasons. If the camera temperature increases (REC flashes in the LCD monitor), the camcorder will stop to protect the HDD. Excessive sound or vibration can also cause this, so move to a quieter place. Ensure you have inserted a microSD card and set both [REC MEDIA FOR VIDEO] and [REC MEDIA FOR IMAGE] to [SD]. Also, recording stops automatically after 12 hours of continuous recording.
Why doesn’t the remote control work for my JVC Everio GZ-HD10 Camcorder?
If the remote control for your JVC Camcorder isn't working, first replace the battery. Also, make sure that [REMOTE] in the [BASIC SETTINGS] is set to [ON]. Note that the remote control may not work outdoors or in places exposed to strong light.
How to fix a JVC Camcorder recorded subject that is too dark?
If the recorded subject appears too dark on your JVC Camcorder, try using backlight compensation. You can also set the brightness to the [+] side. For videos, set [GAIN UP] to [AGC] or [AUTO]. For still images, set [GAIN] to [AUTO].
Why is the focus not adjusted automatically on my JVC Camcorder?
If the focus on your JVC Camcorder isn't adjusting automatically, clean any dirt or water droplets from the lens. Ensure that the focus is set to automatic mode. If you are recording in a dark place or a subject with low contrast, manually adjust the focus.
How to fix a JVC Everio GZ-HD10 recorded subject that is too bright?
If the recorded subject is too bright when using your JVC Camcorder, set the backlight compensation to [OFF] if it is currently enabled. You can also adjust the brightness to the [–] side.
| Optical Zoom | 10x |
|---|---|
| Digital Zoom | 200x |
| Aperture | F1.8 - F2.4 |
| Image Stabilization | Optical |
| LCD Screen Resolution | 207, 000 pixels |
| Storage | HDD |
| HDD Capacity | 60 GB |
| HD Output | HDMI |
| USB Interface | USB 2.0 |
| LCD Screen Size | 2.8-inch |
| Video Resolution | 1920 x 1080 |
| Lens | JVC HD Lens |
| Recording Format | AVCHD |
| Microphone | Built-in stereo microphone |
Instructions for charging the battery pack before first use.
Steps to turn on the camera, set date/time, and open the lens cover.
Steps to choose between different video recording modes.
How to initiate and terminate video recording.
Important reminder to back up recorded files to prevent data loss.
Warnings regarding electric shock, fire hazards, and moisture.
Cautions for battery handling, usage in environments, and avoiding hazards.
Key instructions for safe operation and maintenance of the appliance.
Recommendations for backup, trial recording, resetting, and battery precautions.
Step-by-step guide for charging the battery and checking its level.
Procedure to configure the camera's internal date and time.
Steps to switch to video mode and start/stop recording.
Steps to select still image mode and take photos.
Procedures for deleting files and protecting them from accidental deletion.
Instructions for backing up camera files to a DVD disc using a DVD burner.
Basic steps for common camera problems, including reset procedures.
Solutions for power supply issues and problems during recording.
Details on power, dimensions, weight, lens, LCD monitor, and pickup.
Precautions for using the AC adapter and handling battery packs.
Guidelines to prevent data corruption and protect the hard disk and LCD monitor.



 Loading...