6
A-1.1 Continued
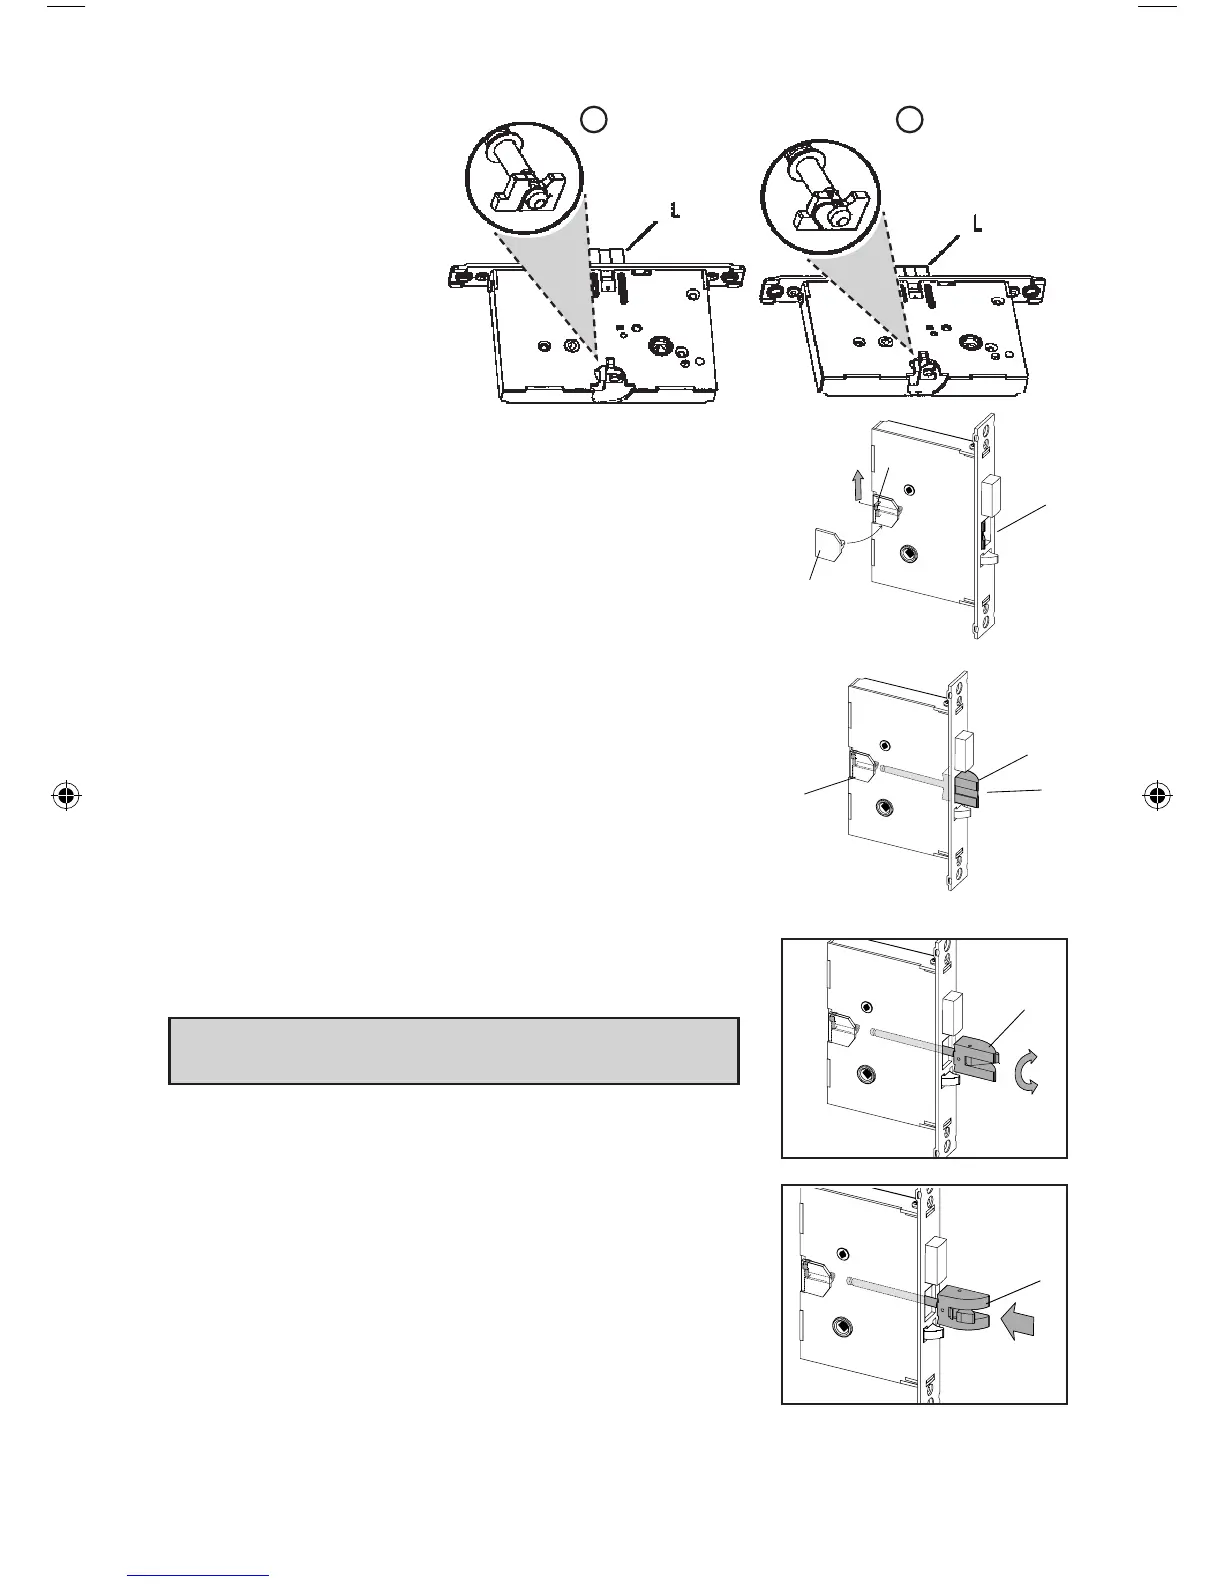
3. Push in the latch bolt (L)
to the middle of its stroke,
and hold it there.
(Continue Step 1 and 2
to the right)
Hold the latch (L) inside the mortise, and insert the tail-
piece retaining tool (S) so that the tailpiece (T) will not
drop inside the mortise case. Hold the tool and the latch
with one hand, and slide up the tailpiece using a small
screwdriver.
Continue to hold tool (S). Release the latch bolt (L) and
keep the anti-friction latch (F) toward the flat side of the
latch bolt so that the bolt extends fully.
4. Pulloutthelatchbolt(L),untilitjustclearsthe
front plate.
NOTE: If you remove the bolt completely, you must
turn it 90
o
to re-insert it.
Rotate the latch bolt (L) 180
o
. Re-insert it to the end of
its stroke.
Holding tool (S) in place, re-engage tailpiece bolt (L)
(slide tailpiece down). There may be some play required
to align the parts. Remove the tool (S).
Lock Position Unlock Position
1 2Clip Clip
L
T
S