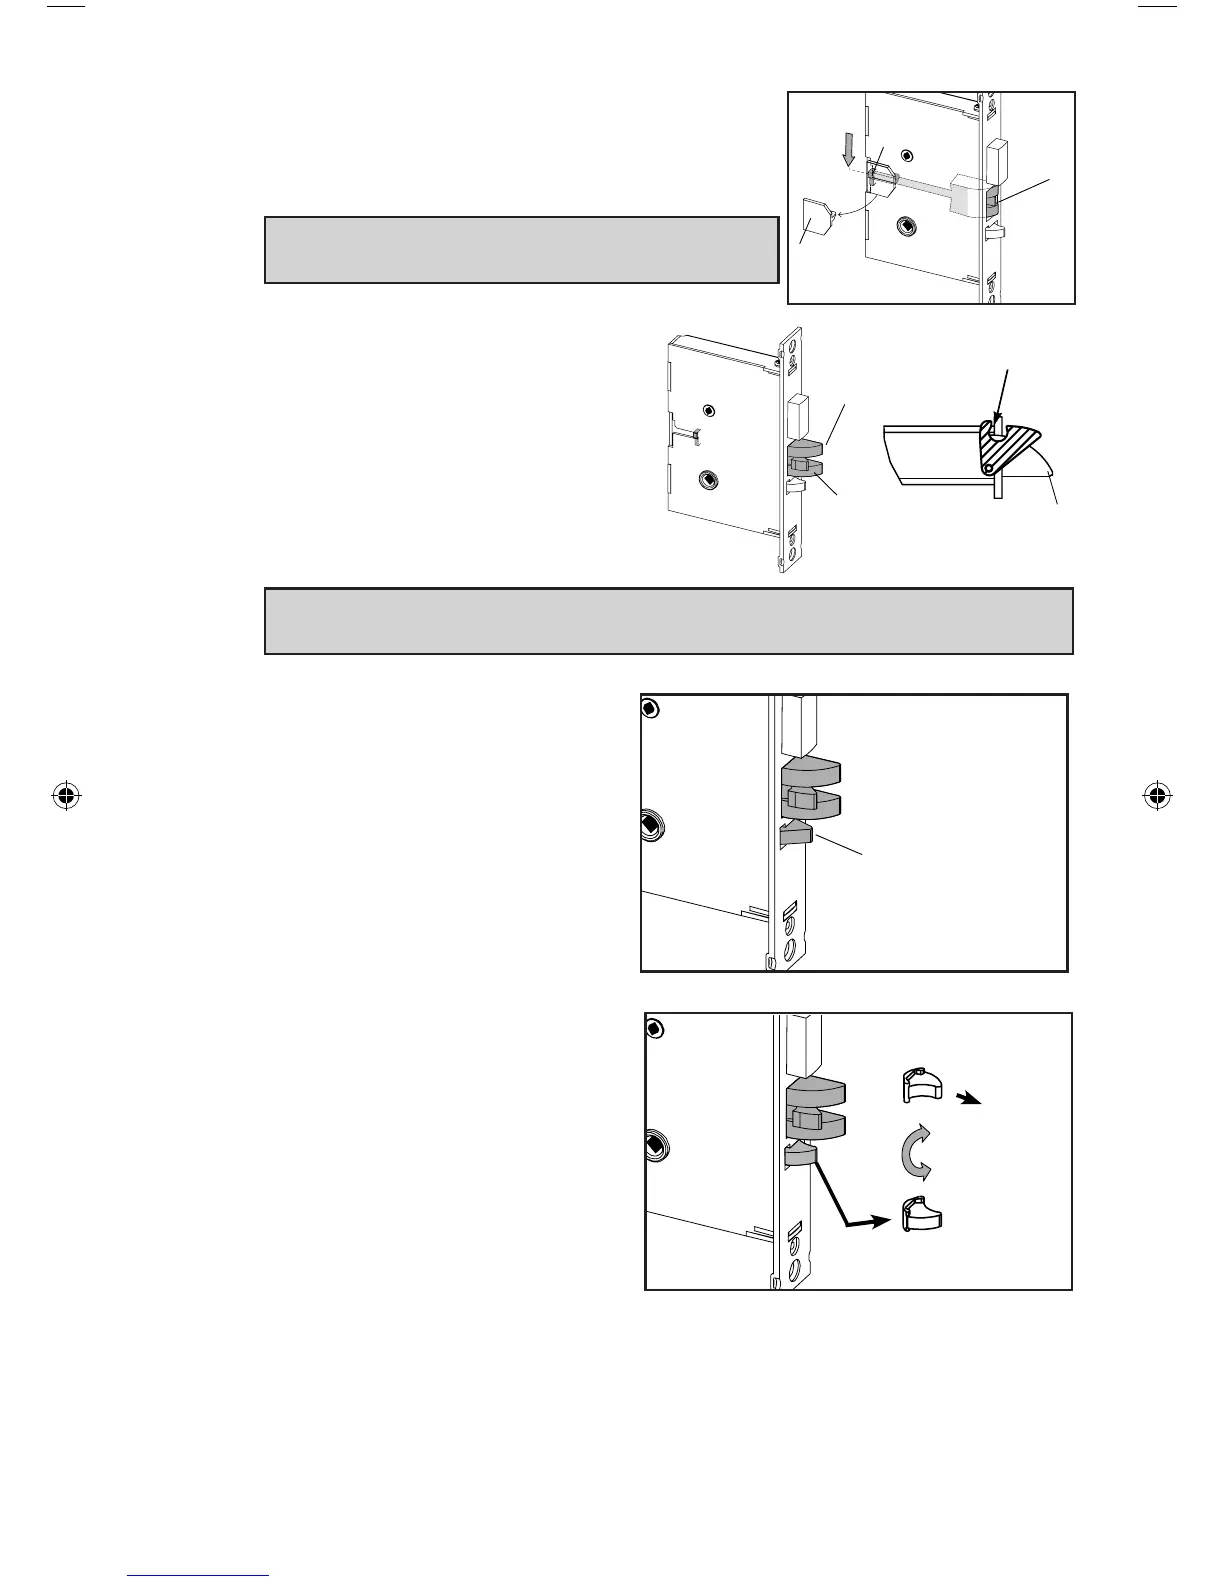
EasyManuals Logo
Home>Kaba>Locks>Simplex 506 Series

Kaba Simplex 506 Series User Manual

Kaba Simplex 506 Series
28 pages
To Next Page IconTo Next Page
To Previous Page IconTo Previous Page
Page #7 background imageLoading...
Page #7 background image
7
Release the latch to the middle of the stroke
and hold it there. Use a small screwdriver to
push the lock mechanism back on lock position
(see step 1 and 2).
IMPORTANT: The lock mechanism has to be
horizontal on lock position.
5. Release the latch bolt (L). Position
the latch bolt so that the bottom
tooth of the anti-friction latch (F)
remains inside the mortise case
as shown.
IMPORTANT: If the tooth of (F) is outside the mortise, you will not be
able to re-assemble the faceplate on the mortise.
6. If the auxiliary latch (X) is
shaped like a triangle, there is
no need to change its handing.
If the auxiliary latch (X) is
crescent shape, remove it,
turn it 180
o
, and replace it. The
auxiliary latch slides easily in and
out of the mortise.
L
T
S
L
F
S
L
180°
L
L
T
S
L
F
L
F (tooth)
mortise
bottom view
X (triangular = OK)
X (crescent = must be reversed)
180°
(re-insert)
ASM
L
F
L
F (tooth)
mortise
bottom view
X (triangular = OK)
X (crescent = must be reversed)
180°
(re-insert)
ASM
L
F
L
F (tooth)
mortise
bottom view
X (triangular = OK)
X (crescent = must be reversed)
180°
(re-insert)
ASM
LIT1051_Simplex_506x _Mortise_1012.indd 7 1/7/13 3:13 PM

Questions and Answers:

Question and Answer IconNeed help?

Do you have a question about the Kaba Simplex 506 Series and is the answer not in the manual?

Kaba Simplex 506 Series Specifications

General IconGeneral
BrandKaba
ModelSimplex 506 Series
CategoryLocks
LanguageEnglish

Related product manuals