will be snapped and the interval between each picture is 1 second.
[Record]: When alarm is triggered, the device SD card will be driven to record images. The record files
can be saved via E-mail sending or FTP uploading.
[Motion Detection Area]: Left click and drive the mouse to set the surveillance areas (4 areas at most).
[All]: Set the whole video as motion detection area.
[Clear]: Clear all motion detection areas.
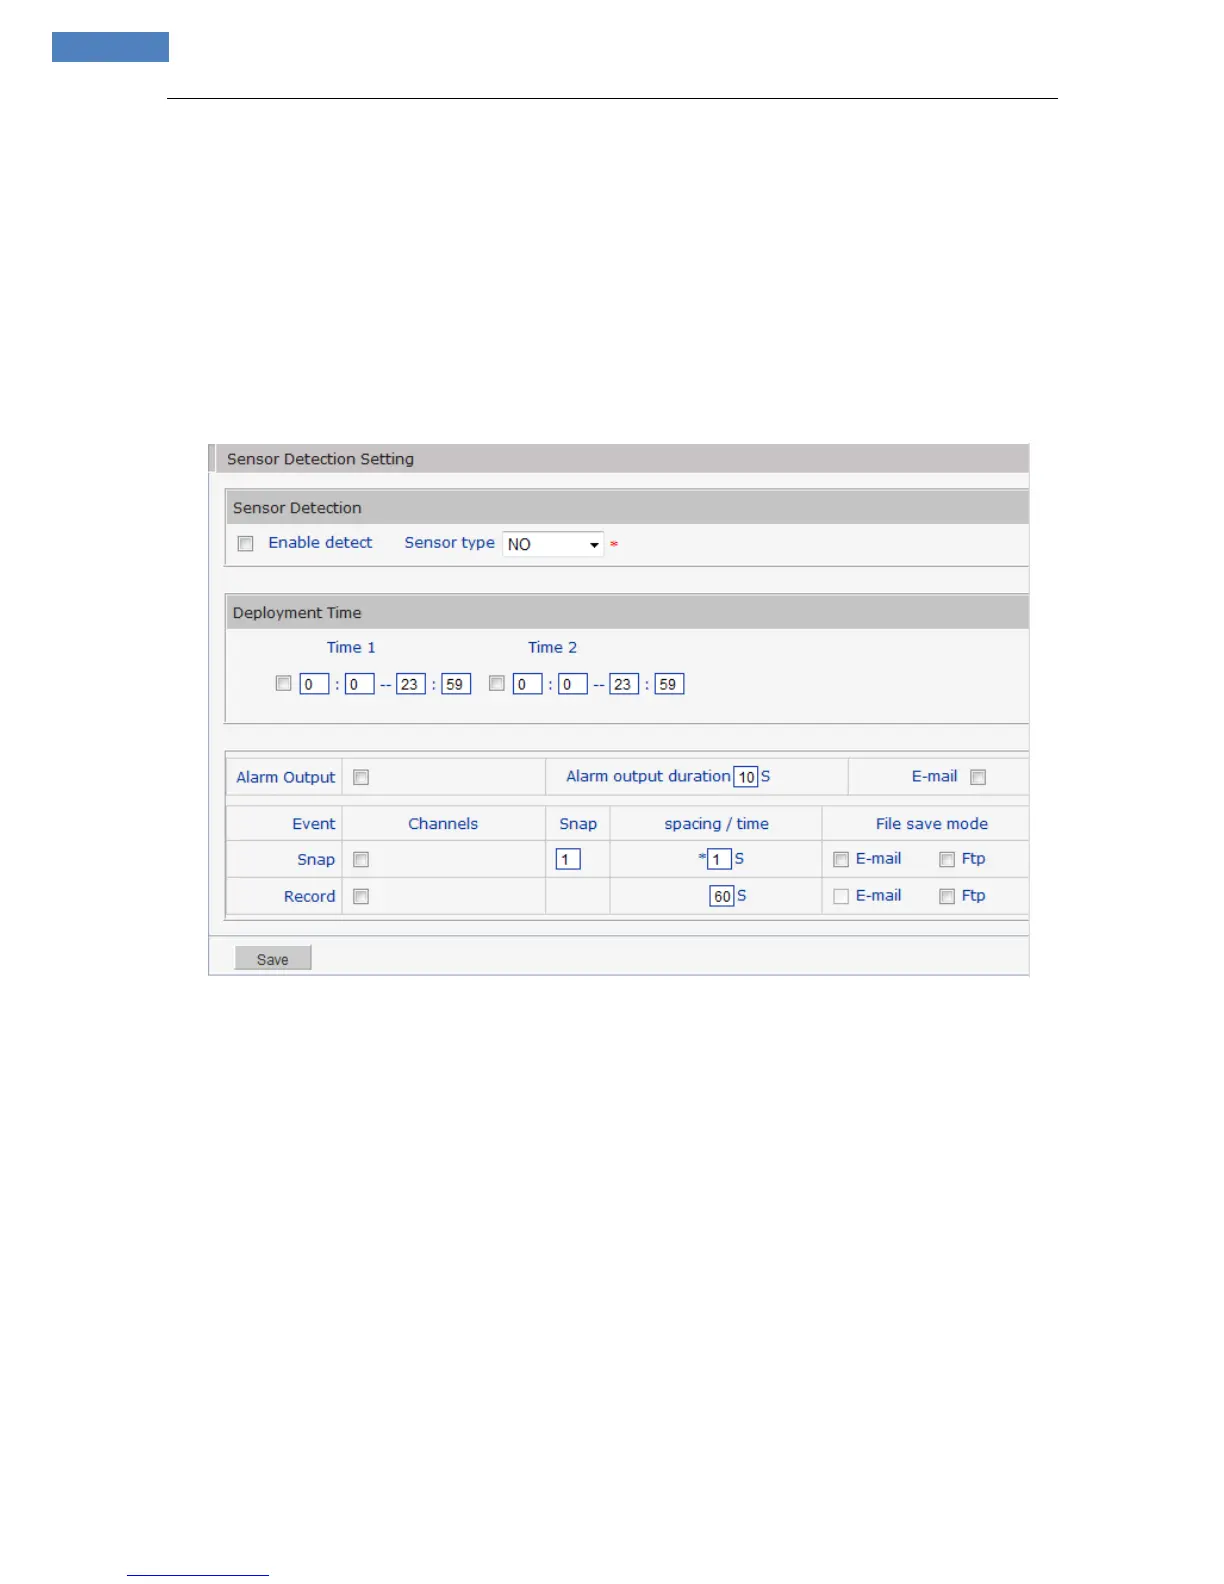
5.2.5.2 Sensor Setting
See Figure 37 for the interface of “Sensor Setting”:
Figure 37
Set sensor alarm parameters here: Enable detect, sensor type, deployment time, linkage alarm output,
linkage output duration, E-mail sending when alarm has been triggered, linkage snapping/recording, etc.
[Enable detect]: Enable or disable sensor alarm detection.
[Sensor type]: NO and NC mode.
[Deployment Time]: Set the period of time for sensor alarm detection, two periods allowed.
[Alarm output]: Enable or disable linkage alarm output
[Alarm output duration]: Set the duration of the linkage alarm output after being triggered (in seconds),
the range of the duration is 0~86400s.0 means that there is no limit for alarm output.
[E-mail]: Send sensor alarm information to users via E-mail, details about E-mail setting please refer to
[Network Settings].
[Snap]: When alarm is triggered, the device SD card will be driven to snap pictures. The pictures can be
saved via E-mail sending or FTP uploading. For snapping parameters, if the number of pictures snapped at
one time is set as 10 and the snapping interval is 1 second, which means when there is an alarm, 10 pictures
will be snapped and the interval between each picture is 1 second.