12
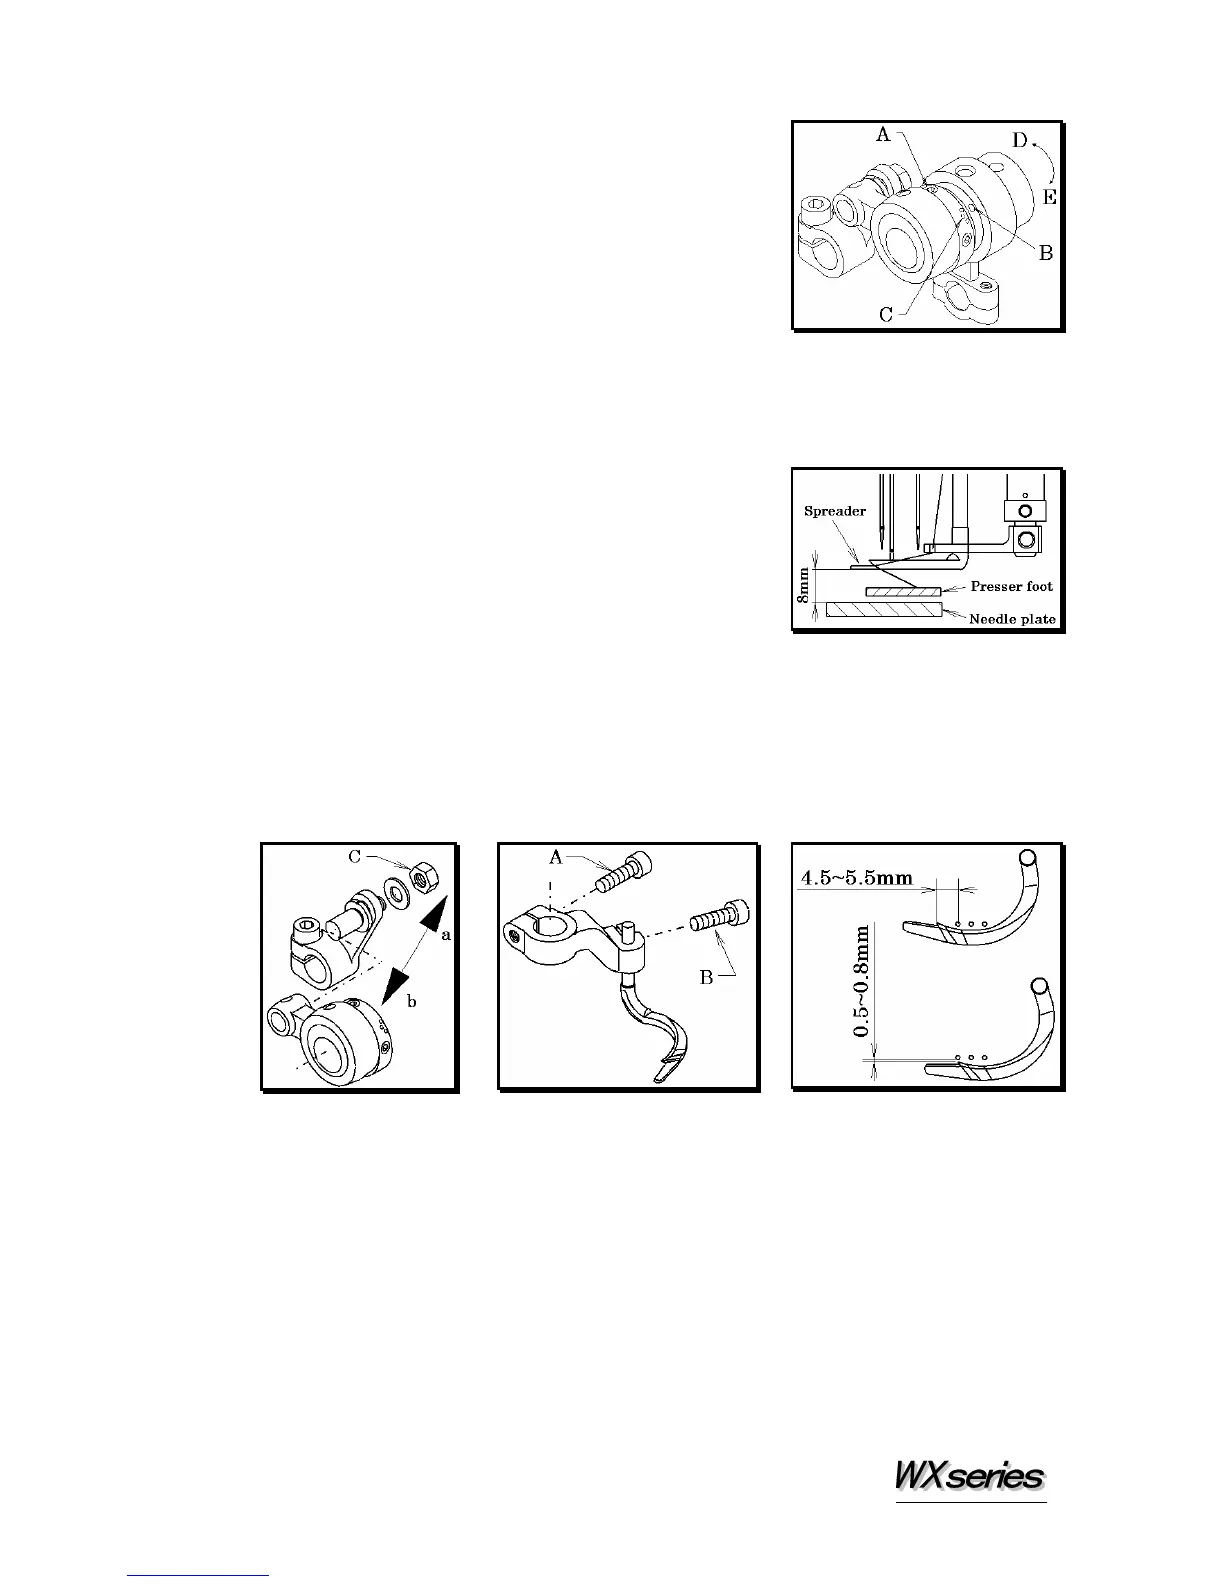
7-3 Timing of the spreader
The timing of the spreader is factory-set by referring to
the previous procedure (see 7-2).
Adjust according to the thread to be used or other
conditions. To make this adjustment,
1. Remove the top arm cover.
2. Loosen two screws for looper eccentric A on the upper
shaft.
3. Shift alignment mark C front or back while referring
to alignment mark B.
To advance the timing of the spreader to the needle, shift mark C in the direction of D.
To delay the timing of the spreader to the needle, shift mark C in the direction of E.
7-4 Position of the spreader (WX8842,8842-1)
■Height
The distance between the top surface of the needle plate
and the bottom surface of the spreader should be 8mm.
■Left-to-right position:
When the spreader is at the extreme left end of its travel,
the distance between the center of the left needle and the
point of the thread carrying notch should be 4.5~5.5mm.
When the spreader passes the left needle, the distance
between the point of the thread carrying notch and the left needle should be 0.5~0.8mm.
To make the above adjustment, loosen screws A and B.
■Adjust the amount of the spreader movement according to the number of spreader threads
and/or the fabric weight to make this adjustment, remove the arm top cover, loosen nut C
and then move the adjusting lever pin in direction (a) or (b).
To decrease the amount, move the pin in the direction of (a).
To increase the amount, move the pin in the direction of (b).
 Loading...