26
< Note >
Be careful about the remaining compressed air.
Even if stopping the air source at compressor, it is
possible to remain compressed air in tube.
Release the remaining compressed air by regulator.
< Note >
When checking the proper overlapping between upper
cutter and lower cutter, move upper cutter by your
hand.
< Note >
After adjusting, drop down upper cutter at the bottom
position ( bottom dead point ).
Then, confirm whether upper cutter and lower cusster
shall meet each other at 1 mm distance or not.
< Note >
Make sure to turn off the power (electric and
compressed air), before adjusting, cleaning etc.
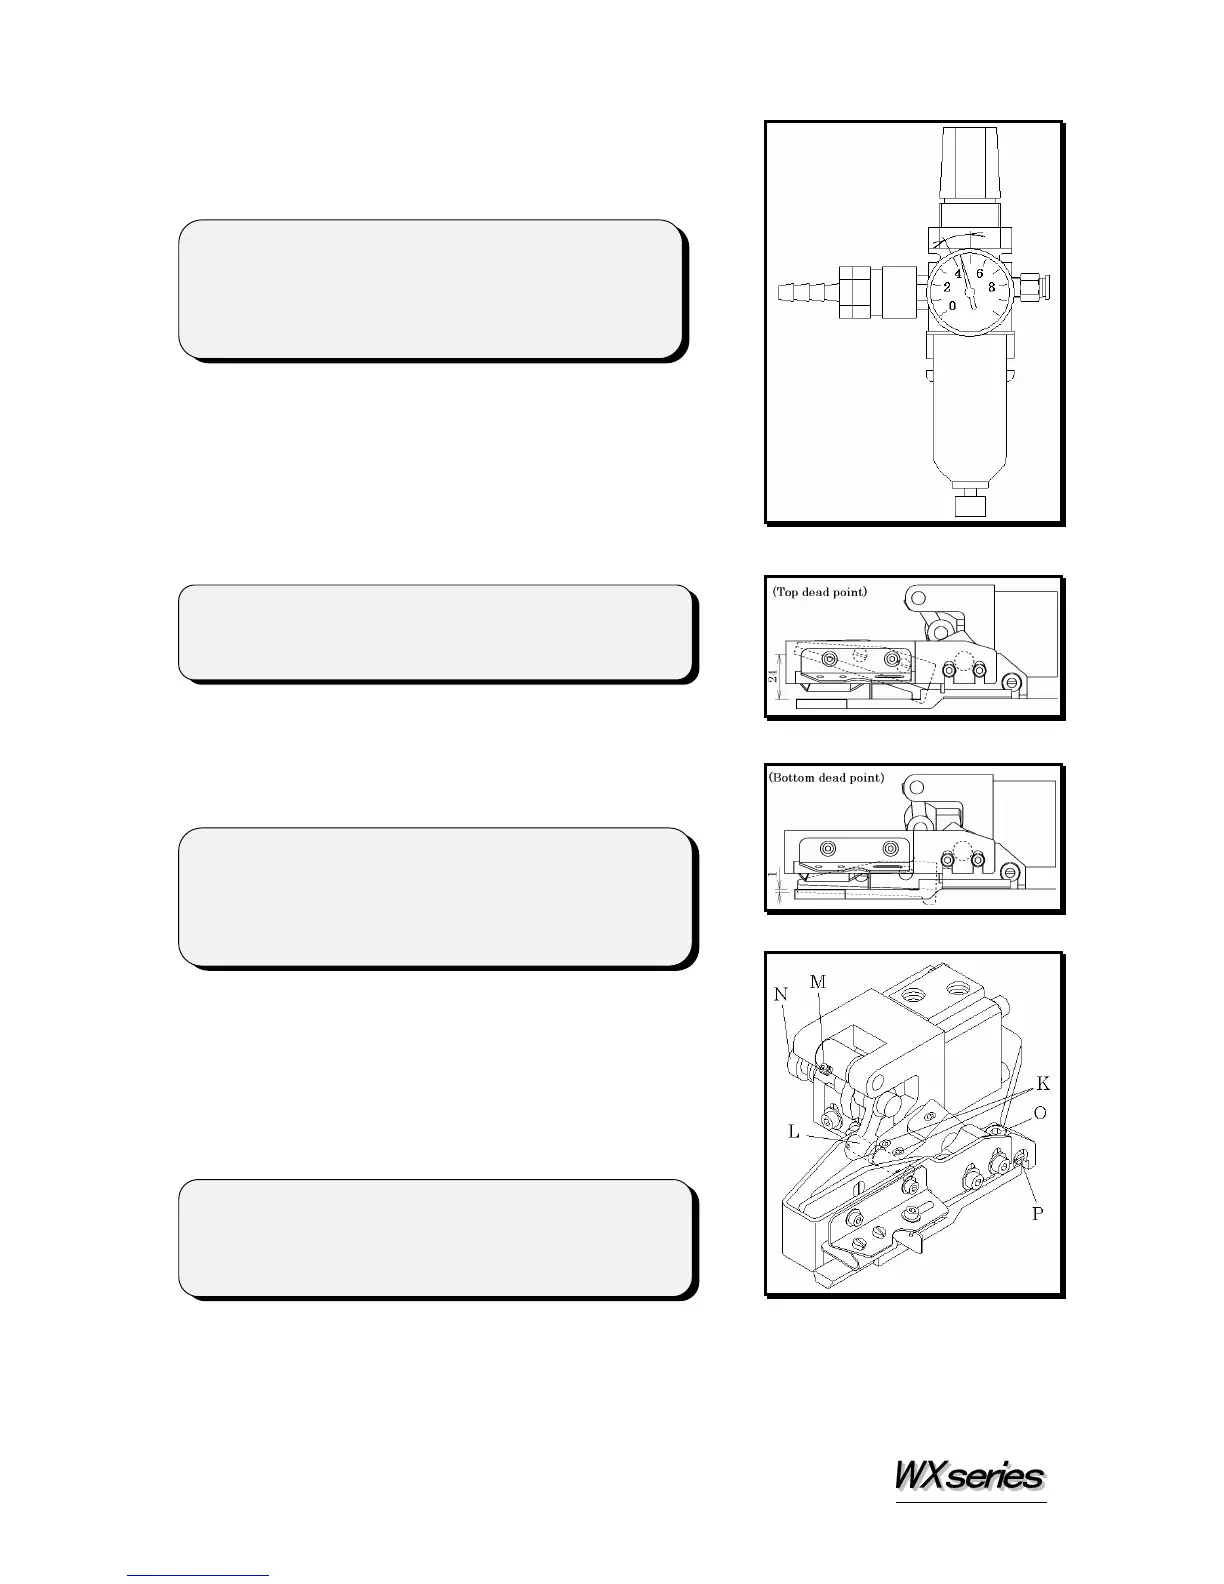
14-5 Air pressure
Set the air pressure at 4~5 kg/cm2 by regulator.
Do not increase the air pressure over 5kg/cm
2
, which
may cause trouble.
14-6 Adjustment (Air type)
a) Height of Cutter
Loosen screw K and adjust lever L in order to set
24 mm of the distance between lower cutter and
upper cutter at the top position (top dead point).
b) Overlapping of Cutter
1. Loosen screw M, then loosen screw N until
disappearing of pressurized power of upper
cutter.
2. Loosen screw O, then adjust screw P in order
to overlap properly between upper cutter and
lower cutter.
c) Power of Upper Cutter
After loosen screw M, then adjust the pressurized power of upper cutter against lower
cutter by screw N.
 Loading...