1
< Note >
Before replacing the needle, be sure to turn off the machine.
A clutch motor continues running for a while after the machine is turned off.
Therefore keep on pressing the pedal until the machine stops.
【1】NEEDLES & THREADING THE MACHINE
1-1 Needles
UY128GAS of Schmetz or Organ
Select the proper needle for the fabric and thread.
< Needles and needle size >
Schmetz UY128GAS Nm65 Nm70 Nm75 Nm80 Nm90
Organ
UY128GAS # 09 #10 #11 #12 #14
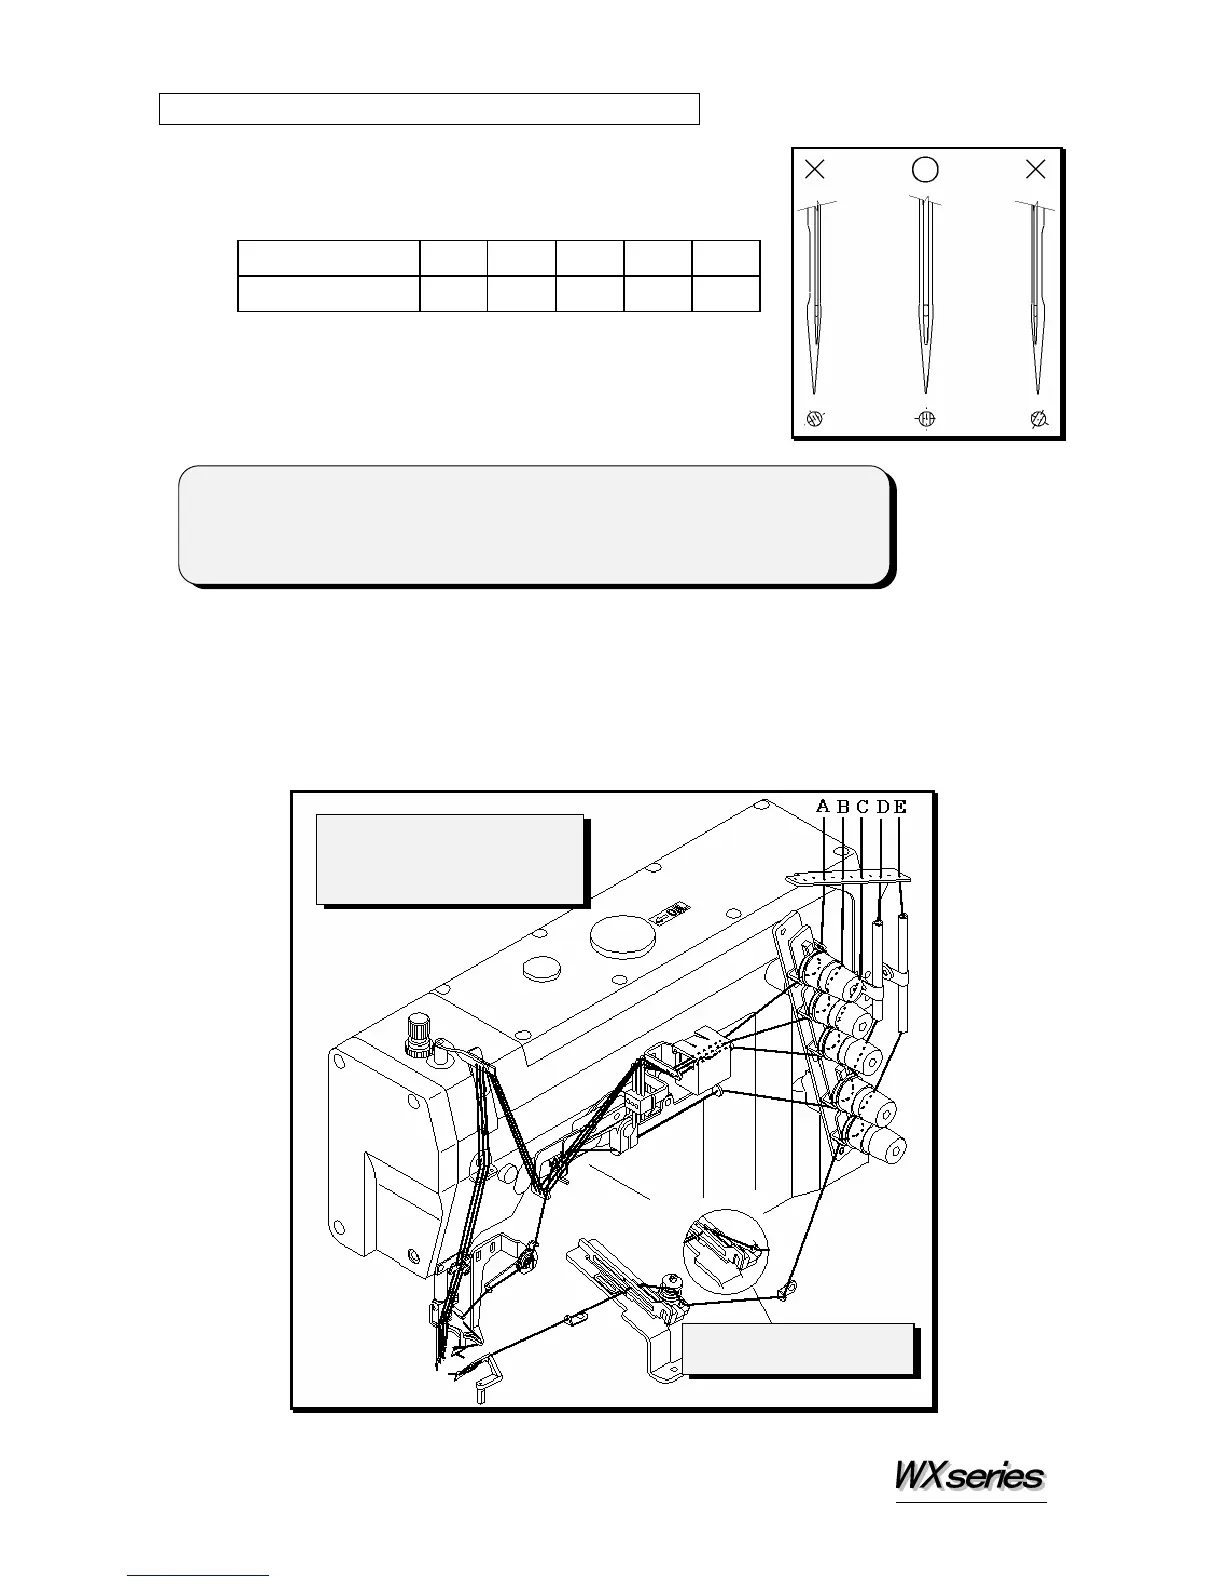
1-2 Replacing the needle
To replace the needle, check the needle carefully to see
that the scarf is turned to the rear of the machine (see the
illustration). Then install the needle correctly.
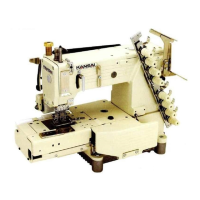
1-3 Threading the machine
Thread the machine correctly by referring to the illustration below.
Threading the machine incorrectly may cause skip stitching, thread breakage and/or
uneven stitch formation. Thread tension should be changed according to various kinds of
conditions such as the thread to be used and/or the feeding amount (see Chapter 10 for
"Stitch formation").
A, B, C ... Needle threads
D............. Top cover thread
E ............ Looper thread
For stretchable threads
such as woolly thread