English KMR 1000 T 23
Let down the main brush.
♦ Pay attention to the position of the
bristle set when installing the new
main brush!
! Slide the main brush in the
receptacle on both sides, and
secure it using a flat washer and
screw.
♦ Note the correct position of the flat
washer, it must overlap the main
brush on the driver from both sides.
! Take the sweeper down from the
drive ramps
! Check the main brush pattern and
position
! Screw on covers
! Insert the swept material container
Check and adjust sweeping range
of roller
! Check the tyre air pressure
! Raise the sweep roller
! Raise the side broom
! Pull and hold the coarse-dirt flap.
! Drive the sweeper on a flat and
smooth floor noticeably covered
with dust or chalk
! Let down the coarse-dirt flap
! Lower the main brush and let it
rotate approx. 30 s
! Raise the sweep roller
! Pull and hold the coarse-dirt flap
! Back out in reverse
! Check the sweep mirror
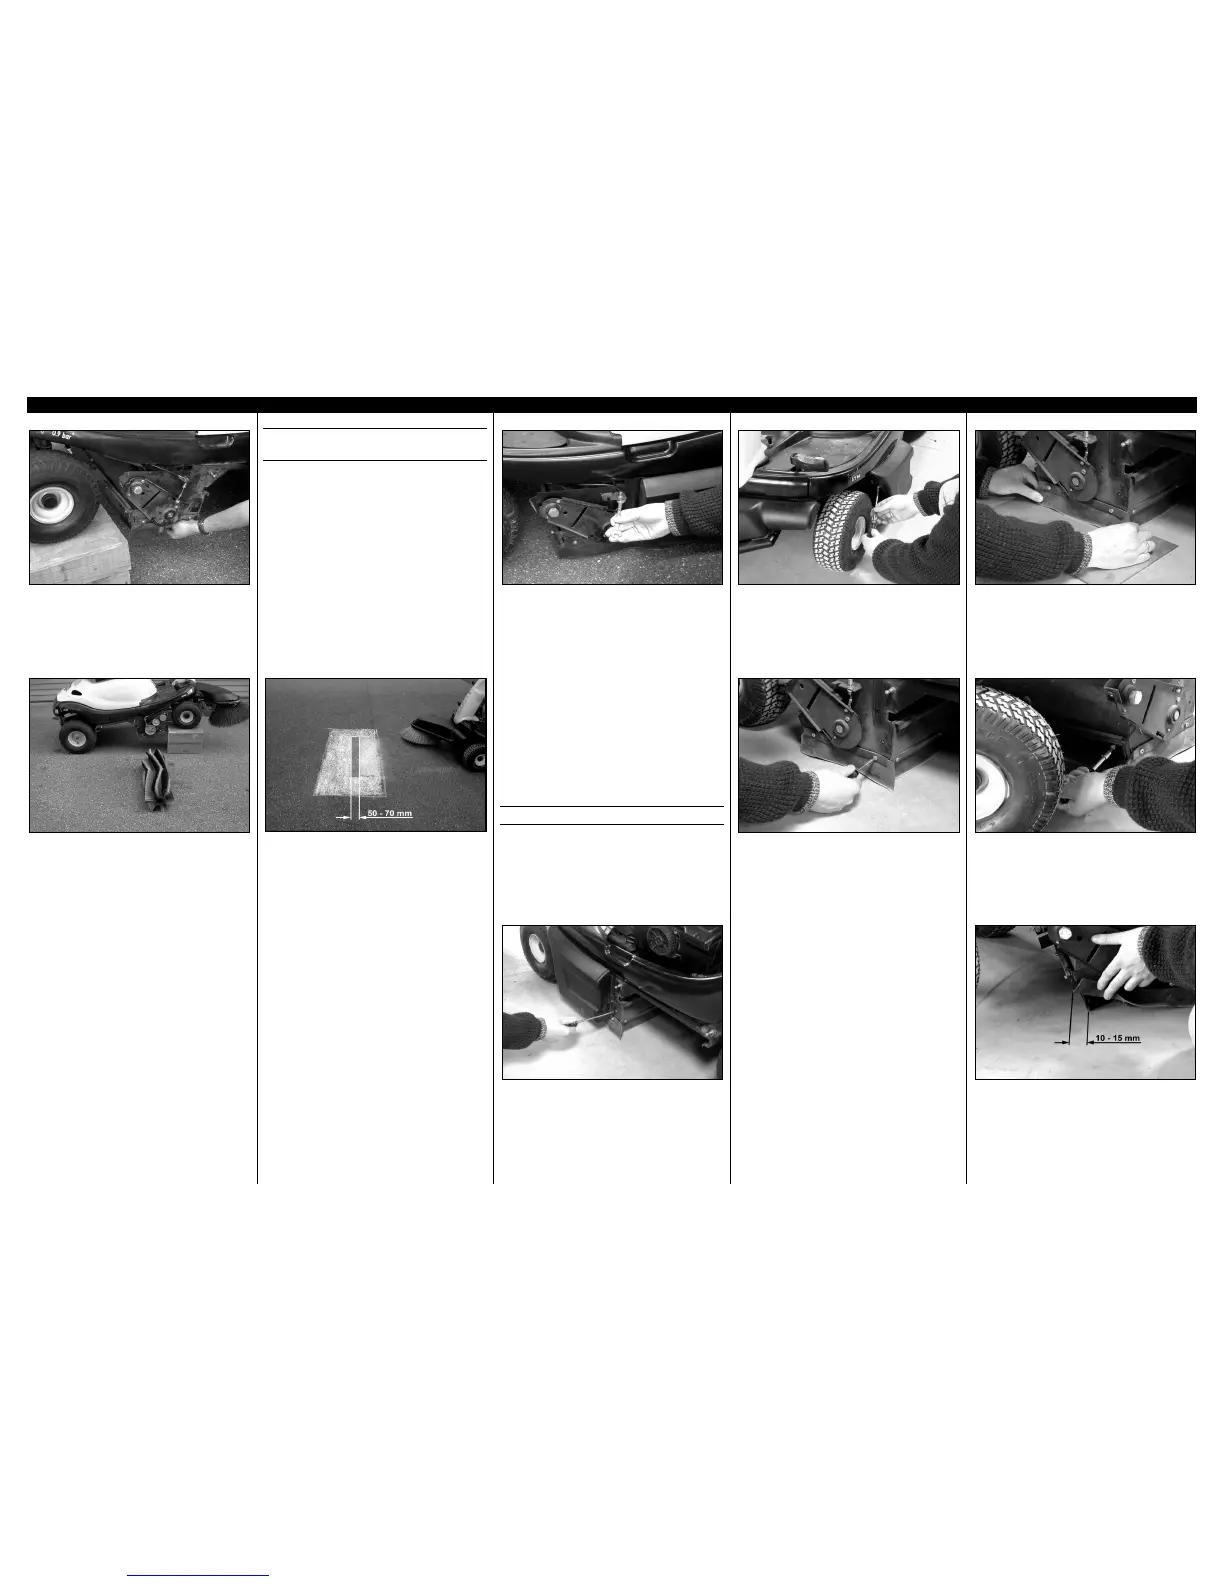
The form of the sweeping pattern
forms a regular rectangle that is less
than 50-70 mm wide
Adjusting the width of the sweep
mirror
Adjust bowden cable on both sides.
Sweeping pattern is not parallel
! Lengthen the bowden cable on the
narrower side of the sweeping
pattern.
The sweeping pattern is too small
! Lengthen the bowden cable on
both sides.
The sweeping pattern is too large
Notify Kärcher customer service
Change the sealing strip
! Turn off machine and remove the
spark plug connector
! Adjust "parking brake" operating
mode
! Remove the swept material
container
Remove covers.
Remove covers.
Side sealing strips
! Unscrew the fastening of the
sealing strip
! Screw on a new sealing strip and
don’t tighten the screws yet
! Slide under a support with 1-2 mm
thickness to adjust the ground
clearance
! Align the sealing strip
! Tighten the screws
Front sealing strip
! Unscrew the fastening of the
sealing strip
! Screw on a new sealing strip and
don’t tighten the screws yet
! Align the sealing strip
! Adjust the ground clearance of the
sealing strip such that there is a
spacing of 10-15 mm toward the
back
! Tighten the screws
 Loading...