Timed Scan: On
[Start]: 6:00
[Stop]: 8:00
Interval :15M
These settings would cause the cam to capture a photo (or video, if
the camera is set to that mode) once every 15 minutes, beginning at
6:00AM, until the Timed Scan recording block stops at 8:00AM.
The next day, the camera would again record an image or video
once every 15 minutes between 6:00AM and 8:00AM. Remember,
Timed Scan recording is independent of normal triggers due to
animal activity - even if no animals enter the IR sensor coverage
zone, an image or video will still be captured every 15 minutes
during the block of time. If an animal triggers the camera"in
between" the 15minute intervals, it will be recorded, same as it
would if you has setup the camera with Timed Scan turned Off.
Note: Timed Scan setting of frequent intervals and/or long periods
between start and stop time can reduce battery life.
This camera can send pictures instantly to your mobile device via
GSM/GPRS network. You’ll be alerted just when a picture or video
has been taken. The camera sends MMS message through GPRS
network, so before using this function, you need to open GPRS
service from your service provider. It supports four band 850MHz,
900MHz, 1800MHz and 1900MHz. For related information, please
refer to section 4.1.14 MMS settings.
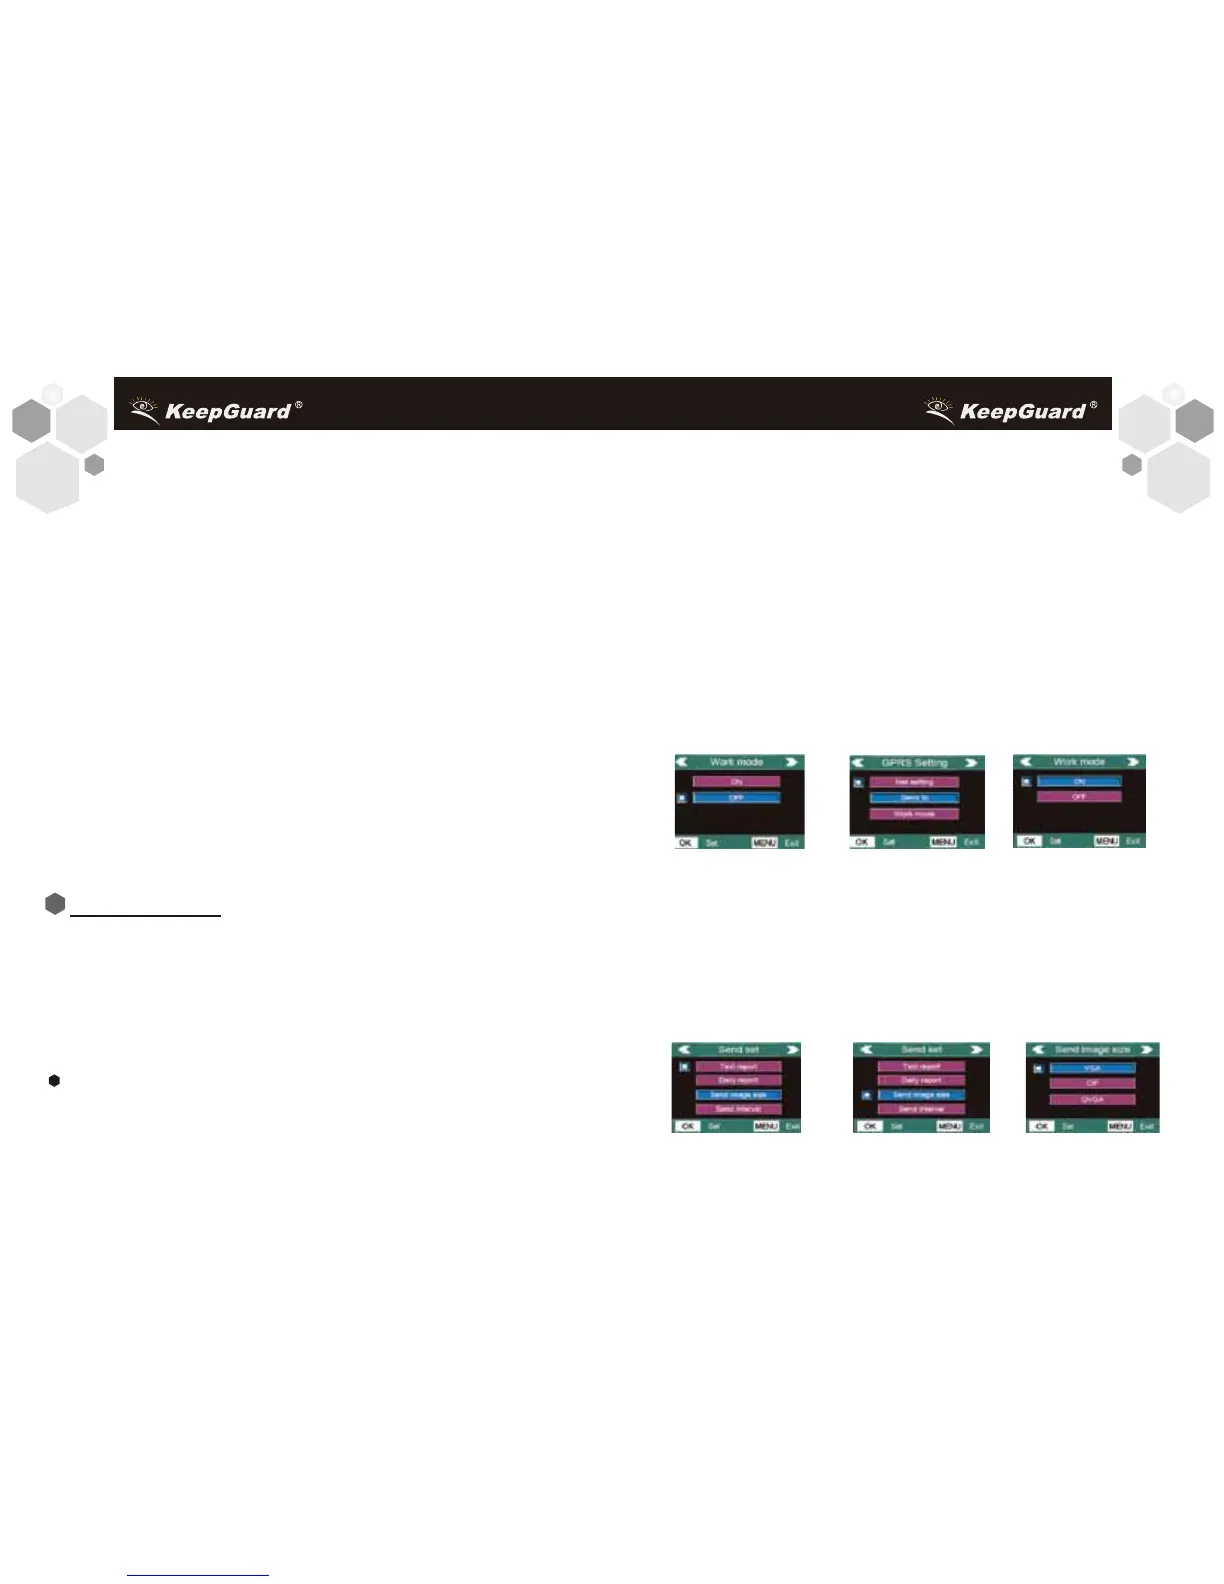
Set Work Mode
Work modes inlude Text report,Daily report,Send image size,
Send interval,Dail Report and Select GPRS Send.
The following shows how to set the Work mode:
Make sure the power Switch putted in the SETUP position.
After the LCD comes on,
1. Press MENU to display the setting menu.
2. Press RIGHT or LEFT until reach the “GPRS Setting” menu.
3. Press UP or DOWN to select Work mode. Press OK into
submenu(Press MENU to exit.).
4.Press UP or DOWN to select ON or OFF. Select ON, the camera
will enter into the Send setting menu automatically. Select OFF to
close the Work mode.
As is shown in the following charts:
5. If you select ON, you can press UP or DOWN to select one Work
mode from four. Press OK to enter the submenu.
Take “Send image size” for example.
Press UP and DOWN to select the “Send image size”. Then press
OK enter into the submenu. Press UP and Down to select VGA,
CIF or QVGA. Press OK to save this setting and return to the
previous menu. Press MENU to exit.
1918
19
GPRS SETTING