ArcValidator
Operating manual - EN
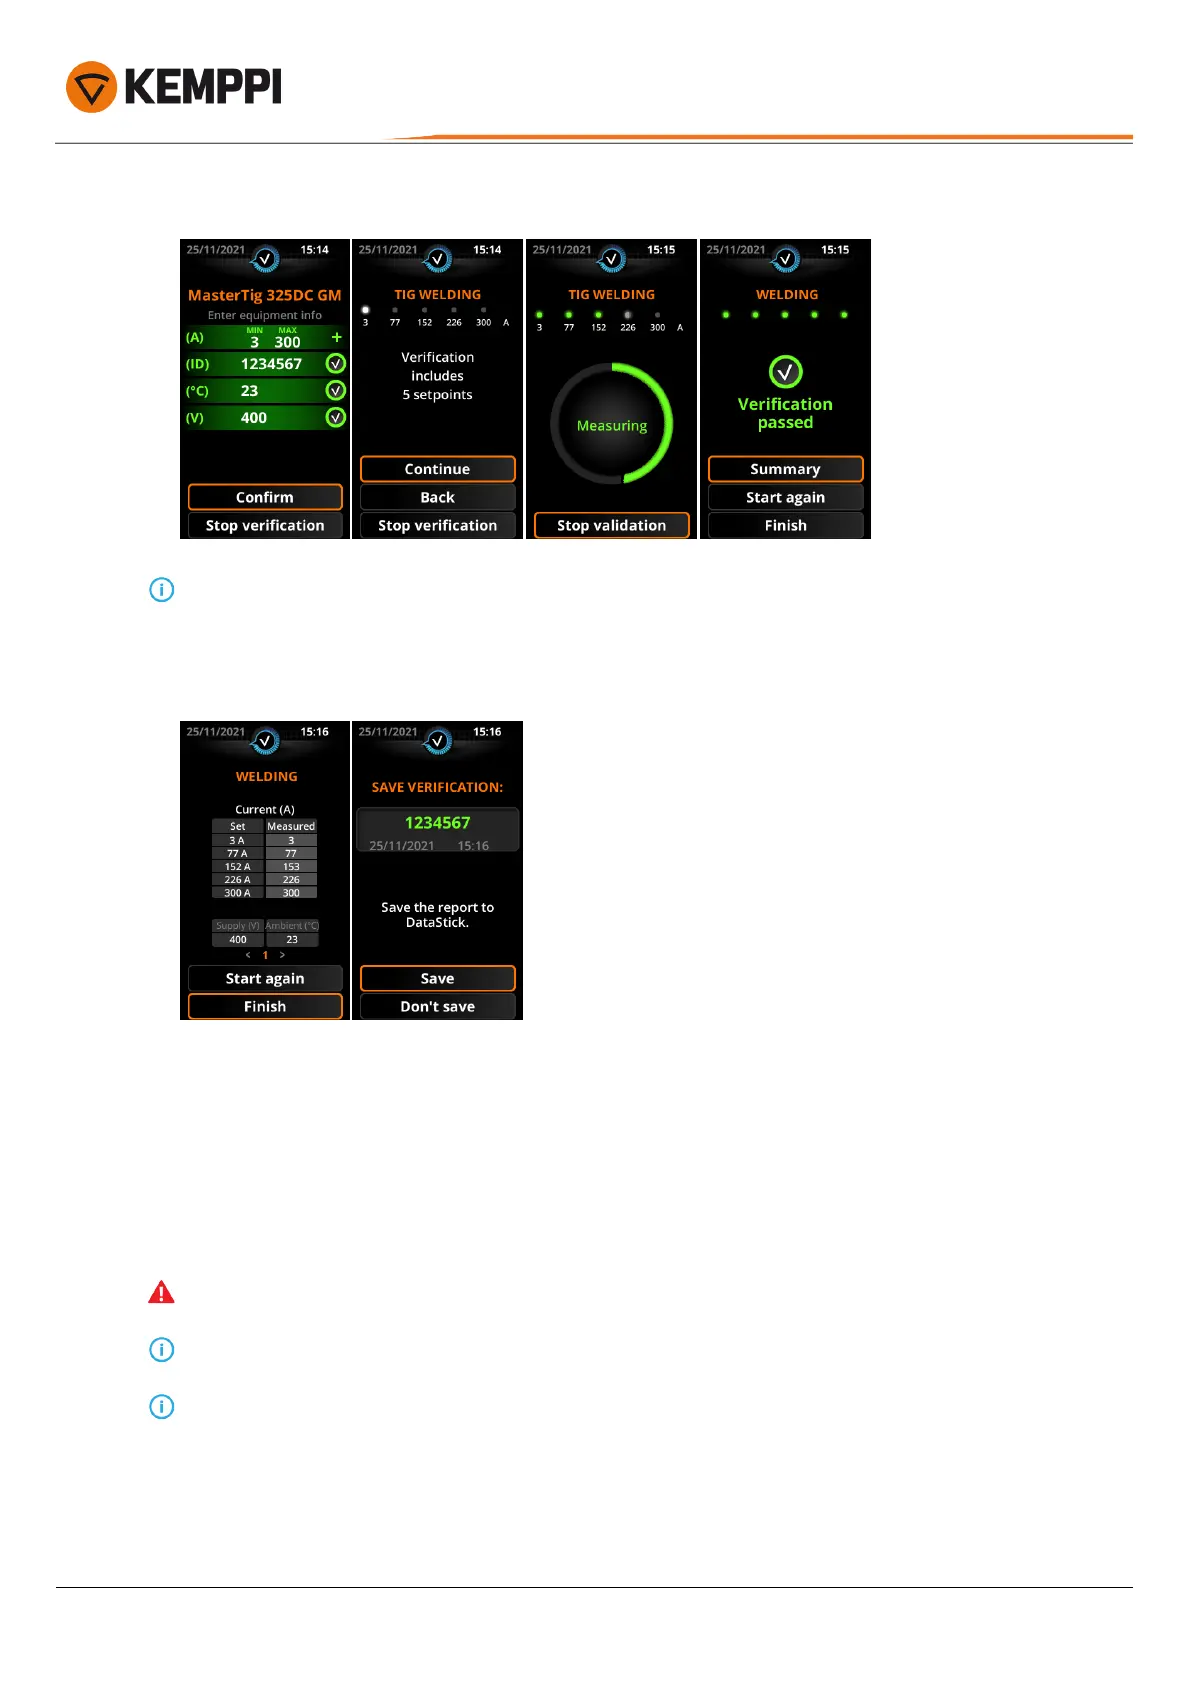
5. Start the verification process and follow the on-screen instructions.
In manual verification mode, the user is required to adjust the verified values manually on the welding equipment,
operate the welding torch and then fill in the values shown on the welding equipment's display during the simulated
welding run.
6. When the verification is ready, save the verification report to the DataStick. A summary of the completed verification
can also be viewed.
7. Turn the equipment off.
8. Transfer the verification data to the computer using the DataStick (as described in "Transferring verification data to
computer" on page24).
9. Using the ArcValidator computer software, open and finalize the reports and export the certificates (as described in
"Viewing and editing verification reports" on page25).
3.1.2 Wire feeder verification
The filler wire exits on the opposite side of the load bank during wire feed speed verification.
For adding and editing equipment profiles, refer to "Managing equipment types and models" on page28.
For verifying the wire feed speed, the ArcValidator load bank incorporates a dedicated wire feed interface on the side
of the load bank. To use this, the gas nozzle must be removed from the welding gun.
1. Remove the gas nozzle from the welding gun.
2. Connect and turn the equipment on (as described in "Connections" on page10).
>> Turn the welding equipment on first and then the ArcValidator load bank. Wait until both are fully started.
© Kemppi
22
AVPCRC / 2224