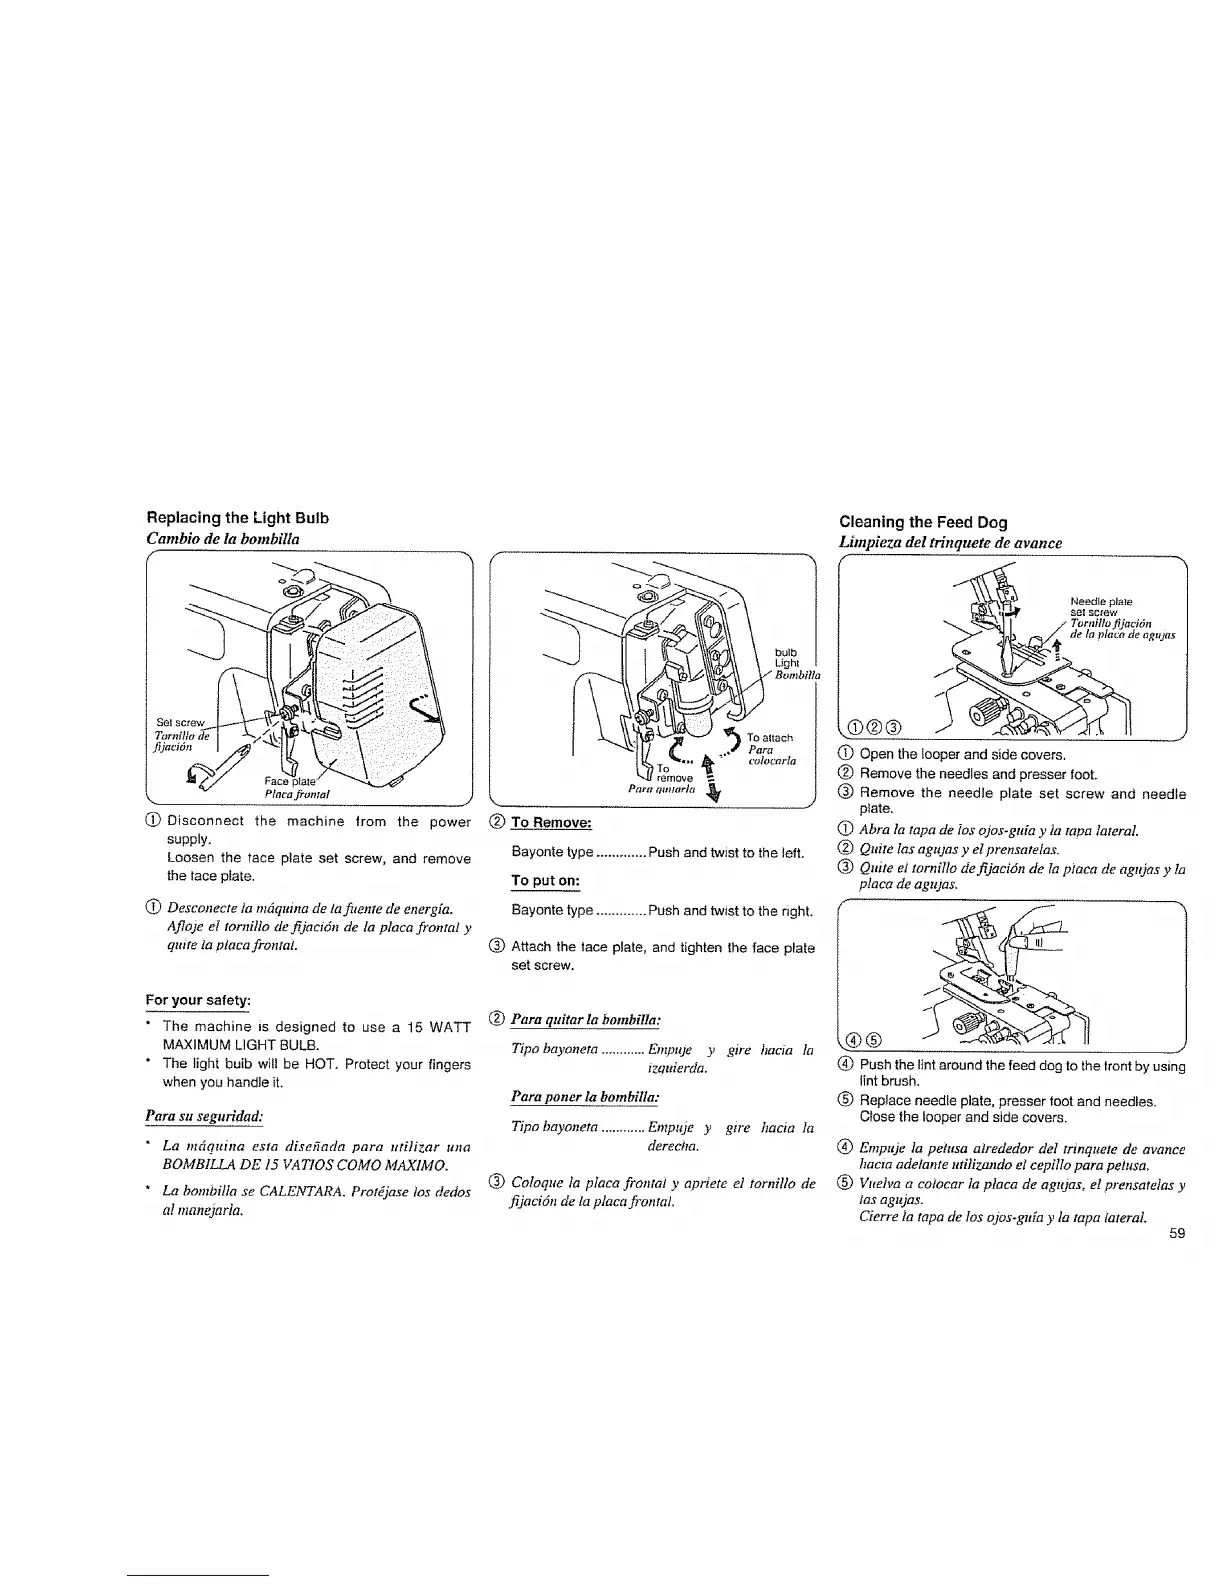
Replacing the Light Bulb
Cambio de la bombilla
Fac_
Pin€aft-areal
(_ Disconnect the machine from the power
supply.
Loosen the tace plate set screw, and remove
the lace plate.
@ Desconecte la m6quina de lafilente de energia.
Afloje el tornilto de fijacidn de la place frontal y
quite la piaca frontai.
For your safety:
* The machine is designed to use a 15 WATT
MAXIMUM LIGHT BULB.
* The light bulb w_l! be HOT. Protect your fingers
when you handle it.
Pare su seguridad:
* La mdqaina esta disefiada pare utilizer una
BOMBILLA DE 15 VATIOS COMO MAXIMO.
* La bombilla se CALENTARA. Protdjase los dedos
at manejarta.
-., f
bulb
Light
(_) TO Remove:
remove
Partz Om/arla
To altach
Pare
_/ocarla
Bayonte type ............. Push and twist to the left.
To put on:
Bayonte type ............. Push and twist to the right.
(_ Attach the lace plate, and tighten the face plate
set screw.
(_) Pare quitar la bombilla:
Tipo bayoneta ............ Empuje 3' gire hacia ta
lzouierda.
Pare poner la bombilla:
Tipo bayoneta ............ Empuje y gwe hacia 1a
derecha.
_) Coloque laptaca frontal y apriete el tornillo de
fijaci6n de la place frontaL
Cleaning the Feed Dog
Limpieza del tHnquete de avance
8)®®
@
@
®
@
@
®
.%@
®
®
_gtUos
Open the looper and side covers.
Remove the needles and presser foot.
Remove the needle plate set screw and needle
plate,
Abra la tape de los o)os-gtda y ia tapa lateral.
Quite las agujas y el prensatelas.
Qnite e1 tornillo de fijaci6n de la place de agujas y la
place de agujas_
,J
Push the lint around the feed dog to the front by using
lint brush.
Replace needle plate, presser foot and needles.
Close the looper and side covers.
@ Empuje la pehtsa alrededor del trmquete de avance
hacia adelante utilizando el cepillo pare pelusa,
(_) Vueiva a coiocar ta place de agajas, el prensatetas y
las agujas.
Cierre ia tape de los o3os-guia y la tape lateral,
59



 To Next Page