Connection/Installation
106
7
Dashboard camera interface
Connect a Dashboard Camera DRV-N520
(optional accessory). (P.108)
8
Accessory 9: GPS Antenna
Use the supplied GPS antenna. Using the GPS
antenna other than the supplied one may
cause a drop in positioning accuracy.
9
Accessory 4: Bluetooth Microphone
10
3rd view camera input (Yellow). See To set up
the camera assignment settings (P.77).
11
Rear view camera input (Yellow) *
2
12
Front view camera/Dashboard camera input
(Yellow).
See To set up the camera assignment
settings (P.77). *
3
13
VIDEO Output (Yellow)
*1 Connecting Mini plug to RCA cable to AV-IN
terminal enables you to use cameras only. If
you connect CA-C3AV (optional accessory),
AV-IN (for visual) or the camera is available.
*2 Connect an HD camera to Rear view camera
input terminal to use HD video. (DDX9907XR /
DMX957XR only)
*3 Connect an HD camera to Front view camera/
Dashboard camera input terminal to use HD
video. (DDX9907XR / DMX957XR only)
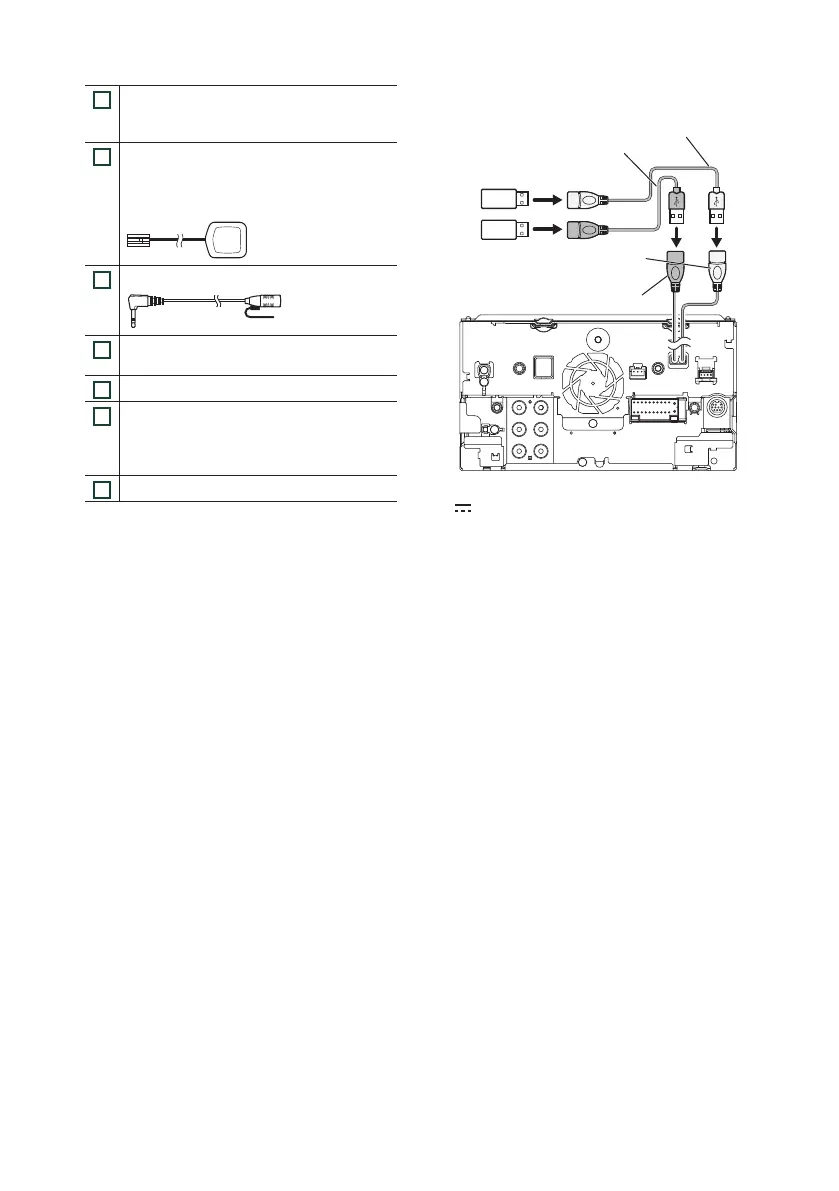
Ñ Connecting a USB device
USB device
[2]
USB (Gray) terminal
[1]
USB (Black) terminal
[1]
Accessory 2 (Black) (1 m)
[3]
Accessory 3 (Gray) (1 m)
[3]
[1]
USB maximum power supply current :DC 5 V
1.5 A
[2]
Sold separately
[3]
See Securing the USB extension cable
(P.107).
 Loading...