number like 13812345678. User can set 6 groups alarm phone numbers at most.
Then press key 【BACK】to return to desk page.
Delete Alarm Phone No.
As shown in picture 3-1, after entering to the settings of alarm phone numbers,
press key 【Menu】 to delete the alarm phone number and press key【OK】to
save, then press key【BACK】to return to desk page.
3.6.2 Set CID No.
As shown in picture 3-1, press key【UP/DOWN】to select 【2. CID No.】and press
key【OK】or input 2, then input group number (1-2), then input CID number like
88889999 and press key 【OK】to save. Then press key 【BACK】to return to desk
page.
Delete CID No.
As shown in picture 3-1, after entering to the settings of CID numbers, press key
【Menu】 to delete all the CID No. and press key【OK】 to save, then press key
【BACK】to return to desk page.
3.6.3 Set Help Phone No.
As shown in picture 3-1, press key【UP/DOWN】to select【3. Help Phone No.】
and press key【OK】 or input 3, then input group number (1-3), then input phone
number like 13812345678 press key【OK】 to save. User can set 3 groups alarm
phone numbers at most. Then press key【BACK】to return to desk page.
Delete Help Phone No.
As shown in picture 3-1, after entering to the settings of Help Phone No., press key
【Menu】 to delete Help Phone No. and press key【OK】 to save, then press key
【BACK】to return to desk page.
3.6.4 Set SMS Phone No.
As shown in picture 3-1, press key【UP/DOWN】to select 【4. SMS Phone No.】and
press key【 OK 】 or input 4, then input group number (1-6), then input phone
number like 13812345678 press key【OK】 to save. User can set 6 groups alarm
phone numbers at most. Then press key 【BACK】to return to desk page.
Delete SMS Phone No.
As shown in picture 3-1, after entering to the settings of SMS Phone No., press key
【Menu】 to delete Help Phone No. and press key【OK】 to save, then press key
【BACK】to return to desk page.
3.6.5 Phone Call
As shown in picture 3-1, press key【UP/DOWN】to select 【5. Phone Call】and
press key【OK】, then input phone number like 10086. Press key【OK】 to start
calling. Press key 【BACK】to hang up.
3.7 Accessories
Enter Number(00-99):
Total:001 Total:000
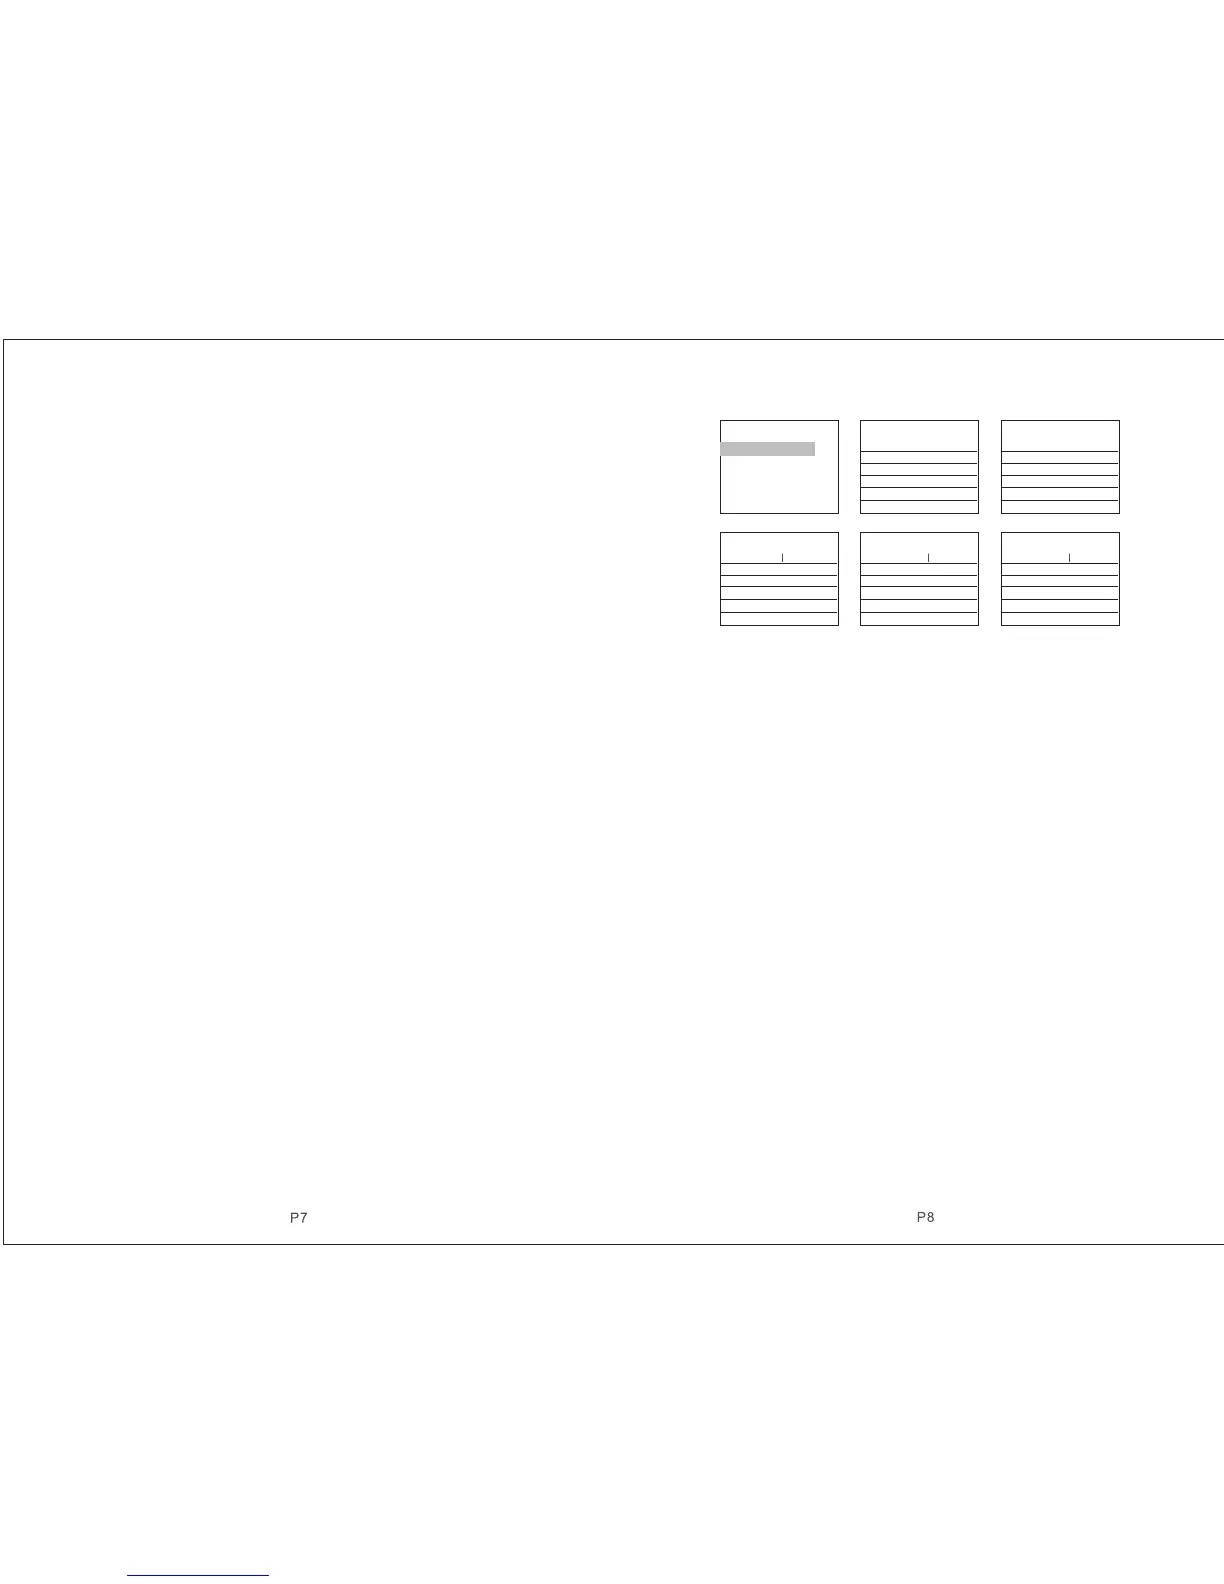
Picture 3-2
3.7.1 Add Remote Control
As shown in picture 3-2, press key【1. Add Remote Control】. With the voice
prompt “Please input numbers (01-99)” ( e.g. Study No. 1 remote control, then
input 01, study No. 22 remote control, input 22), then press key【OK】. At this
moment, press any key on remote controller to send a signal to host. Host voice
prompts “Add Successfully ” with 【Add Successfully】on display, which means
the remote control has been programmed to the host. If voice prompts add
repeatedly, it means that the remote control has been added to the host already
and couldn’t be programmed repeatedly. To learn more remote controls, press
any key on other remote controls. The host can study as most as 150 different
remote controls.
3.7.2 Delete Remote Control
As shown in picture 3-2, press key【3. Delete Remote Control】. With the voice
prompt “Please input numbers (01-99)”( e.g. delete No. 1 remote control, then
input 01; delete No. 22 remote control, input 22; delete all by pressing key 【
ARM】),then press key【OK】.
3.7.3 Add Detectors
As shown in picture 3-2, press key【2. Add Detectors】. With the voice prompt “
Please input zone numbers (01-99)”( e.g. Study Zone No. 1 remote control, then
input 01, study Zone No. 22 remote control, input 22), then press key【OK】. At
this moment, trigger detectors to send a signal to host. Host voice prompts “Add
Successfully ” with 【Add Successfully】on display, which means detector has
been programmed to the host. If voice prompts add repeatedly, it means detector
has been added to the host already and couldn’t be programmed repeatedly.
To learn more detectors, trigger other detectors. The host can study as most as
150 different detectors.
OK.Ent e r ES C . Retur n
OK.Ent e r ES C . Retur n
OK.Ent e r ES C . Retur n
OK.Ent e r ES C . Retur n
OK.Ent e r ES C . Retur n
OK.Ent e r ES C . Retur n
Add Accessories
1.Add Remote Contro l
2.Add Detector
3.Del Remote Control
4.Delete Detector
5.Smart Accessories
Add Remote Control
Enter Number(00-99):
Add Detector
Smart Accessories Smart Accessories Smart Accessories
Enter Number:
0.Siren 9.Alarm Out
Arming Key.ON
Disarm Key.OFF
Enter Number:0
0.Siren 9.Alarm Out
Arming Key.ON
Disarm Key.OFF
Enter Number:0
0.Siren 9.Alarm Out
Arming Key.ON
Disarm Key.OFF
OK. Enter
 Loading...