B3000 SERVICE MANUAL
60-200807-000, REV C 53
NOTE: The wires must be reconnected to their proper connections when installing the new
module. Failure to do so will result in having extremely noisy pumps while they are in operation.
Make sure that Cold Water Tank drain hose is NOT pinched when reassembling.
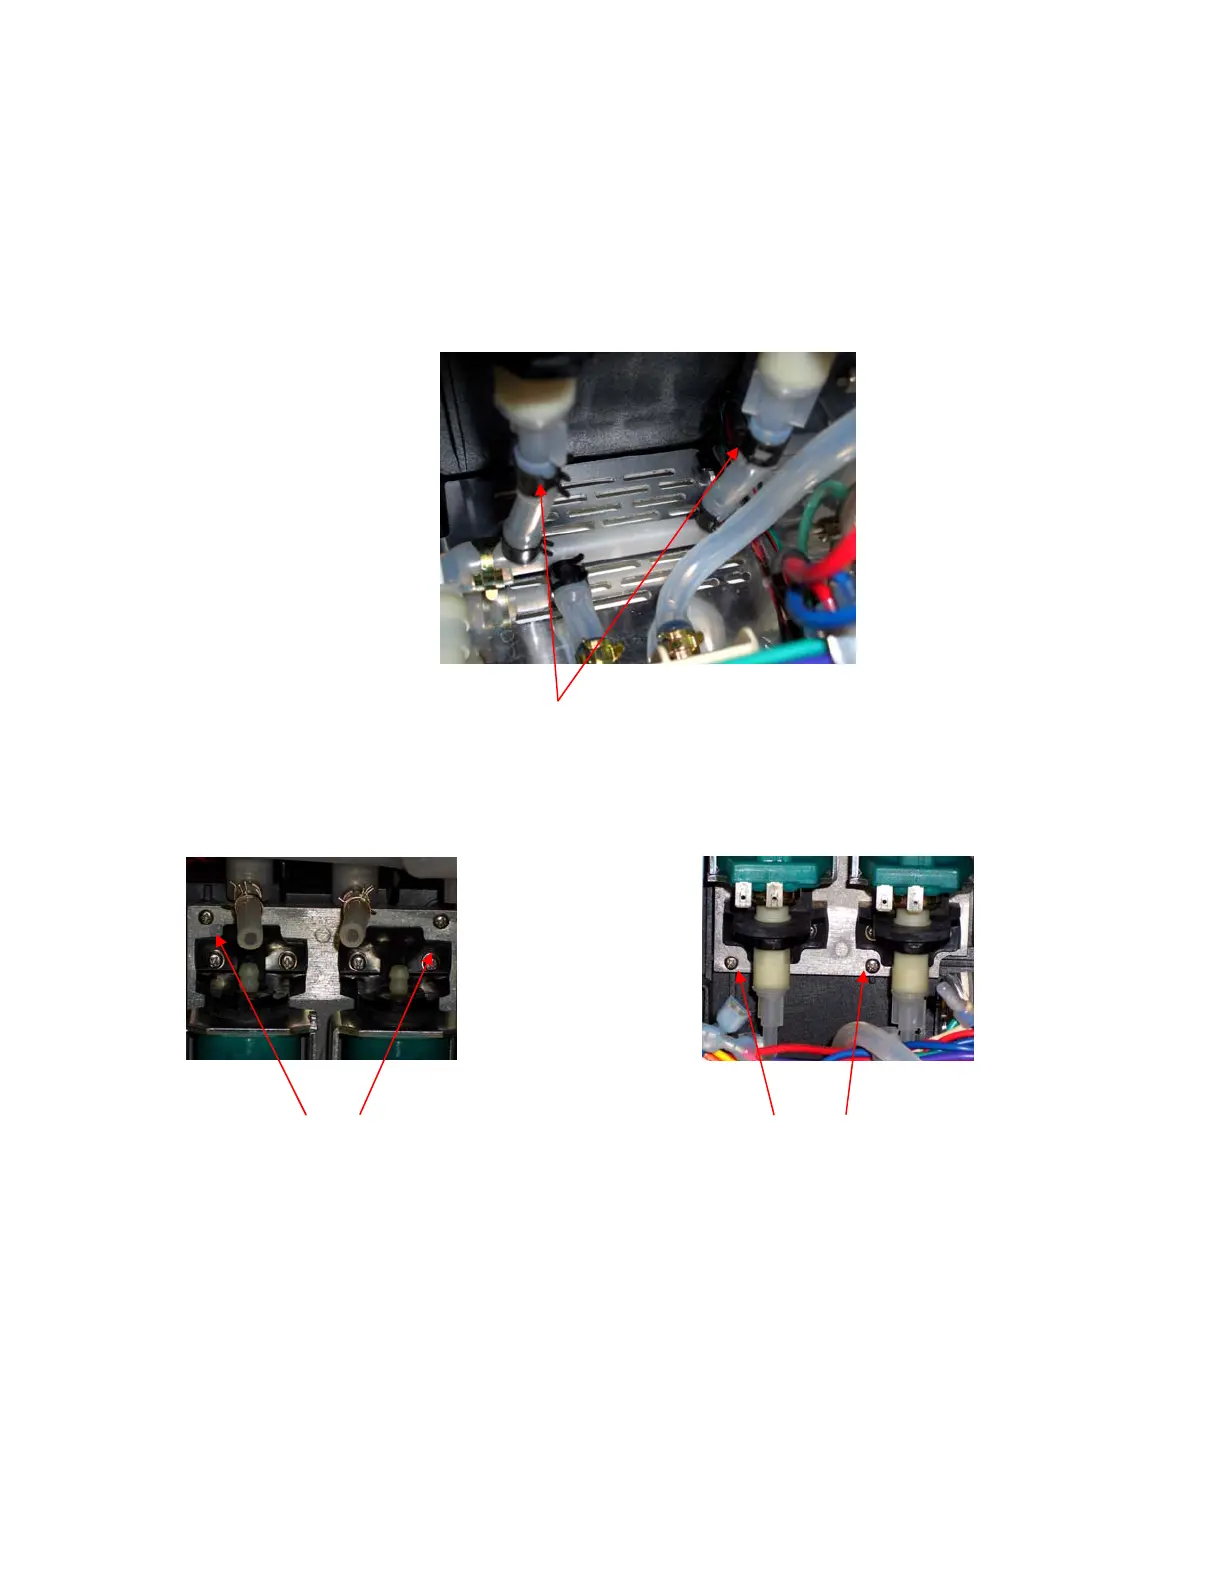
3. Disconnect these four wires.
4. Loosen the captive screws holding the Power Module in place. (page 36) Gently slide out the
module. This will allow access to the manifold clips.
5. Disconnect the clamps and water hoses attached to the water manifold.
6. Remove the Multi Connector Tee manifold from new module. Set this aside. It will be used
when installing a new Power Module that does not come with this connection.
7. Locate the four screws holding the module to the chassis. Fully loosen these screws while
holding the CWP module. They are captive screws so they will NOT come out completely.
8. The Cold Water Pump Module can be removed from the brewer.
9. Install the new module and connect all of the appropriate connections, hoses, and wires making
sure that they are secure and tight.
10. Conduct a BIT test (see appendix VII on page 85) to insure the proper function of the brewer.