2.7 Power
Up
Operation check
Turn off
(
O
)
the
POWER switch.
Z Check that the
power cord is correctly connected.
See sections
2.5,
“Connecting the Power Cord” and
2.6,
“Grounding
(Eaith).”
^
Check that
nothing is connected to the DC INPUT (load input terminal)
on the front and
rear panels.
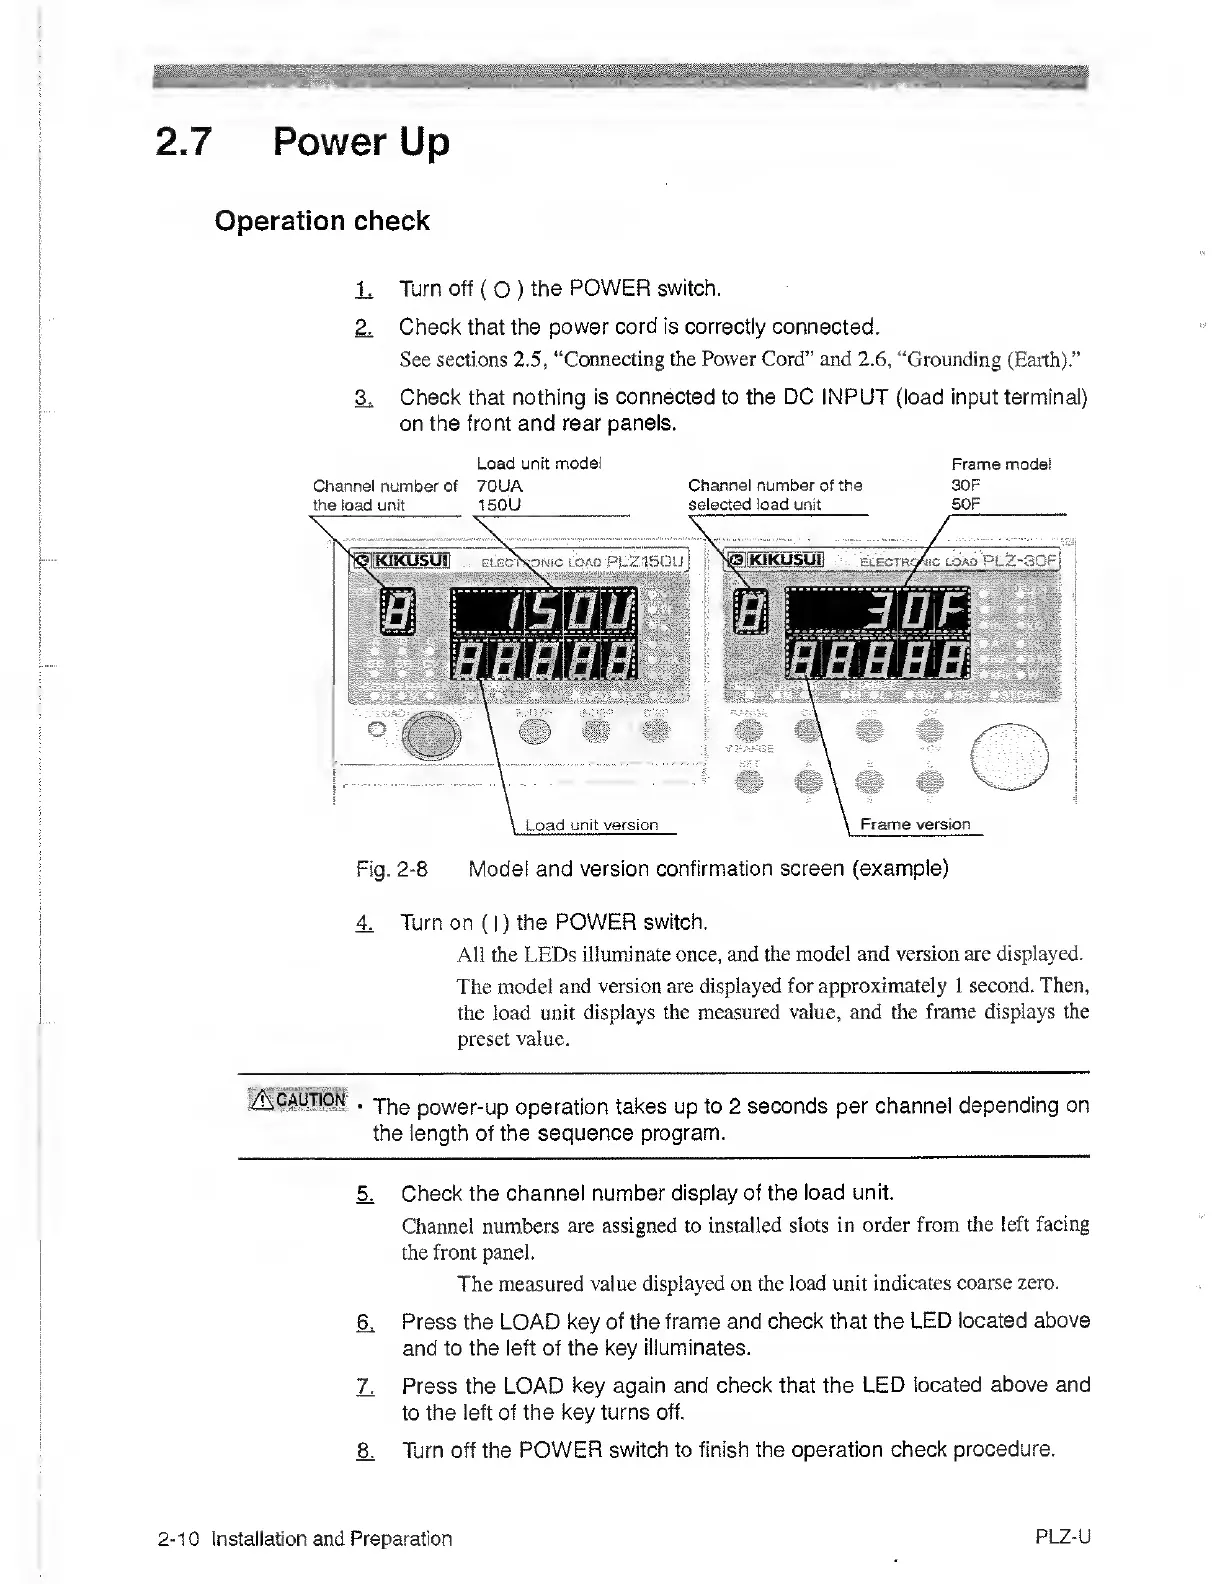
Load unit
model
Frame model
Channel number of 70UA
Channel number of the 30F
the
load
unit
150U
selected
load unit
50F
Fig.
2-8
Model and
version confirmation screen (example)
4 Turn on
(
I )
the POWER
switch.
All the
LEDs illuminate once, and
the model and version are
displayed.
The model
and version are displayed
for approximately 1 second. Then,
the load unit
displays the measured value, and the
frame displays the
preset
value.
iiSBMlM .
The power-up
operation takes
up to
2
seconds per channel
depending
on
the length of the sequence
program.
L.
Check the
channel number display of the
load unit.
Channel numbers
are assigned to installed
slots in order
from the left
facing
the front panel.
The measured
value displayed on the load unit
indicates coarse zero.
6^
Press the LOAD key
of the frame and check that
the LED located
above
and to the left of the key
illuminates.
L
Press the LOAD
key again and check that the
LED located above and
to
the left of the key turns off.
8^
Turn off the
POWER switch to finish the operation
check procedure.
2-10
Installation and Preparation
PLZ-U

 Loading...