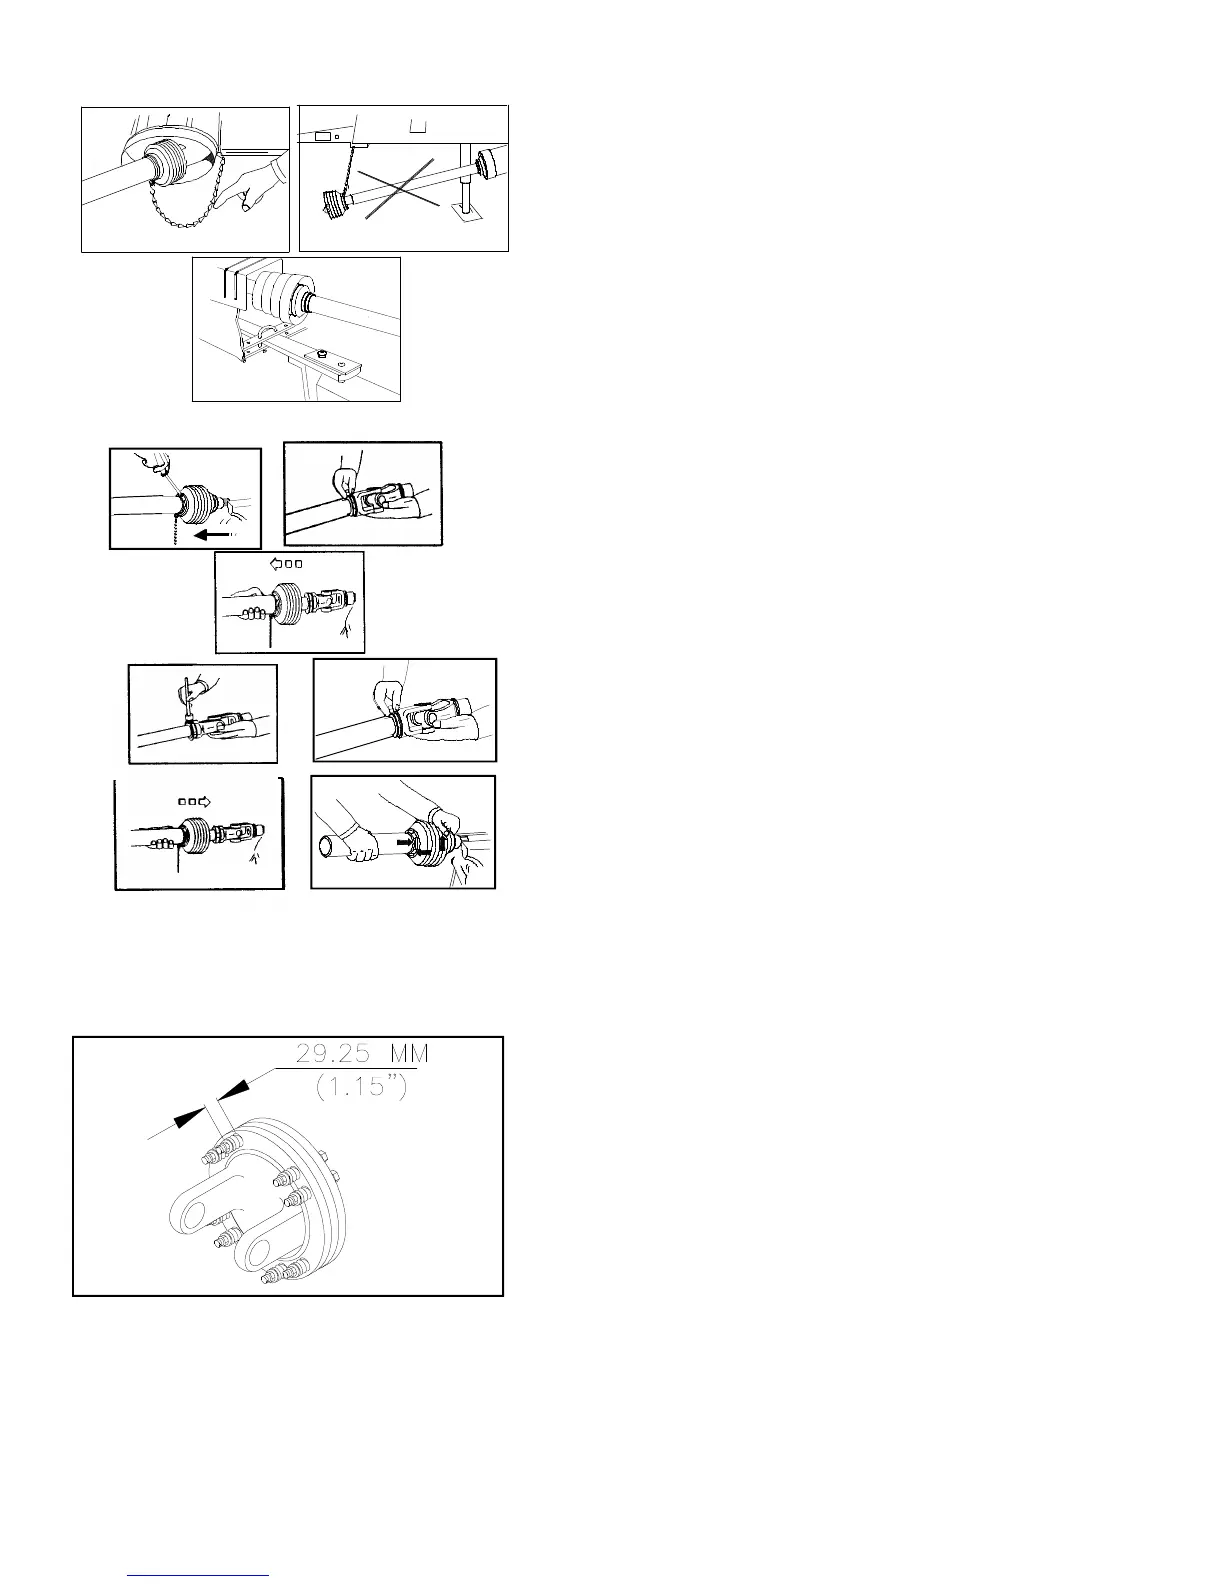
G. Assembling guard:
1. Grease collar groove and inner profile tube.
2. Fit shield tube into collar by centering the
slots over the collar teeth.
3. Align cone, centering grease nipple to
grease filling hole on collar. Press down-
ward to connect.
4. Make sure the three collar tabs are prop-
erly engaged by tapping on cone.
H. Slip Clutch - preset at factory
Damage may occur to other parts of the grain
cart if the spring tension is not set properly.
Correct operating procedure of the slip clutch
is to have it slip slightly with each use.
1. If adjustment is necessary, length from
flange surface to under side of nut should
be 29.25 MM (1.15”).
2. Tighten nuts following an alternating cross
pattern until reaching the height specified.
Check that height is constant for all
springs.
3. If too much slippage occurs, only tighten
each nut a quarter of a turn at a time.
This quarter turn will increase the torque
approximately 500-750 inch lbs.
4. After extended time without use, the slip
clutch may “freeze up”. It is very impor-
tant at the beginning of each season to
loosen the nuts, slip the clutch, and re-
tighten the nuts to the correct length.
1. Chains must be fitted to allow sufficient
articulation of the shaft in all working po-
sitions. Care must be taken to be sure
that chain does not become entangled with
drawbar hitch or other restrictions during
operation or transport of machine.
2. The PTO drive shaft must not be sus-
pended from the chain when PTO is not
in use or unattached from drive unit.
3. If chain should become unattached, do
not attempt to reattach it with the PTO
engaged. Turn off PTO and tractor engine
before making any repairs. If chain is
missing, replace it before use.
F. Dismantling guard:
1. Keep cone pressed downward and release
collar tabs by pushing with a screwdriver.
Push cone off tube.
2. Spread collar to remove from tube.
3. Slide tube off the shaft.
OM02520
G1
G2
G3
G4
E1 E2
E3
F1
F3
F2