21
BELT REPLACEMENT:
For belt part numbers, refer to parts breakdown
section for parts identification.
a) Remove the belt guard.
b) Remove the auger shear bolt.
c) Remove the chain guard.
d) Unlink the chain by removing the connecting link
and take off the chain.
e) Remove the auger drive shaft assembly.
f) Remove the old V-belts and install the new V-
belts.
g) Reinstall the drive shaft and secure in place.
h) Reinstall the auger shear bolt.
IMPORTANT: Install the drive shaft and shear bolt
in first, to make sure that the parts are in their
proper locations.
i) Reinstall the roller chain with the connecting link.
j) Reinstall the chain guard.
k) Verify the belt tension so that it is always adjusted
at its maximum. See instructions in next section.
l) After installing the belts, you may run the engine
without the belt guard but only to verify the belt
alignment and only under strict supervision. Do not
approach (you or anyone else) the moving parts.
Engage and disengage the snowblower to verify if
the belts are well aligned, especially on the idler
pulley. If necessary, you can add or remove a flat
washer for final adjustment.
m) Reinstall the belt guard.
BELT REPLACEMENT & ADJUSTMENTS
7
CAUTION
7
Never use the snowblower without the belt guard.
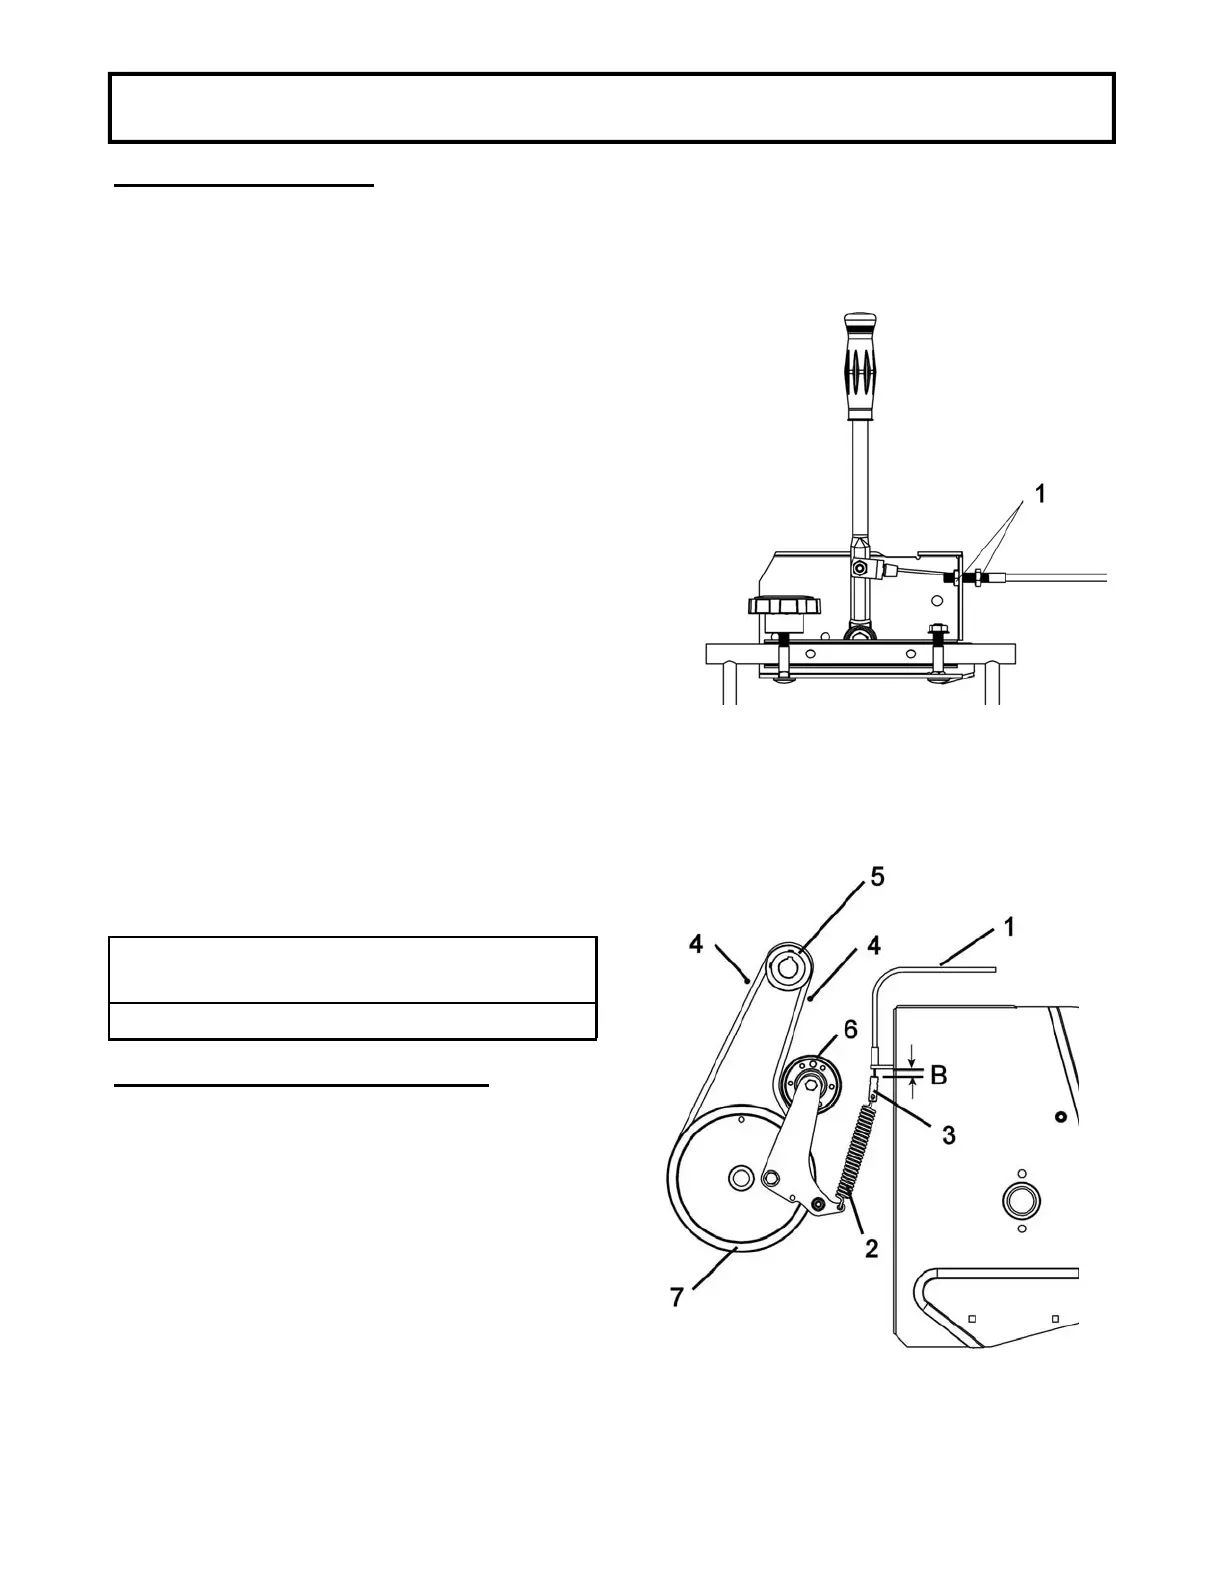
To adjust the cable, disengage the clutch arm.
Loosen the two nuts (item 1). Adjust to obtain the
right tension. The distance (item B) between the cable
support and the cable end (item 3) should be
1/4’’ (.250’’) to 5/16’’ (.312’’) when in the engaged
position.
Adjust cable
Adjust cable
TENSION CABLE ADJUSTMENT:
IMPORTANT:
To ensure a longer life span of the belts: Notice
when you engage the snowblower by pulling the
clutch arm, the last few inches of the pull, you
must feel a stronger resistance, due to the
tension on the belt. If you do not feel this tension,
re-adjust the cable. Follow the instructions below.